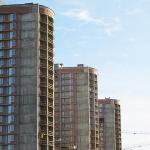
Important! When creating a drawing of a house, it is necessary to proceed from the number of people who will live in it. It is also desirable to provide one or two guest rooms.
Self-planning of the house can be performed in the following options:
- The simplest option. The plan of the building is drawn on a sheet by hand. In this case, millimetric paper is needed. If it is not there, then you can use a sheet that has a checkered line.
Advice! The above option is suitable for people with drawing skills. Otherwise, the layout will have flaws and inaccuracies.
- The most accurate option. The most obvious option for creating a house layout is to use a design computer program. Such programs allow not only to make basic sketches, but also to create a complete drawing of a two-story house that meets all building codes.
Advice! In order to avoid possible errors in the calculations, it is advisable to use only licensed software.
- Most creative option is the use of the 3D editor. Such a project turns out to be three-dimensional and perfectly conveys not only the size and location of the rooms, but also the author's design ideas.
Video instruction on the phased self-planning of a residential building in one of the specialized programs
What does a complete house project look like?
A complete house project involves not only the appearance and layout, but also a complete description of all building parameters, engineering communications and characteristics of building materials. In other words, this is a complete guide to action for builders, which can give a knowledgeable person complete information about a future building.
Thus, complete house designs include:
- Architectural description of the building. This includes drawings of the facade of the house with the dimensions of the interior. It indicates the size and location of windows, doors, there are all utility and residential premises.
- Calculation of constructive nuances, including truss structures, house box, foundation and roofing. All these elements should be depicted in the drawings schematically with the application of calculations and detailed markup.
Treatment of the facade with a water repellent
- Electrical network diagram. It describes in as much detail as possible the connection of the house, the features of electrical wiring with wiring diagrams, the location of sockets, etc.
- Engineering nuances. This includes a floor plan with the laying of vital communications - ventilation, plumbing, sewerage, heating, gas, etc.
Thus, house designs are not limited to just one drawing, as some people who are ignorant of all the nuances of this process suggest. Therefore, refusing the services of a professional designer, it should be understood that before building a house, complete drafting of project documentation is necessary.
How a house plan is created
The layout of the building is based on handwritten or electronic drawings, for the correct implementation of which it is necessary to follow the following sequence of actions:
- On graph paper, the required scale is set.
- The axes of the house are being drawn.
- Next, you need to draw the walls.
- We draw internal partitions.
- Now you need to place windows and doors on the drawing.
- For each room, the name and area are indicated.
Advice! The development of a plan for engineering communications, the layout of the electrical network, etc. should be carried out by a specialist. Therefore, in the absence of knowledge in these industries, it is necessary to consult with an experienced designer who will avoid gross errors. The most unpleasant situation is when the project was approved for construction, the house was built, and only then technical flaws begin to appear, which are very difficult to eliminate.
Using a home design program
To date, there are many computer programs designed for building design. There are among them both amateur, which cannot be considered as a serious tool, and professional programsused by specialists around the world. These include: AutoCad, Compass 3D and others.
A set of drawings developed in such a program has a number of advantages:
- Faster plan creation process.
- The program minimizes possible inaccuracies in calculations.
- Ability to create a three-dimensional model of the house.


- Virtual planning of not only premises, but also engineering networks.
- Fast development even by those users who are not familiar with the basics of drawing.
- Wide functionality and a large set of tools for the implementation of any technical and design solutions.
- Lots of lessons and useful tips on how programs work on the Internet.
- The presence of built-in libraries that contain furniture, architectural elements and even finishing materials, which allows not only to create a drawing, but also to imagine the appearance of the future home. This is very important in order to consider the project in terms of convenience, comfort, etc.
When creating a drawing of a house, you should consider the following recommendations from experts:
- The number of rooms, taking into account their functional purpose and location relative to each other. Here it is necessary to provide not only the main rooms reserved for each family member and functional premises (bathroom, toilet, kitchen), but also a room where the whole family will gather (hall, living room), entrance hall, veranda, pantry, etc.
- The hobbies of each of the family members should also be considered when planning the house. For example, some houses have their own swimming pool, gym, separate library, sauna, workshop, etc.
- It is better to make private rooms small and cozy, and the hall where the whole family gathers, on the contrary, should be spacious.
- The nursery should be located next to the parent's bedroom.
How to make a good design project? Preparation of a 3D model and the secrets of competent design. Video from Alexey Zemskov
Advice! If the family has small children or elderly people, this should also be taken into account when planning the house. Perhaps in this case it would be better to abandon the second floor or install the safest stairs with comfortable railings and deep steps. Goose step designs are not allowed.
- For a compact placement of the water supply and sewer system, it is desirable to place the kitchen, boiler and knot in one line.
- For effective preservation of heat in winter, it is desirable to have an insulated veranda or vestibule in the house.
- When calculating the area of the building, it must be taken into account that at least 8 m2 of living space should fall on one adult.

Advice! Young families should consider the possibility of replenishing the family at the design stage of the house.
- It is desirable that the location of the windows is south or east.
Conclusion
Many people are interested in how to make a plan or drawing on their own, but not everyone understands how responsible the design stage is. The main nuances of creating a complete house project were discussed above. Here it should be understood that designing a house requires an integrated approach and attention to a number of features.
The main function that they perform drawings of building facades- this is to give an idea to those who study them and work with them about what kind of appearance the building has, what are its architectural features, and in what relationship are its individual elements. There are the following types facades:
- Main
- Yard
- Lateral (end)
Application of door and window openings, slabs of canopies over entrances, balconies, cornices, as well as other available facade elements.

Development of the facade of the house
Application of doors, window frames, balcony railings, chimneys and ventilation pipes located on the roof, marking of elevation marks.

Development of building facades
Next, they check whether the facade corresponds to the cuts and the plan, and carry out its final stroke. If the buildings are large-block or panel, then seams are drawn between the blocks and panels.
A solid thin line is used to depict visible contours in facade drawings. To draw a line of the contour of the earth, you can use a thickened line that extends beyond the boundaries of the facade.
How is the drawing of the facade of the building carried out in accordance with the current standards and rules? What are the different projections of a building called?
Let's get acquainted with the general rules for the execution of construction drawings.
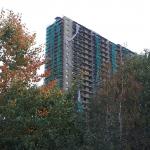
In the photo - a sketch of the facade of those times when the requirements for project documentation differed from the current ones.
General provisions
The answer to the question of how to draw the facade of a building, we will begin by listing the requirements common to all construction drawings and diagrams.
Terminology
- All construction drawings are obtained by projecting a certain type of building onto a plane.
- The actual drawing of the facade of the house is its frontal projection onto a plane parallel to the facade.
- The projection of a section of a building in a longitudinal or transverse plane is, respectively, a longitudinal or transverse section.
- If a horizontal section of a building is transferred to paper, it is commonly called a plan. Depending on the level at which the cut is made, it can be a basement plan, a first floor plan, and so on.
- A top view of a site that includes a building or a group of buildings and structures is commonly called a master plan.
- Finally, no matter what object is depicted - the basement of a kindergarten, the facade of an industrial building, the facade of a cottage, or a toilet in a summer cottage - all these images have a common name: architectural and construction drawings.
Despite the spread of electronic media, the drawings must be printed on paper.
Regulations
Sections, plans and drawings of building facades must be made in a common ESKD system (unified system for design documentation). Its standards are determined by GOST 2.301-68 - GOST 2.307-68.
What exactly is regulated?
- Sheet formats for all drawings.
Important: format requirements imply certain aspect ratios of the sheet itself, and not the drawing frame.
- Scale series of images.
- Line thickness.
- The name of the image elements.
- Drawing fonts.
- Image methods on the drawings of various objects.
- Graphic designations of various materials.
The following scales can be used when drawing up master plans for objects:
- 1:200;
- 1:5000;
- 1:10000;
- 1:20000;
- 1:25000;
- 1:50000.
In the drawings of facades and plans, of course, larger scales are also used.
A 1:1 scale can be used when transferring complex-shaped cornices and other small elements onto paper. However, this is rather an exception. Zoom scales are not used in architectural and construction drawings.
Rules for the execution of drawings
In order to correctly make drawings of house facades, floor plans and other architectural and construction schemes with your own hands, you need to adhere to fairly strict rules.
- The thickness of the main line must be the same for all details of the drawing, performed on the same scale. An exception is sectional drawings: visible contour lines can be drawn with a thin line.
- Names, headings and designations in the drawing field can be written without inclination. But the dimensions and other inscriptions on the arrows are written obliquely, with an angle relative to the base of the line of about 75 degrees.
- The total number of dimensions in the drawing should be, as common sense suggests, sufficient for construction work. In this case, duplication of the same size on different elements of the image is allowed.
- Dimensions are given in millimeters without indicating units of measurement. However, the level above the ground is indicated in meters to the third decimal place.
Traditionally, all dimensions in the drawings are indicated in millimeters. The rule is not absolute; but other units of measurement should be indicated in the notes.
Attention: it is permissible to indicate dimensions in centimeters, provided that the units of measurement are specified in the note to the drawing. And in this case, the units of measurement are not specified separately.
Features of drawings of facades
We have listed the general provisions. Are there any nuances associated specifically with the facades that interest us primarily? How to draw the facade of the building in accordance with the current rules?
Here is the instruction.
- The drawing of the facade should give a clear idea of the appearance of the facade of the building (see), the proportions and size of individual elements.
- If the facade and the plan are on the same drawing, they are performed on the same scale and must be in projection connection. What does this mean? Only that the plan is located on the drawing under the facade.
- The facades of different sides of the building have their own names, which are indicated on the drawing. There are main, courtyard and side (end) facades.
- The drawing indicates all the structural details that will be present in a real building. For example, the main facade of the school in the drawing should be equipped with a porch, a yard facade with a fire escape; cornices, dormer windows and other seemingly trifles are drawn.
- In a technical project, it is customary to show its own shadows and the shadows falling on it on the facade. To do this, the drawing is painted with watercolors or shaded with dry grated ink.
- The facade drawing does not indicate the horizontal dimensions. However, on the one hand, at a distance of 15-20 millimeters from the contour of the facade, general height dimensions and level marks for the ground, windows and doors, plinth, eaves and ridge of the roof and the top points of pipes and ventilation are affixed.
- At the bottom of the facade, axes of expansion joints and differences in the height of the building are applied.
Before us is a drawing of the facade made in accordance with all the rules. Quite complex, I must say. It was taken from a very real building - the Bolshoi Drama Theater on the Fontanka embankment in St. Petersburg.
Conclusion
You can find more information about building drawings in the video at the end of the article. In addition, it is useful to know that the price, including a complete set of drawings, starts from 10,000 rubles for standard solutions. Exclusive projects can cost ten times more. Successes in construction!
facades- orthogonal projections of the building onto a vertical plane - the outer side of the building. The drawing of the facade gives an idea of the appearance of the building, its architecture and the ratio of its individual elements. Distinguish the main facade, courtyard and side, or end, facades.
The main facade is the view of the building from the side of the street or square. The definition of other facades follows from their name. The project usually gives the facades of all sides of the building. With its complex configuration (L- and W-shaped, etc.), facades located in different planes can be depicted on separate drawings. One drawing is made for identical facades.
The name of the facade is determined by the extreme coordination axes, between which the building section shown in the drawing is located, or the brand of the axis located in the facade wall, for example, "Facade 1-7", "Facade A-B", "Mounting diagram of the facade 1-13" etc. The name of the facade is inscribed above the image with a minimum gap (Fig. 10.12. D).
The scale of the facade should be minimal, but sufficient to show the relief of the wall, openings, holes in the walls, etc.
On the facade drawings, it is desirable to indicate expansion joints, fire escapes, external drain pipes, ramps at the gates, louvered grilles, including those installed instead of window frames, etc. Hatching highlights wall sections made of a material that differs from the material of the entire building. The dashed lines show the mounting openings to be laid (Fig. 10.12.2).
In industrial-type buildings with a large length of the facade with a rhythmic arrangement of windows, it is allowed to show the pattern of window frames only in the extreme two or three openings at both ends of the building; on longitudinal views of lanterns - also only at the ends, in civil buildings - in all window openings. However, the degree of detail when drawing the facades of civil and industrial buildings depends on the scale. The drawing of window frames, the type of doors and gates are shown only on facades made on a scale of 1:100 and larger; at smaller scales, only the contours of the valves and openings are drawn.
If there are complex sections on the facade, they are depicted separately on a larger scale, i.e. a fragment of the facade is being executed.
The main drawing of the facade should contain a link to its fragments indicating the number of the sheet on which they are placed. Most often, this is a curly bracket, under which the sheet number is indicated (Fig. 10.12.3). On fig. 10.12.3 shows the facade of an industrial building, on which the fragment shown in fig. 10.12.4. Above the fragment, an inscription is made according to the type: "Fragment of the facade."
In prefabricated buildings (large blocks, panels, etc.), facade fragments are not drawn, but replaced with links to wall or facade layouts (Fig. 10.12.5). On fragments of the facade, all the details are shown in detail and the necessary marks and inscriptions are applied.

The dimensions available on the plan and section make it possible to draw the facade of the building.
The finished drawing is drawn up with the following data. In buildings of all types, coordination axes are shown located along the edges of the facade, at expansion joints, in places of ledges in the plan and differences in the heights of the building. In industrial buildings, coordination axes are applied at one more side of each gate opening.
Dimensions on the drawings of the facade, as a rule, are not put down, with the exception of the dimensions of the binding of elements that are not identified on the plans, sections and fragments (Fig. 10.12.2 and 10.12.6).
On the drawings of the facades indicate the marks of the ground level, the top of the walls, entrance areas and facade elements located at different levels. On the drawings of the facades of industrial buildings, marks are also made for the top of the walls, the bottom and top of the openings. It is advisable to turn the mark shelf away from the image.
On the facades in the reference circles, the details available in the project are marked, if they are not shown on the details of the plans and sections. If there are fragments of facades, marking should be carried out only on fragments. On the facades, window blocks are marked according to the type OK-1, OK-2, etc. or schemes for filling window openings, if they are not shown on the plans.
The mark of the type of opening filling is affixed on the facade inside the contour of the window opening, and for small openings - under it or on the extension line. If all window openings of the building have the same type of filling, it is not marked on the facade.

On the drawing of the facade, marks and dimensions are applied, as well as the binding of openings and holes that are not indicated on the plans and sections. In addition, indicate the type of decoration of wall sections that differ from the rest (prevailing); outdoor fire and evacuation stairs, adjoining galleries. In large-block and panel buildings, walls are cut into blocks and panels.

The facade drawing, which is one of the projections of the building, is built on the basis of the plan and section drawings. All preliminary constructions are performed with thin lines.
The drawing of the facade of the building is drawn in the following sequence:
- First, a horizontal straight line is drawn with the thickness adopted for tracing the facade. It is taken out of the contour by about 30 mm. This line serves as the base on which the facade of the building is built (Fig. 10.12.7).
- Then a second horizontal line is drawn at a distance of one and a half millimeters from the first - the blind area line.
- Thin lines draw horizontal contours of the basement, bottom and top of openings (window and door), cornice, ridge and other elements of the building,
- Next, draw vertical lines of coordination axes, walls, window and door openings, etc.
- Draw balcony railings, smoke and ventilation pipes and other architectural details of the facade,
- Reference circles are applied, facade elements depicted on fragments, circles of coordination axes, extension lines and elevation marks, and, if necessary, dimension lines are indicated.
- They put down elevation marks, axle marks, dimensions, if necessary, perform all the required inscriptions. A different construction order can also be used to depict a facade.
Today, durable materials are used in construction, allowing not only to build a strong building, but also to give it an aesthetically beautiful look. Thus, it is necessary to choose the right building materials. Very important design of building facades at house design especially when it comes to graduation projects.
Imagine a project that combines neat construction drawings properly embellished with gradient, fill, and even hatching. This immediately raises the level of your project. Therefore, in this lesson building facade drawing in AutoCAD).
When drawing the facade of the house, it is necessary to place its plan below. It is best to additionally use a section of the building.

According to the plan, we expose horizontal lines-rays. They must be installed in the corners of the house, at the beginning and end of window and door openings. This is how we get drawing lines that indicate walls and form window and door blocks. A section is used to orient doors and windows vertically.

If the latter is not ready, then you can start from the point indicating the height of the floor of the first floor, in this case it is more difficult to draw, since at the same time you need to work on replacing the section (calculate the heights of the points of the beginning and end of the openings ...).

After the lines denoting the top of the floor have been demolished from the section, it is also necessary to sit the lines that will become the lines of windows and doors.

If you remove the extra elements, you get window and door blocks.

The second point is tables and text on whatman paper. Drawings must be arranged in a certain sequence. Of course, there are no very strict requirements in this, but you should familiarize yourself with the main factors. You can familiarize yourself with them by looking at the finished theses or by watching the video lesson on the layout of the graduation project.
Cartograms (fixation drawings and diagrams) of the facades are a visual document showing the state of the facade and the scope of the upcoming restoration work. In foreign practice, cartograms are a documented, easily and objectively controlled basis for planning areas and scopes of work. According to them, the amount of restoration and additional lining materials is determined. These cartograms are used after restoration to verify the results and final calculations of the customer and contractor. A unified international system for designating and indexing stone weathering forms is used. Let's take two examples.
Near the building at 15, Solyany Lane, the high plinth is made of pink micro-wedge granite (rapakivi). Above, all the architectural elements of the facade are made of sandstone. In the facing blocks of sandstone, its two color varieties are easily distinguished: gray and grayish-yellow. All smooth wall fields, sculpture, semi-columns and their bases are made of gray sandstone, and the window openings of the first floor and panels under the windows of the second floor are made of yellow (Fig. 7, A).
Rice. Fig. 7. Schemes of materials used in decoration (a) and defects in materials (b, c) of the facade of the building at 15, Solyany Lane
During a full-scale examination of the facade of this building and mapping of materials and their defects (Fig. 7, b, V) The following forms of sandstone weathering have been identified (Savchenok et al., 2009):
Color change due to chemical weathering of minerals, predominantly oxidation of Fe compounds (Dc),
Atmospheric particulate pollution to dark crust changing surface (pl-dkC),
Colonies of microflora (fungi, algae, lichens) and bacteria (Bi),
Separation of the dark crust that changes the surface (diK),
Chipped due to human impact (chipped due to war, vandalism, etc.) (aO),
Surface coating with artificial mastic compositions and solutions,
Cracks that do not depend on the structure of the stone (vL),
Pollution (by paint) due to human interference - modern painting (al).
When mapping the facade, it was established and documented that among the forms of weathering, pollution by particles from the atmosphere (pl-dkC) (see Fig. 7, b) and sandstone discoloration (Dc) (see Fig. 7, V). Areas of sandstone pollution by particles from the atmosphere are clearly distinguished up to the formation of a dark-colored crust on them, which changes the surface. These crusts are most often developed on protruding (column bases, pedestals, etc.) and relief (carving, sculpture, balusters, etc.) parts of the cladding. It is these parts of the facade that most intensively take on the impact of external moisture and pollution by particles from the atmosphere, accumulate them on the surface with the formation of a surface dark-colored crust.
The building of the former Russian Bank for Foreign Trade at 32 Bolshaya Morskaya Street is lined with red-brown, yellow, and light green sandstone blocks to its full height (Fig. 2) (Bulakh et al., 2008). Mapping revealed the following main forms of sandstone weathering (Fig. 3) (Bulakh et al., 2005):
Separate peeling of scales before coloring the stone (eF-Pu);
Atmospheric particle pollution (pI);
Separate exfoliation of scales, flakes (eF);
Numerous peeling scales, Flakes (mF);
Individual peels (eS);
Multiple flaking (mS).

Il. 2. Scheme of materials for the front facade of the building at Bolshaya Morskaya Street, 32 (after restoration work in 2005)
Materials used in the construction of the building in 1887-1888: 1 yellow sandstone, 2 green sandstone, 3 red sandstone, 4 ceramic; materials used during the restoration work in 2005: 5 details made using a dry mixture for decorative mortar (LLC "AZHIO"), 6 - details and inserts made using yellow original sandstone, 7 - details and inserts made from Polish sandstone from the Szmiluv deposit, 8 - details made with the use of Funcosil restoration solutions, 9 putties made with the use of Funkoznl restoration solutions, 10 gilding with gold leaf, 11 - steel sheets; additional designations: 12 an inscription carved in red Württemberg sandstone, 13 places of scaffolding during restoration work in 2005, 14 - date digits restored using a mixture of Kerabond cement-polymer adhesive and granite chips, 15 - date digits created during construction of the building in 1887-1888.

Il. Fig. 3. Scheme of defects in the sandstone of the front facade of the building on Bolshaya Morskaya Street, 32 (as of 2002, made by A. A. Zolotarev (Bulakh et al., 2005).
1 - pollution by particles from the atmosphere (pi); 2 - separate exfoliation of scales, flakes (cF); 3 - numerous exfoliation of scales, flakes (mF); 4 - individual peelings (eS); 5 - multiple peels (mS); 6 - individual detachment of scales before coloring (eF-Pu).
Observations have shown that there is a clear genetic relationship between the forms of weathering of sandstone and their intensity, on the one hand, and its mineral composition, on the other. Red-brown, light green and yellow sandstones are characterized by the intensive development of almost all forms of weathering. In gray and grayish-yellow sandstones, weathering forms of groups I, II, and IV are predominantly developed. Weathering forms belonging to group III are clearly less pronounced or practically absent in these sandstones. The only exception in this group for gray and greyish-yellow sandstones is the separation of the dark crust that changes the surface (diK).
The performed documentary fixation of stone varieties, its defects and the degree of destruction of the stone before restoration and the same documentary fixation of the state of sandstone after restoration made it possible to give a reasonable qualimetric assessment of the actual effectiveness of the restoration work performed in 2000 on the facade of the Russian Bank for Foreign Trade. It turned out to be negative (Bulakh et al., 2008; Bulakhetal., 2011).
There are the following types of facades: main facade, palace facade and side or end facades.
The main facade is the view of the building from the side of the street or square. The name of the facade is determined by the extreme coordination axes, between which the building section shown in the drawing is located, or the brand of the axis located in the facade wall, for example, “Facade 1-4”, “Facade À-”, “ Facade wiring diagram 1-13". The scale of the facade should be minimal, but sufficient to show the relief of the wall, the openings of the holes in the walls, etc.
On the drawings of the facades, it is desirable to indicate expansion joints, fire escapes, pipes of the external drain, ramps at the gates, louvered grilles, etc. A conditional graphic designation distinguishes wall sections made of a material that differs from the material of the entire building (Table 5). In industrial-type buildings with a long facade with a rhythmic arrangement of windows, it is allowed to show the pattern of window frames only in two or three extreme openings at both ends of the building.
The pattern of window frames, the type of doors and gates are shown only on facades made on a scale of 1:100 and larger; at smaller scales, only the contours of the valves and openings are drawn.
If there are complex sections on the facade, they are depicted separately on a larger scale as a fragment. On the main drawing of the facade, a link is given to its fragments indicating the number of the sheet on which they are placed.
The facade drawing is built on the basis of the plan and section drawings.
In the name of the facade, if necessary, the scale of its image is indicated, for example: “Facade 1-22 (1:200)”.
An example of the facade of a residential building is shown in Fig. 25, and a fragment of the facade of the industrial building - in fig. 26.
On the drawings of the facades apply and indicate:
- coordination axes of the building (structure) passing in the characteristic places of the facade (for example: extreme, at expansion joints, in places of ledges on the plan and height difference);
- the appearance of the building, including windows, doors, gates, steps, balconies, etc.;
1,000 Óð.ç. 1
2,450 +2,250
Rice. 25 4
Facade 1-22 (1:200)
Fragment 1 | ||||
- marks of the ground level, entrance platforms, top of walls, bottom and top of openings and facade elements located at different levels (canopies, remote vestibules). It is allowed to indicate the marks of the bottom and top of the openings in sections;
- marks, dimensions and bindings of openings and openings not indicated on the plans and sections;
- types of filling window openings, if they are not part of the prefabricated wall structures (they are not shown in the training assignments);
and cuts;
- type of decoration of individual sections of the walls, different from the rest (prevailing);
- outdoor fire and evacuation stairs, adjoining galleries.
4. SEQUENCE OF IMPLEMENTATION OF THE ARCHITECTURAL DRAWING OF THE BUILDING
4.1. Purpose and content of the work
The purpose of the task is to study the features and conventions in the execution, design and reading of construction drawings of buildings, as well as to consolidate the skills of building a perspective image of objects.
IN every task for calculation and graphic work are a schematic drawing of the plan, facade and section of the building, the explication of the premises, as well as the assembly or structural element that needs to be drawn (Fig. 27).
IN job you need to do the following:
1. Draw the floor plan on a scale of 1:100.
2. Make a section of the building on a scale of 1:50 (if there is more than one floor, the section is made along the staircase).
3. Draw the facade of the building on a scale of 1:100.
4. Draw the specified node or structural element on a scale of 1:5 or 1:10.
5. Create a perspective view of the building. Architectural and construction drawing of the building and perspective
each building is made on a separate sheet of A1 drawing paper.
Take brick (250x120x65 in size) as a material for external and internal walls, concrete for foundations, prefabricated concrete slabs for coatings, and steel for roofing.
Take external walls with a thickness of two bricks, i.e. 510 mm, internal capital - 1.5 bricks or 380 mm, partitions (regardless of material) - 100 mm.
The slope of the roof for steel 18, or 1/5 - 1/6 of the height to the span of the building to be covered.
On the scheme of the plan, the letters indicate the following designations: ÎÊ1, ÎÊ2, ... - window openings; Ä1, Ä2, ... - doorways; Â1, Â2, ... - gates; В - bathroom; Ò - toilet; LL - stairwell, as well as the explication of the premises.
4.2. The layout of the sheet of the architectural and construction drawing of the building
An example of placing a plan, facade and section on the drawing is shown in fig. 27.

The plan of the building should be placed with the long side along the sheet, turning the side of the plan corresponding to the main facade of the building to the bottom edge of the sheet.
For the possibility of applying dimensional chains and marking the coordination axes, the outline of the plan should be placed approximately at a distance of 75-80 mm from the drawing frame.
The facade is located in place of the front view, and the cross section is to the right of the facade so that it is possible to apply the necessary inscriptions, dimensions and marking of the axes.
An enlarged image of a building structural element is given in the free space of the drawing, and the explication is above the main inscription.
Initially, the settlement and graphic work is completely drawn in thin lines, after which it is checked by the teacher, who, subject to the correct execution of the drawing, gives permission for the stroke.
The stroke of the drawing is carried out with the corresponding types of lines of various thicknesses in accordance with GOST 2.303-68 *, the recommendations specified in section 2.4 of the manual, and the data in Table. 2.
4.3. The sequence of the building plan
1. Plot and mark the coordination axes (see section 3.1
and fig. 28).
2. Draw the contours of the longitudinal and transverse outer
And capital internal walls and columns (Fig. 29).
3. The contours of the partitions are drawn, paying attention to the difference in the attachment of external and main internal walls, main walls and partitions (Fig. 29 and 31).
4. Perform a breakdown of window and door openings (Fig. 30).
5. Draw symbols sanitary and other equipment, as well as indicate the direction of door opening (Fig. 30).
6. If necessary, make a calculation of the stairs and draw its symbol.
7. Extended and dimension lines are applied (Fig. 30).
8. Put down the required dimensions, brands of axles and other elements (Fig. 31).
9. Perform the necessary inscriptions and draw up a drawing.
10. Designate the secant planes of the cuts.


Rice. 30 1
Rice. 31 1
4.4. Building section sequence
1. A horizontal line is drawn, which is taken as the level of the finished floor of the first floor - its level is equal to the mark
0.000 (Fig. 32).
2. A second horizontal straight line is drawn, which determines the planning surface of the earth, and the distances between the corresponding coordination axes are plotted along the clean floor line. Through these points, vertical coordination axes are drawn (Fig. 32).
3. On both sides of the vertical lines at a distance that determines the thickness of the outer, inner walls and partitions that fall into the cutting plane, their contours are drawn in thin lines (Fig. 33).
4. Draw a contour line for the ceiling, ceiling, roof, plinth and blind area (if any) (Fig. 33). The cornice is shown as a transition element from the wall to the roof.
5. Depict window, doorways and technological equipment that fell into the cutting plane (Fig. 34).
6. Depict building elements located behind the cutting plane (doors, windows, partitions, etc.) (Fig. 34).
7. Marking circles of the coordination axes and reference circles are applied, indicating the elements of the section depicted on the fragments. Extended and dimensional lines are drawn, signs of elevation marks are drawn (Fig. 35).
8. Put down elevation marks, dimensions, brands of axles and other elements. Perform the necessary inscriptions (Fig. 35).
4.5. Facade drawing sequence
1. First, a horizontal straight line is drawn with a thickness adopted for the outline of the facade, which is 30 mm longer than the contour of the facade (Fig. 36)
2. Draw a second horizontal line at a distance of 1.5
mm from the first - the blind area line (if any). Thin lines apply horizontal contours of the basement, bottom and top of openings (window and door), cornice, ridge and other elements of the building
3. Draw vertical lines of coordination axes, walls, window and door openings, etc. (Fig. 37). Draw a fence

Facades are called views (projections) of buildings in front, behind and from the side.
The view of the building from the front (from the side of the street) is called the main facade, the view from the back (from the side of the courtyard) is called the courtyard, and the views from the left or right are called the end. In building projects, the names of the facades are linked to the marks of the center axes, indicating in the name of the facade the left and right extreme center axes or the mark of the axis that is located in the wall depicted on the facade, for example, the facade 1 -8, Facade B- A, Facade along the axis A, Facade according to the axis 1 II etc.
In the drawings of mirror facades, the extreme axes of both facades are affixed, for example, the facade A-B AND B-A.
According to the drawings of the facades, they judge the external appearance of buildings, the location and shape of some structural and architectural elements: windows, doors, balconies, architraves, sandriks, pilasters, columns, etc.
The drawings of the facades of large-block and panel buildings show the cutting (slicing) of the walls into panels or blocks. If the brands of elements are indicated on such a facade, it is called a mounting one.
In building projects, where structural drawings are separated into a separate part, the marks of facade elements are shown on the wiring diagrams (see Fig. 57).
Depending on the design stage, purpose and size of the building, drawings of building facades are made on a scale from 1:50 to 1:500. Complex sections of building facades are drawn on a scale of 1:50 or 1:100 on the drawings of facade elements. In the main drawing of the facade, there should be a link to the sheet number where the facade element is shown. So, for example, in Fig. 37 shows an element of the facade of 1 industrial building, the facade B-A Which is shown in Fig. 36.
In turn, individual sections of the facade element can be shown on a larger scale as detail drawings. On fig. 38 details shown 1, 2, 3 and 4 Facade of the same building.
Visible contours in the drawings of facades are outlined with thin lines. So, the contours of the building and openings have a thickness of 0.3-0.4 Mm, The contours of window frames, partitioning of walls into panels and blocks, the contours of corbels, cornices and other architectural elements of the walls are outlined with lines twice as thin as the contours of the building and openings. The ground contour line should be thick, it should extend beyond the facade by 20-30 Mm. The thickness of this line is 1 -1.5 Mm.
The degree of elaboration of individual details of the facade depends on the scale of the drawing. So, for example, the details of window frames, doors and gates are shown on facades made on a scale of 1:100 and larger (see Fig. 34). At smaller scales, only the contours of the valves or openings are drawn (see Fig. 35).
Dimensions on the drawings of facades are usually not applied, they show only the center axes at the corners of the building, at expansion joints and in places of height difference. Outside the drawing, to the right or left of it, the elevation marks of the ground level, the floor of the first floor, the basement, the bottom and top of the openings, the cornice and corbels, the top of the roof, etc. are taken out and inscribed. panel seams.
To better identify the volumetric composition of the building, own and falling shadows are built on the facade drawings (see Fig. 34). In this case, the direction of the light rays is taken such that their projections are located at an angle of 45 ° to the coordinate axis. This allows you to show the true dimensions of the projections and depressions of the facade at the scale of the drawing.
Separate drawings of facades, carried out at the design stage, are washed with dry ink or watercolors. For greater expressiveness of the drawing, in addition to the building, they show a landscape or urban development. Such drawings are called architectural facades.
At the design assignment stage, buildings can be depicted and. These drawings give a more visual representation of the architectural and artistic composition of the designed buildings.