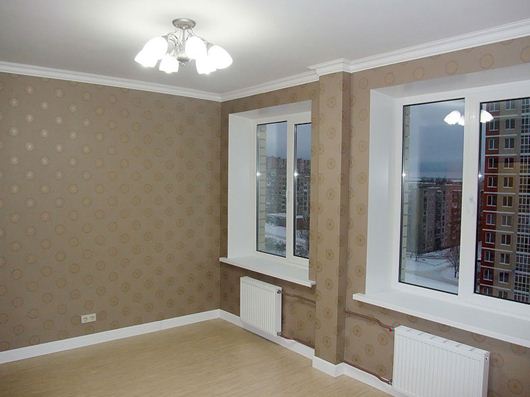
The fashion for plastic windows is not diminishing. On the contrary, such designs are gradually gaining more and more popularity. However, such an installation is usually accompanied by the need to manufacture window slopes, without which the windows will be blown out, and the room will not delight you with its appearance. As usual, the owners are faced with the question of the choice of materials for the slopes. It must be said that the choice is quite limited, since a natural selection of the most suitable materials for these purposes has already taken place. In the article, we will list what you will have to choose from, and also talk about the pros and cons of these materials.
Indoor slope plaster
This is the most common method of finishing interior slopes in the past. This is due to the fact that drywall was not invented before, and no one even heard of plastic. Now some owners decide on such a finish because of its cheapness. But is this method really good?
Indeed, having bought a bag of ready-made mortar, for example, white plaster or cement mortar, you can independently, very quickly make more or less acceptable slopes. Then the surfaces are sanded and covered with a white water-based emulsion. What's the catch, then? Why is the fashion for such slopes tending to zero?
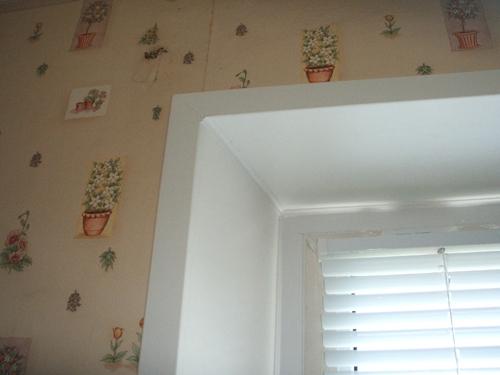
The secret is very simple. Any plaster surfaces, being on the border of cold and warm air, are subject to rapid destruction. They are simultaneously affected by the warmth of the house and the cold of the street. The result is the appearance of small cracks on the surface of the plaster within a year. Then they gradually increase, and the appearance of the slopes irrevocably deteriorates. The owners of the premises have to make annual redecoration of such slopes. Therefore, it is not recommended to use any types of plaster solutions for the manufacture of slopes.
Plasterboard finishing of window slopes
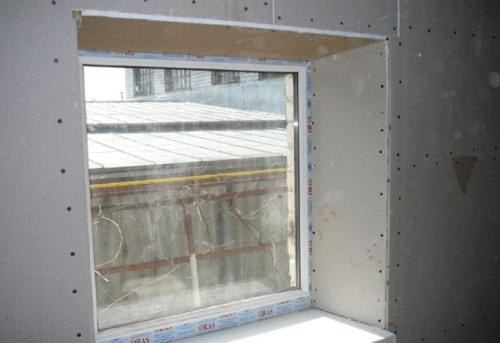
This modern material is quite suitable for the manufacture of door or window slopes. Moreover, it is, like plaster, absolutely environmentally friendly. It is not difficult to make slopes from gypsum plasterboard if you study the appropriate recommendations. But, if you want it to be really beautiful, invite a specialist. The surface of the drywall is perfectly flat, so the slopes will be very even, unlike plaster. Drywall does not require any cosmetic repairs for 25-30 years. The paint may need to be refreshed as it gets dirty.
Drywall is installed on glue or on dowels, plastered, and later, after the surfaces have dried, painted in several layers facade paint... The advantages of GCR are obvious. This is a low cost of the sheets and glue themselves, simplicity and high speed of installation. Suffice it to say that in 1 day you can easily make rough plasterboard slopes in 4-5 rooms, and then plaster them. On the second day, the slopes are polished and painted. That's how quickly it all ends. Of the minuses, a large amount of dust can be noted that occurs when cutting and fitting drywall sheets. The work is also wet, as is the plaster, so be prepared for a fair amount of dirt in the room.
Plastic slopes
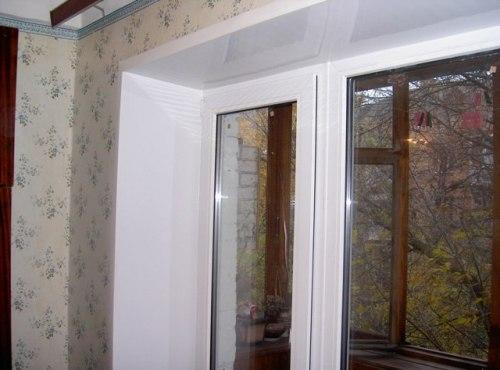
Contrary to popular belief about the dangers of plastic, we dare to assure you that modern plastic panels intended for internal use are completely harmless to humans. Do you use a lot of things made of acrylic, silicone, leatherette? Plastic does not emit any toxins or fumes around itself, therefore it is also environmentally friendly. And the fact that it does not allow air to pass through, don't let it bother you. Plastered and painted drywall also does not let it through.
A huge plus of plastic slopes is their practicality. Plastic does not get dirty, does not lose its color, caring for it is extremely simple. Slope installation work is done in record time. Slopes throughout the apartment are usually made in 1 day. This is the cleanest method of making slopes of all of the above.
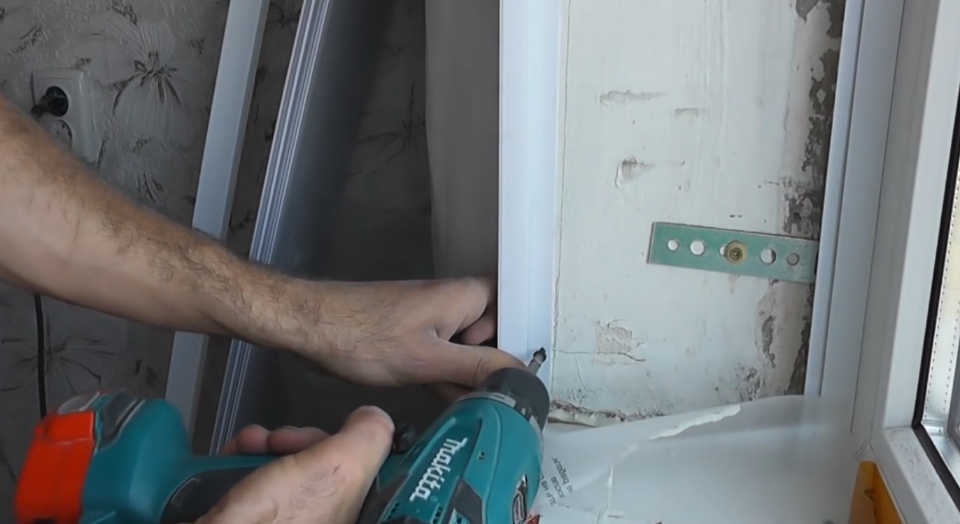
The only "dirty" moment is stuffing wooden blocks inside the walls from the side of the window or doorway. As a minus, it is worth paying attention to the relatively high cost of such slopes. Consider the cost of the plastic itself, plastic profiles, wooden beams and hardware.
Your home has new doors or maybe windows. It is wonderful! But now it's worth thinking over and making another one important element, namely the slopes. What can they be made of? Let's answer this question.
How to decorate the slopes of doors and windows?
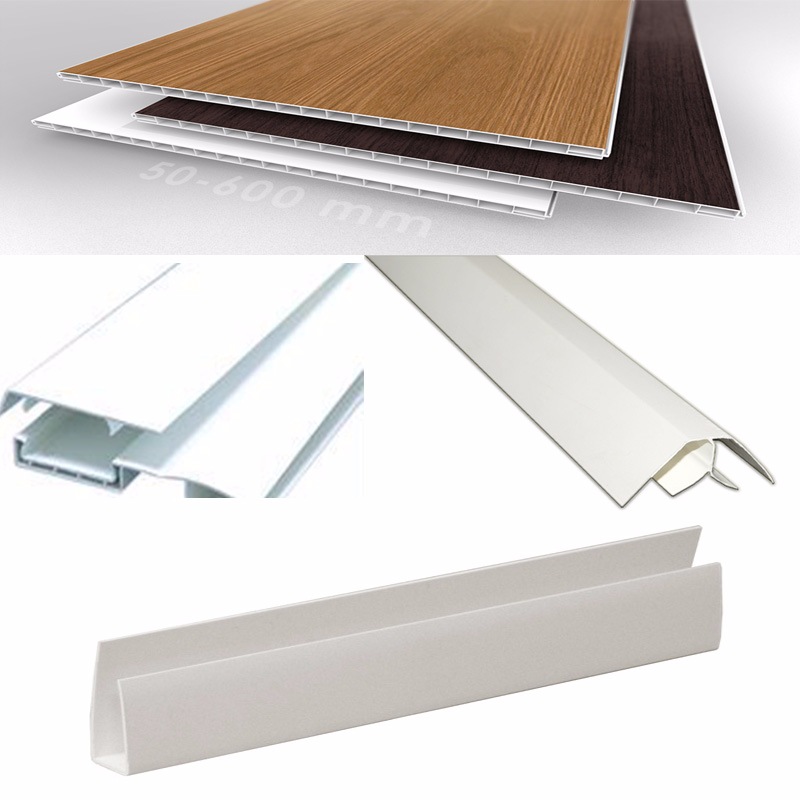
Window slopes can be finished with plastic, drywall, sandwich panels or just plaster. All the same materials are suitable for door slopes, plus an MDF-based laminate. Let's consider each material in more detail.
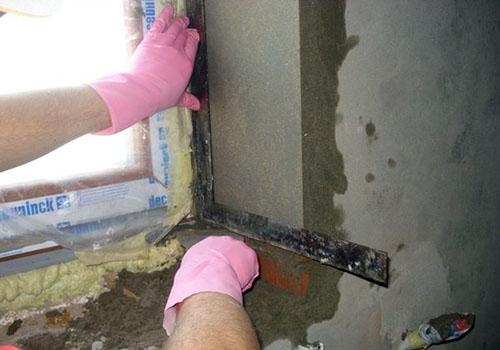
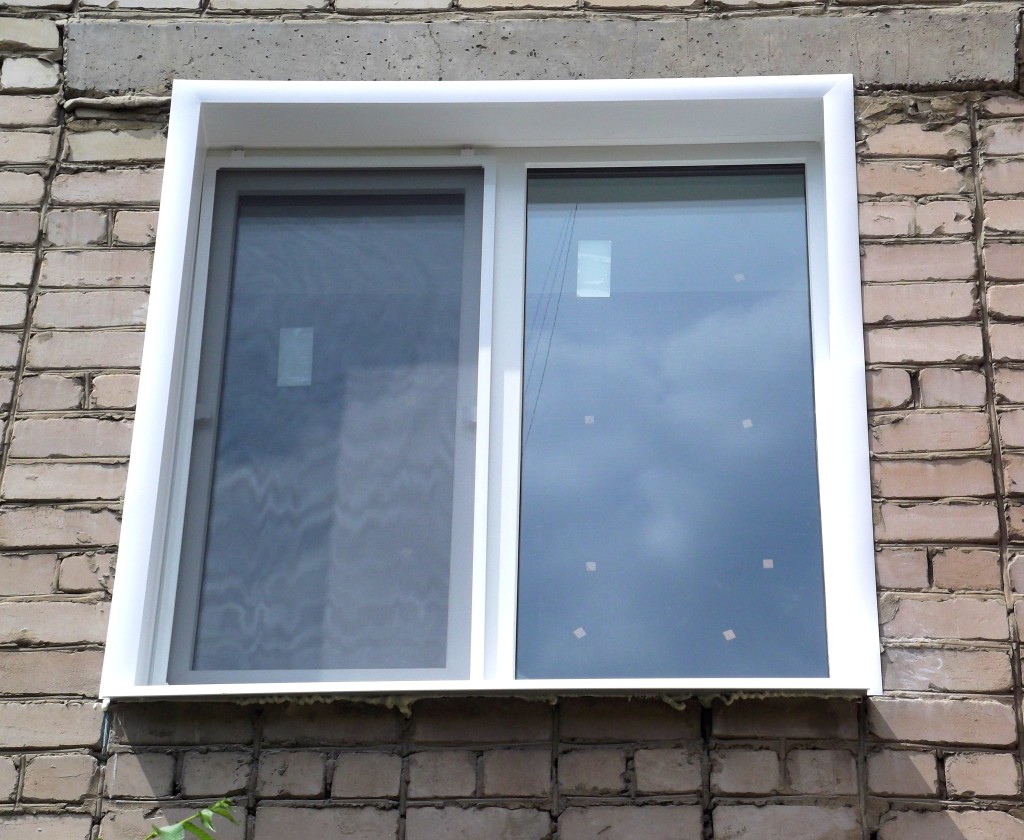
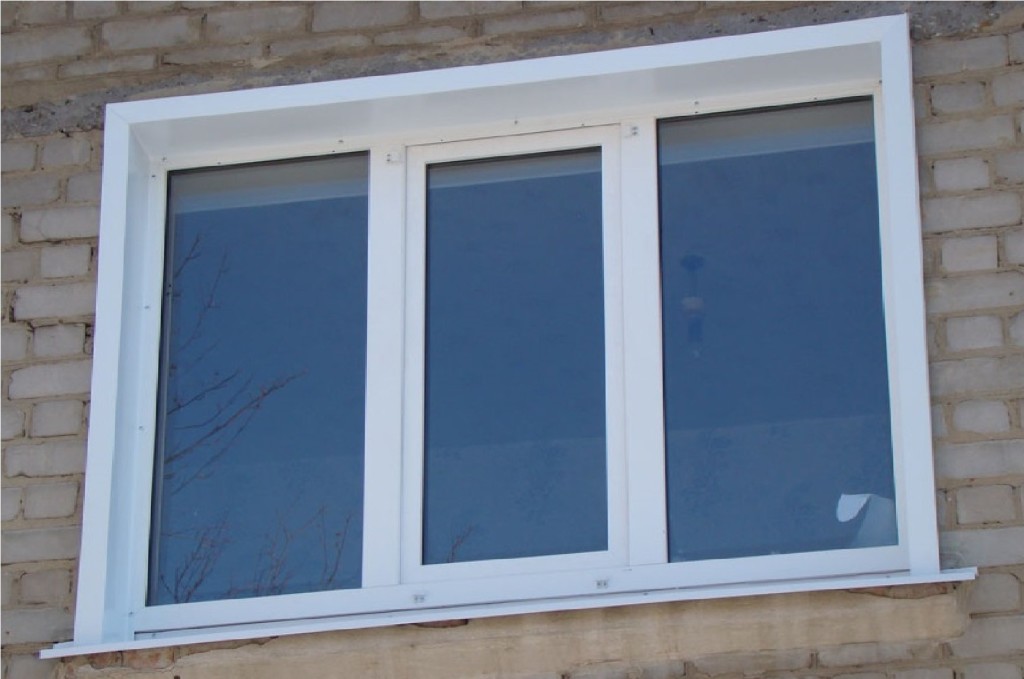
A slope made of this material guarantees high-quality thermal insulation to the room, since under the plastic layer there is a layer of insulation material - assembly or mineral wool. Slopes of this type are easy to install, they have a long service life (about 20 years), they are not afraid of direct sunlight and moisture. And color options, to match the frames, there is a wide variety of PVC window panels. This type of material is also suitable for finishing door slopes. It is scratch resistant and abrasion resistant. There are no problems with the choice of a shade to match the door and wallpaper.
Attention! Do not use wall panels for finishing window slopes! Usually, the wall panel is 25 cm wide, which may simply not be enough. Then you have to dock two panels, which will affect the sound and heat insulation of the room. In addition, these panels are not resistant to bright sun and will fade over time.
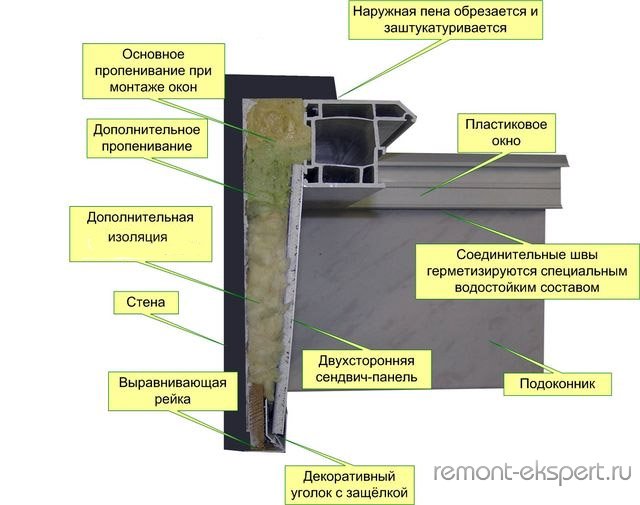
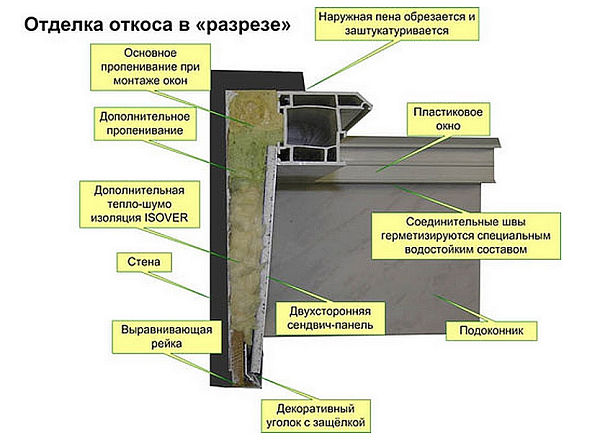
This type of finish has a long lifespan, almost like plastic. In addition, it is mounted completely without joints. The panels have increased resistance to frost and moisture, and also provide excellent heat and sound insulation. Three-layer sandwich panels: a front layer consisting of foamed PVC (polyvinyl chloride), a thermal insulation layer (based on polystyrene) and a backing sheet - rigid PVC.
Attention! If a new window is not finished with sandwich panels, then the distance between the slope and the window frame should be at least 1 cm. And remember that this type of finish is not resistant to impacts.
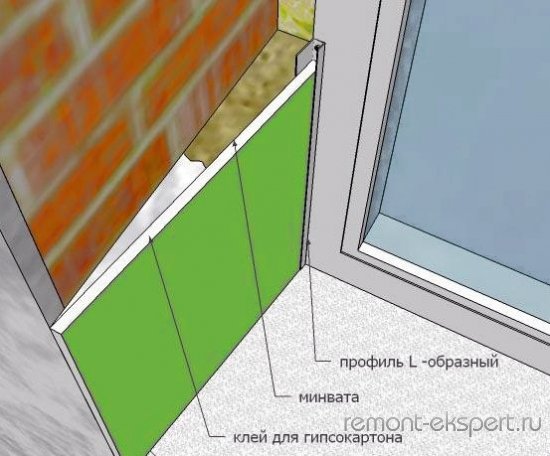
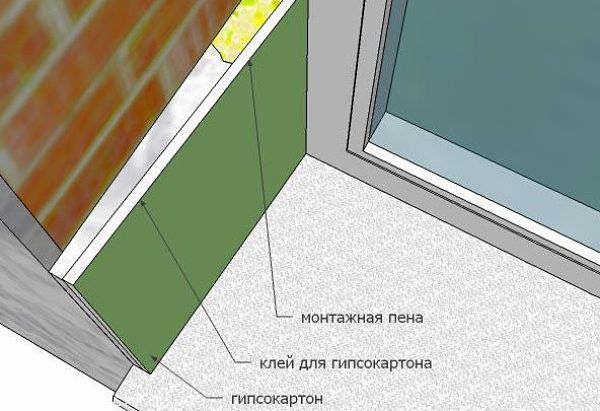
If you are trying to save money on finishing, and the old brick wall is thicker, then drywall is the best way... To create sufficient noise and heat insulation, it is recommended not to paint drywall, but to glue the surface with vinyl. The edges can be sealed with plastic casing.
Attention! Plasterboard slopes are not moisture resistant. Therefore, in rooms with a high level of humidity, it will be necessary to periodically replace them completely.
This is perhaps the simplest and cheapest finishing method. The solution is easy to prepare yourself. For this, sand and cement are mixed in proportions of 3: 1, and alabaster is added to them, so that the mixture sets faster. If you wish, you can buy ready-made plaster.
Attention! To complete this procedure, you must have at least initial skills in working with plaster so that the surface is flat and smooth. Over time, cracks may appear on the plaster slope.
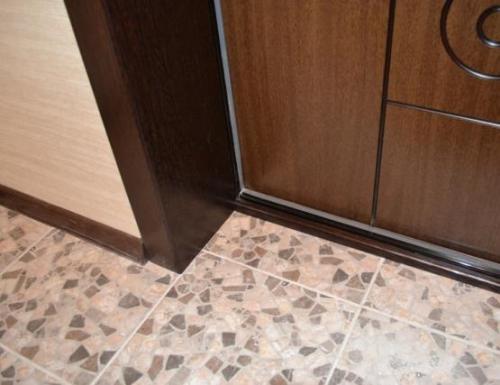
This material is used for door slopes. It is easy to install, serves for a long time, is not afraid of temperature changes and damage. And also, it is able to provide good noise and heat insulation of the room. The laminate is fastened simply using polyurethane foam.
How is the finishing of the slopes of the windows carried out? Today I will share my experience and tell you about the four most common finishes. You will learn important nuances and secrets of doing this work with your own hands.
Slope finishing technology
How to decorate the slopes on the windows inside? There are several ways:

Method 1: wet method
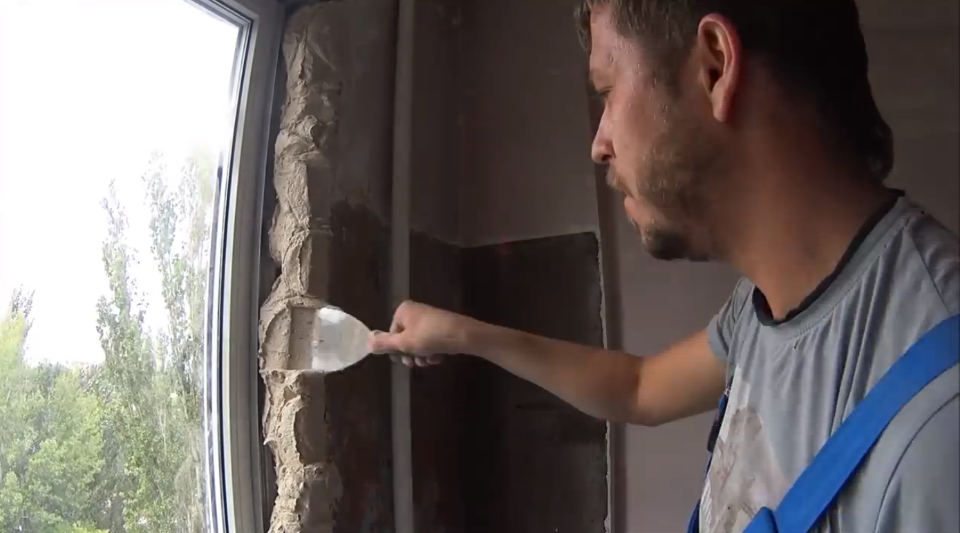
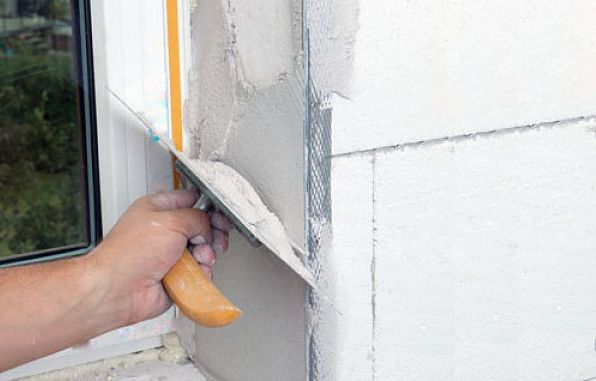
Wet finishing is the most traditional one. Its essence lies in plastering the opening with cement or plaster mortar.
The process of finishing the slopes of windows with plaster looks like this:
| Illustrations | |
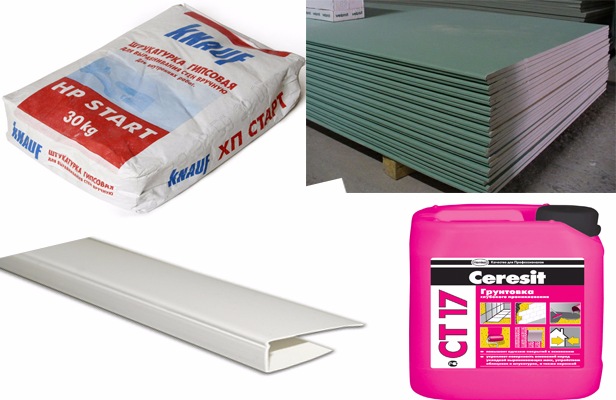
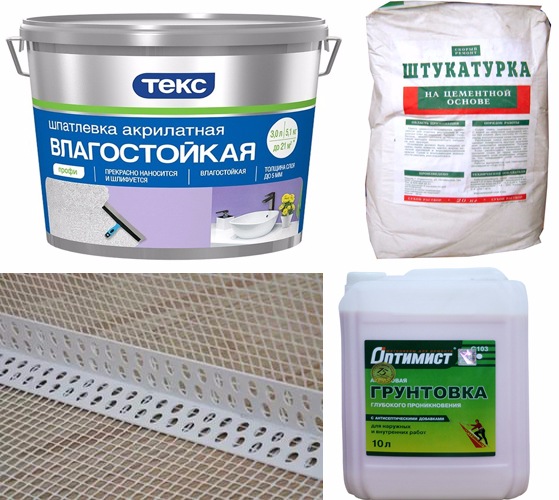 | Preparation of materials. For plastering slopes you will need:
|
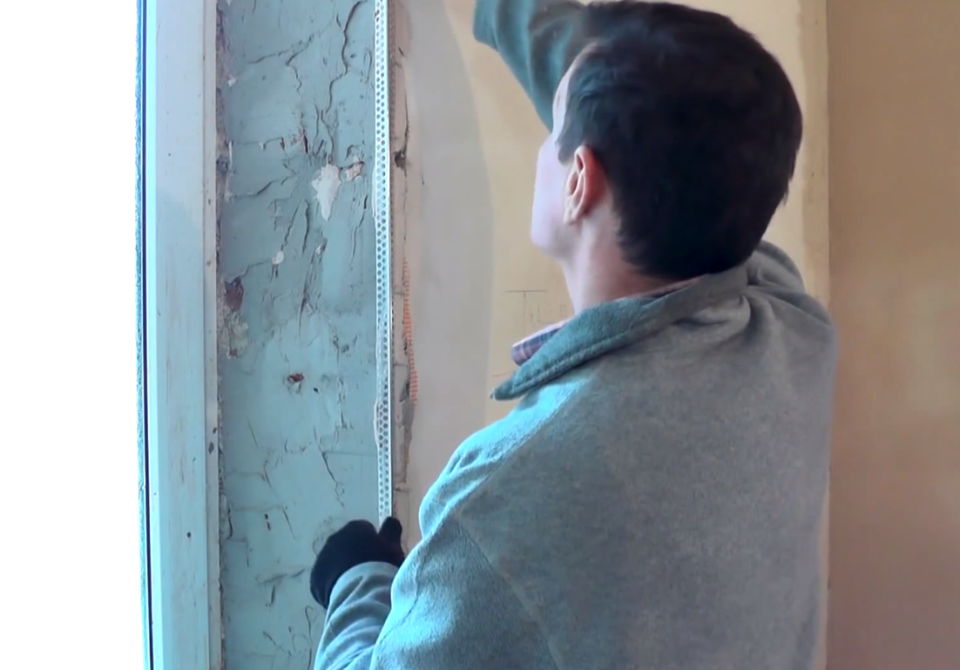
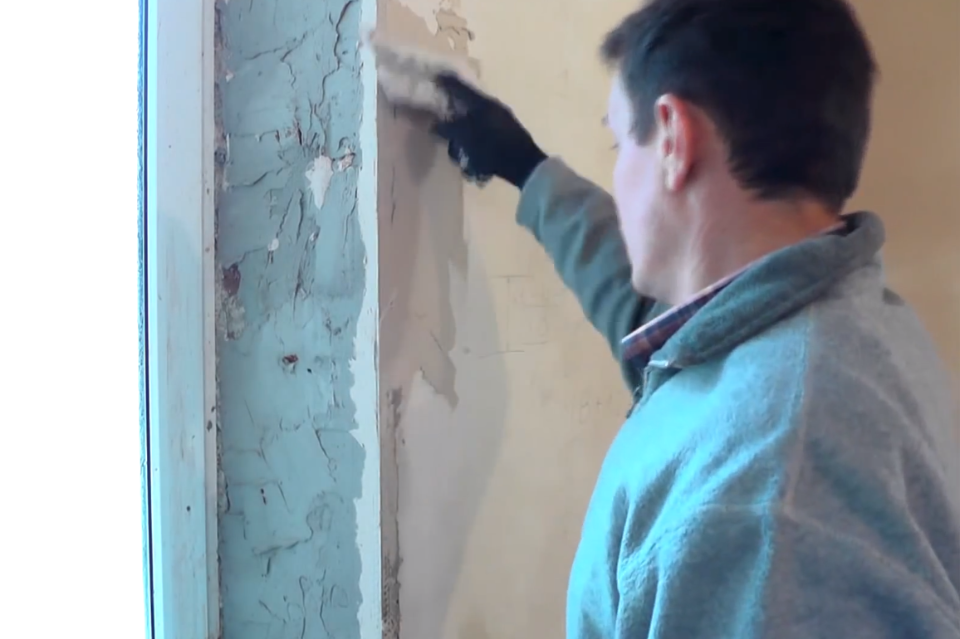
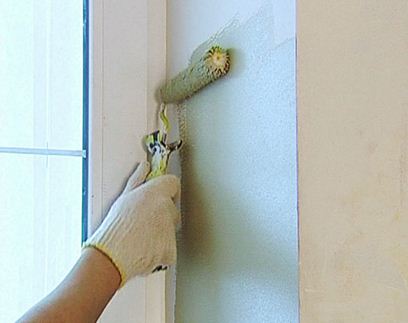
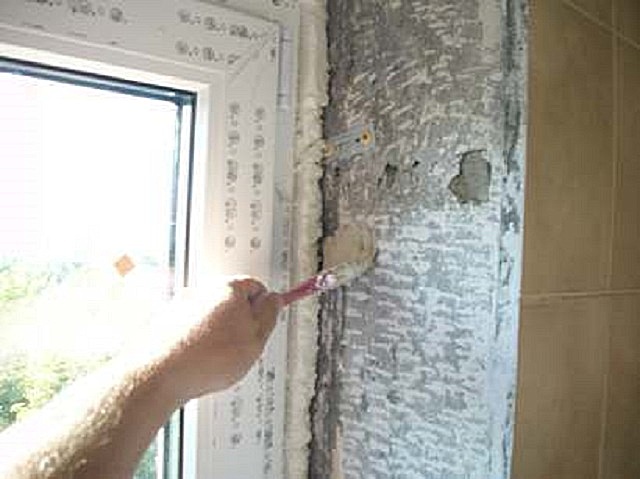 | Priming of slopes. Apply the liquid in a thin layer using a paintbrush. For maximum effect, treat the surface with two coats of soil. |
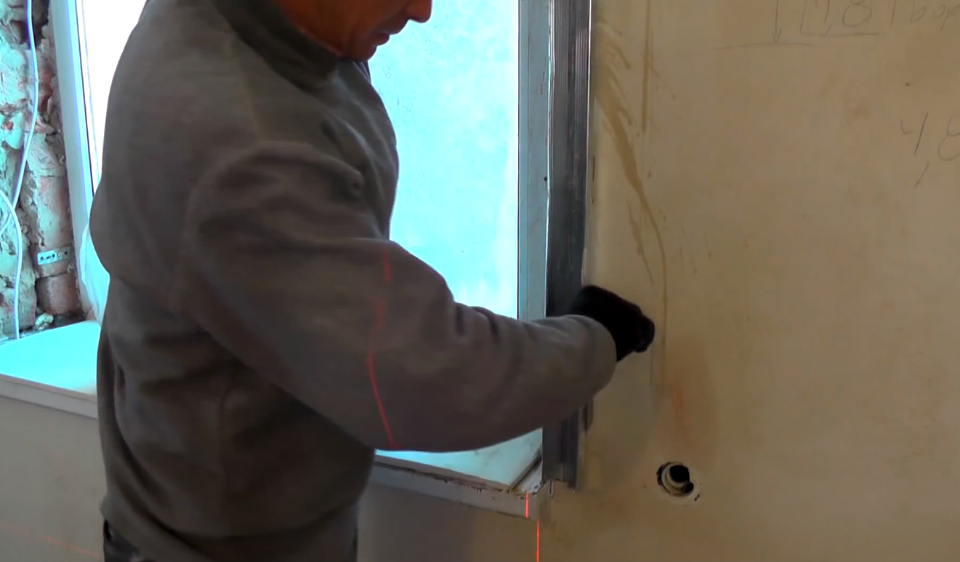
 | Performing markup.
The same principle is used to mark the upper slope. |
 | Installation of slats along the perimeter of the opening. From the side of the wall along the perimeter of the opening, you need to fix wooden slats or metal profiles. To do this, use plaster mortar. Installation is carried out as follows:
Install the horizontal batten for the upper slope in the same way. |
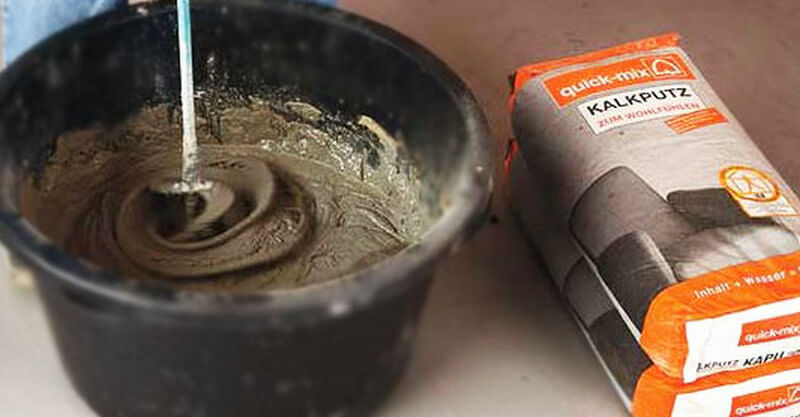 | Preparation of the solution. Pour dry plaster mix into a clean bucket, fill with water and mix thoroughly with a mixer or electric drill. The ratio of water and mixture is indicated on the package. |
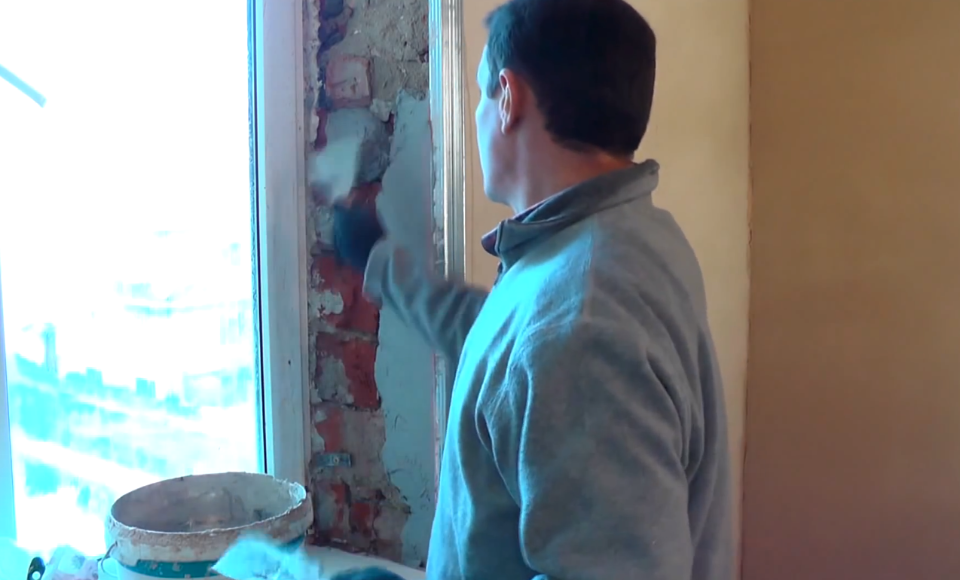 | Pre-alignment of slopes.
|
 | Dismantling the rails. After the mortar has set at remove the slats with your own hands by prying them with a narrow spatula. |
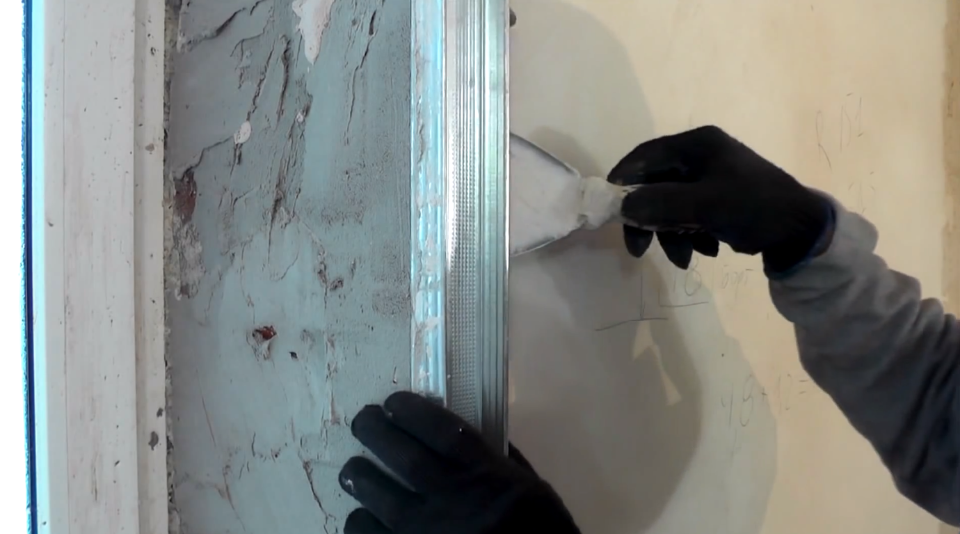
 | Corner installation.
|
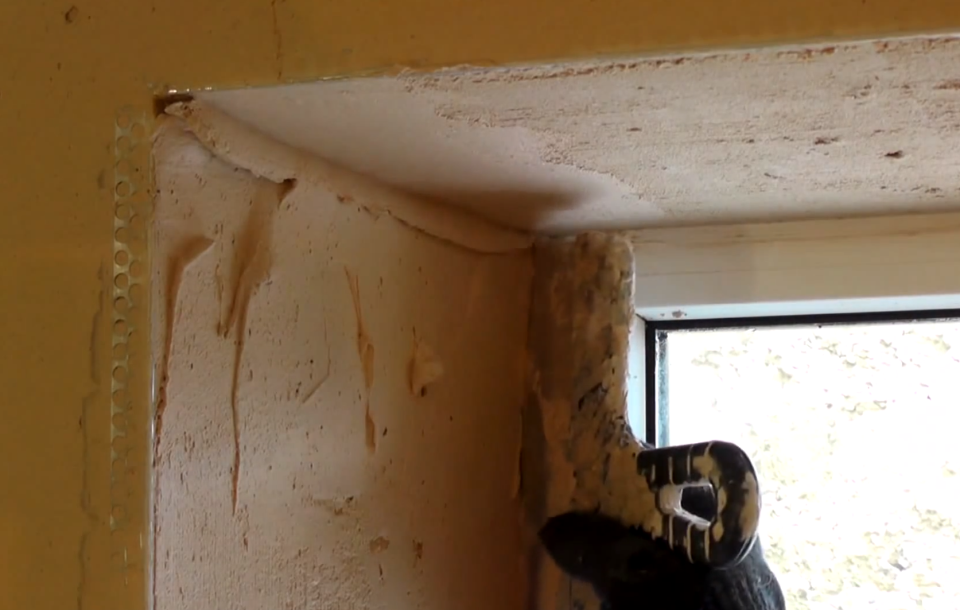
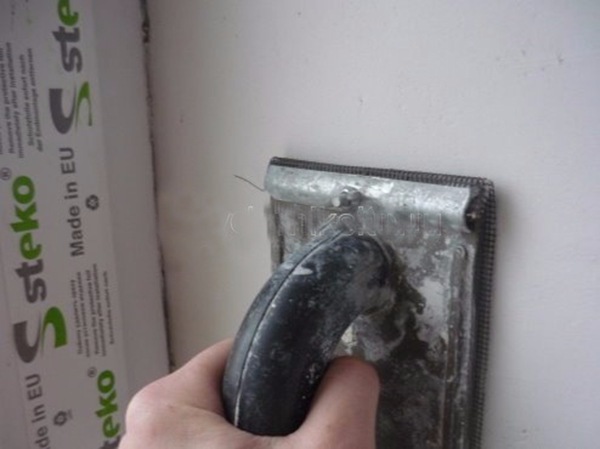
 | Wall alignment. Smooth the surface from the wall side with a starter putty using a trowel. |
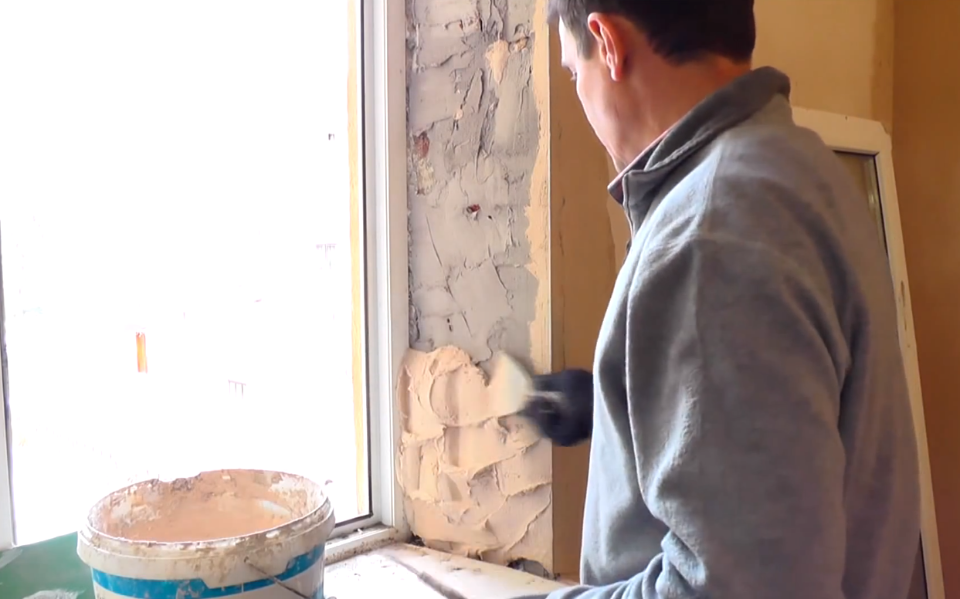 | Application of the solution. Apply the plaster mixture to the surface of the slope with a trowel or with a small excess. |
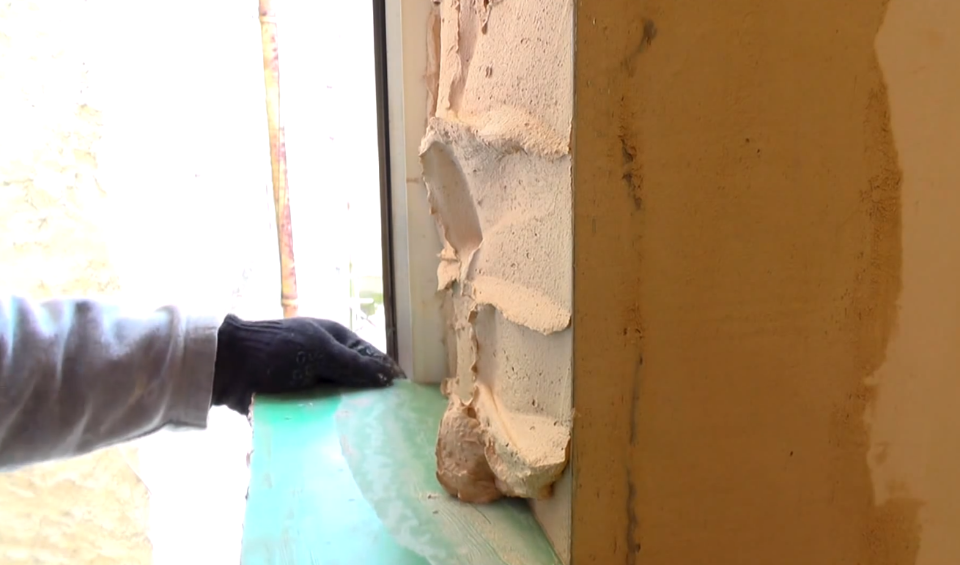 | Leveling the surface. Remove excess mortar with a wide spatula, a small one or a laminate template, as in the photo example. The principle of operation is the same as when aligning the walls with the lighthouse rule. |
 | Cleaning the frame from the solution. Wipe the frame with a sponge to remove any residual solution. |
 | Surface filling. Putty the slopes using a finishing putty. Apply it in a thin layer using a wide spatula. |
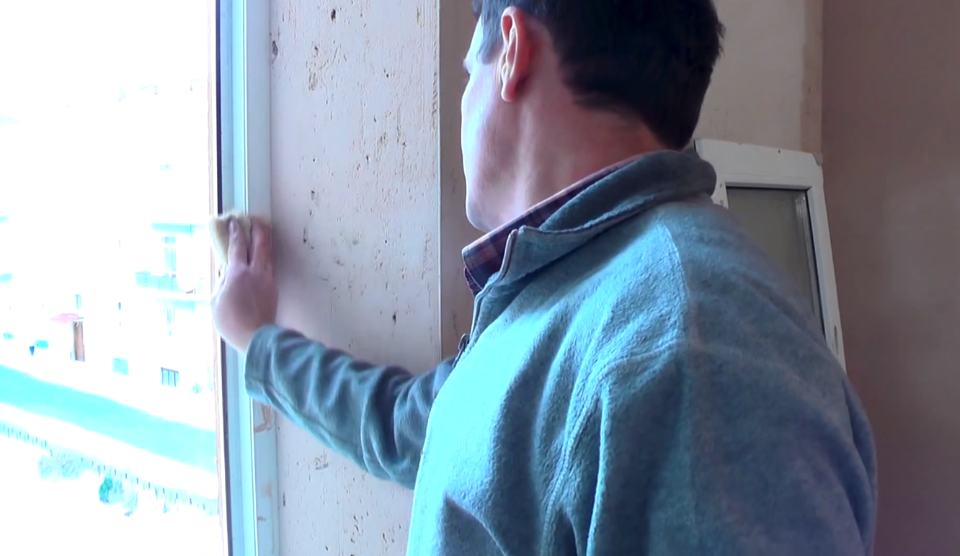
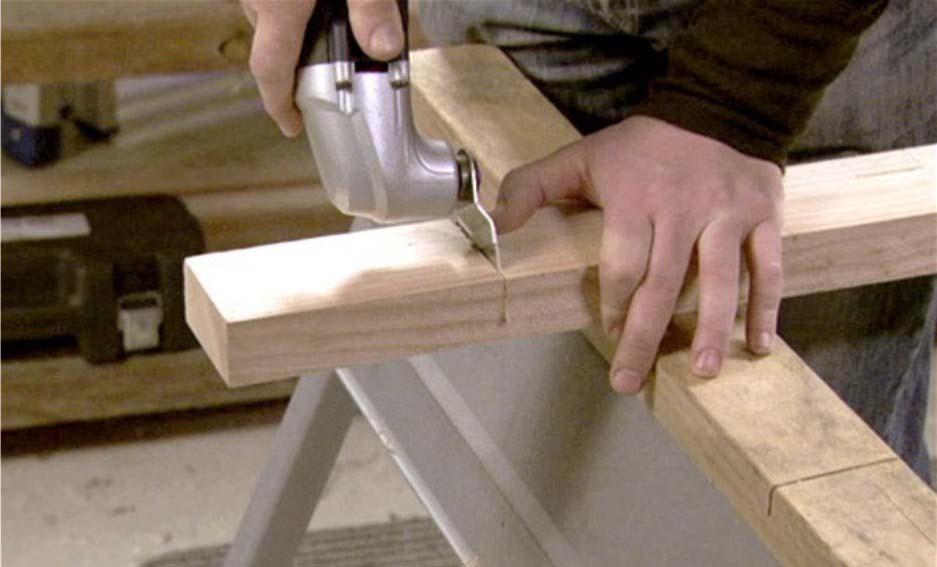
 | Grinding. Use the sanding jointer P120-150. Make circular movements with the tool to erase all minor irregularities and other imperfections. |
 | Slope painting. Apply water-based paint to the slope with a paint roller or brush in a thin layer. For best results, paint the surface in two coats. |
This completes the finishing of the slopes.
Method 2: drywall slopes
An alternative to plastering is "dry" finishes, such as plasterboard slopes.
The advantage of this method is the simplicity and speed of work. In addition, it is possible to perform heat and sound insulation of slopes. Paint can be used as a topcoat for such slopes.
Installation instructions for drywall slopes looks like this:
| Illustrations | Description of the action to be performed |
 | Preparation of materials. For finishing window slopes in this way, prepare the following materials:
|
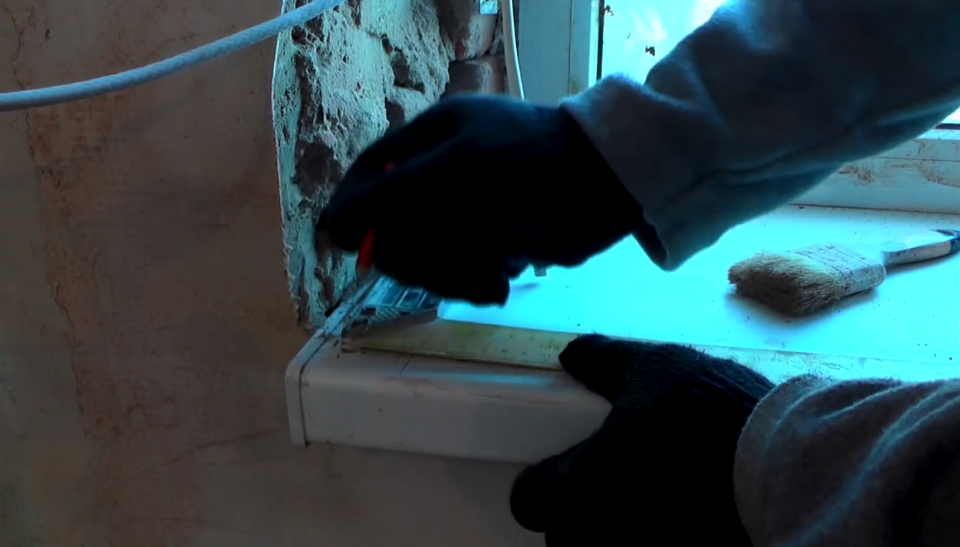
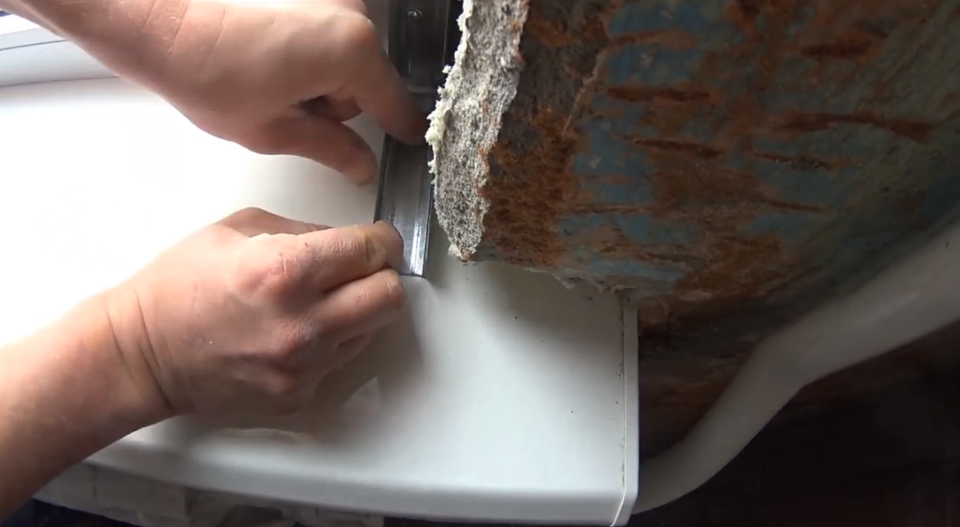
 | Removal of polyurethane foam. If the slopes are being cut off for a new window, trim the foam with a sharp knife. |
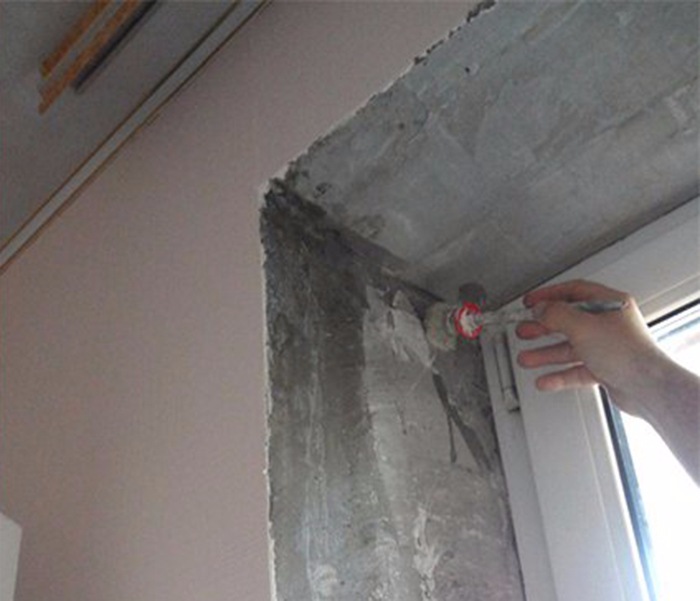 | Padding. Prime the surface as described above. |
 | Executing the layout of the profile location. Apply a few dots around the perimeter of the frame on each side, one and a half centimeters away from the edge. Then connect the resulting points with a line. |
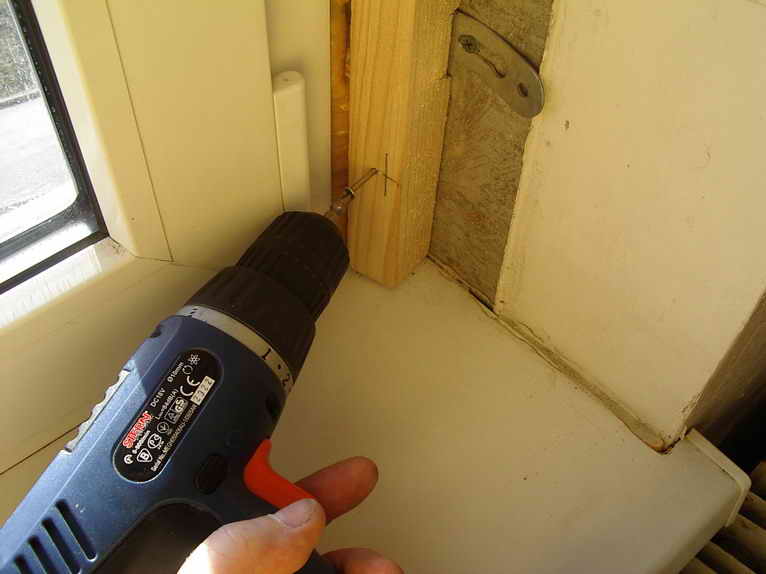
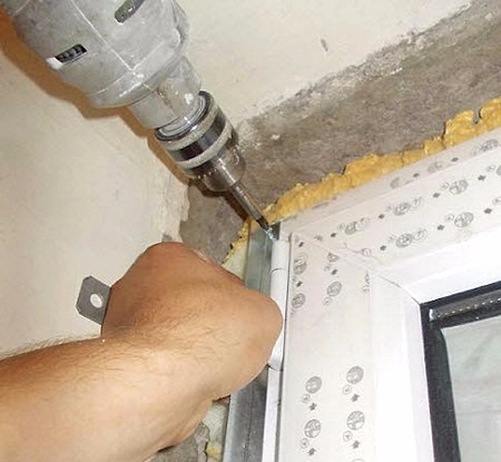 | Profile installation. Fasten the starting profile around the frame perimeter, aligning it with the markings. For these purposes, use self-tapping screws. Screw them in in increments of about 10 cm. |
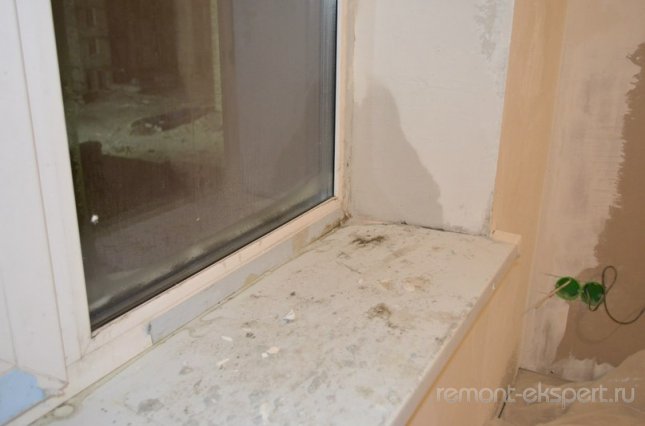
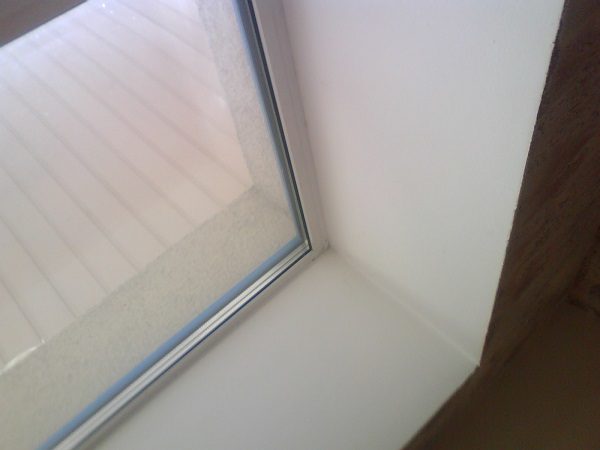
 | Marking the layout on the windowsill. First, an even angle is marked, from which a few centimeters of the alignment should be retreated. |
 | Installation of a profile on a window sill. If there is space between the wall and the window sill, as in the photo example, a metal L- or U-shaped profile must be fixed on the window sill. |
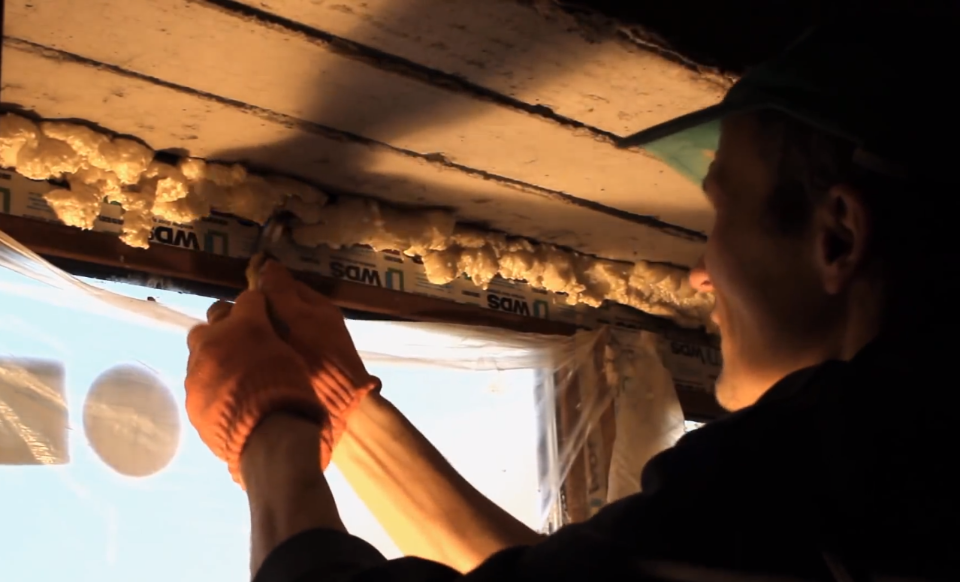
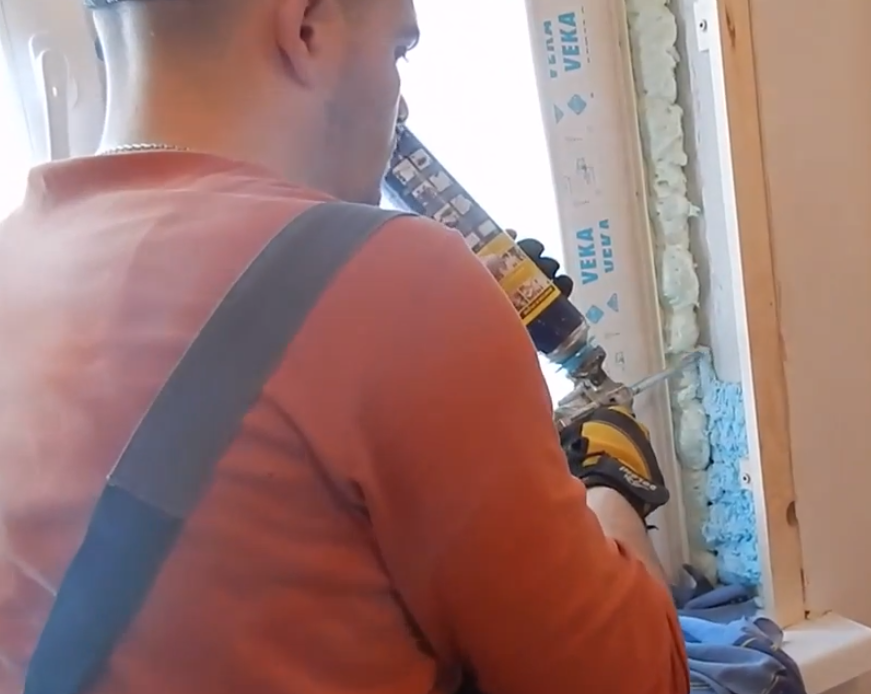
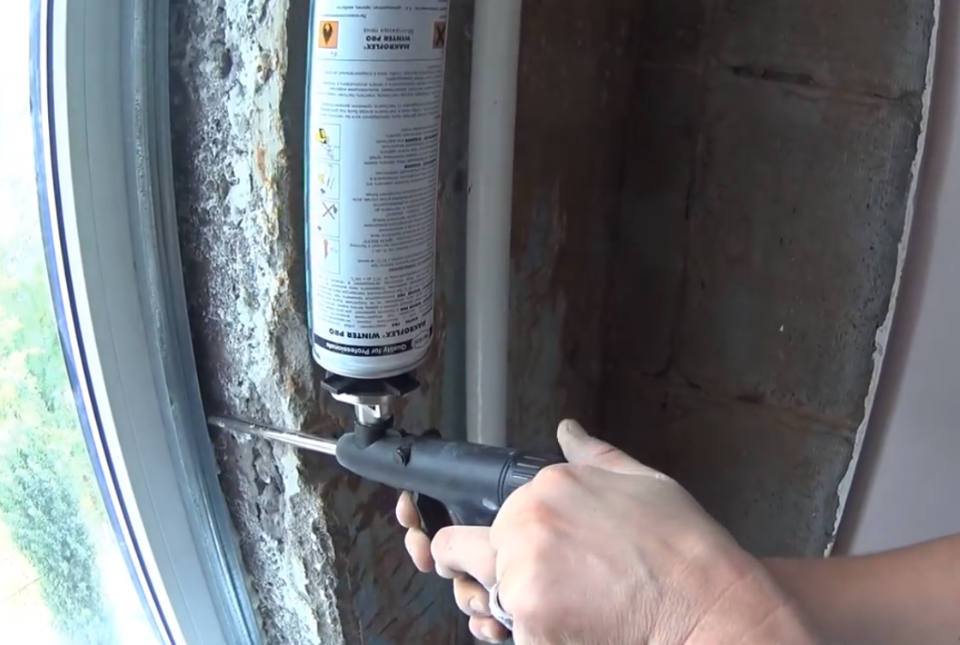 | Foaming gaps. Insulate the space between the starting profile and the opening using polyurethane foam. |
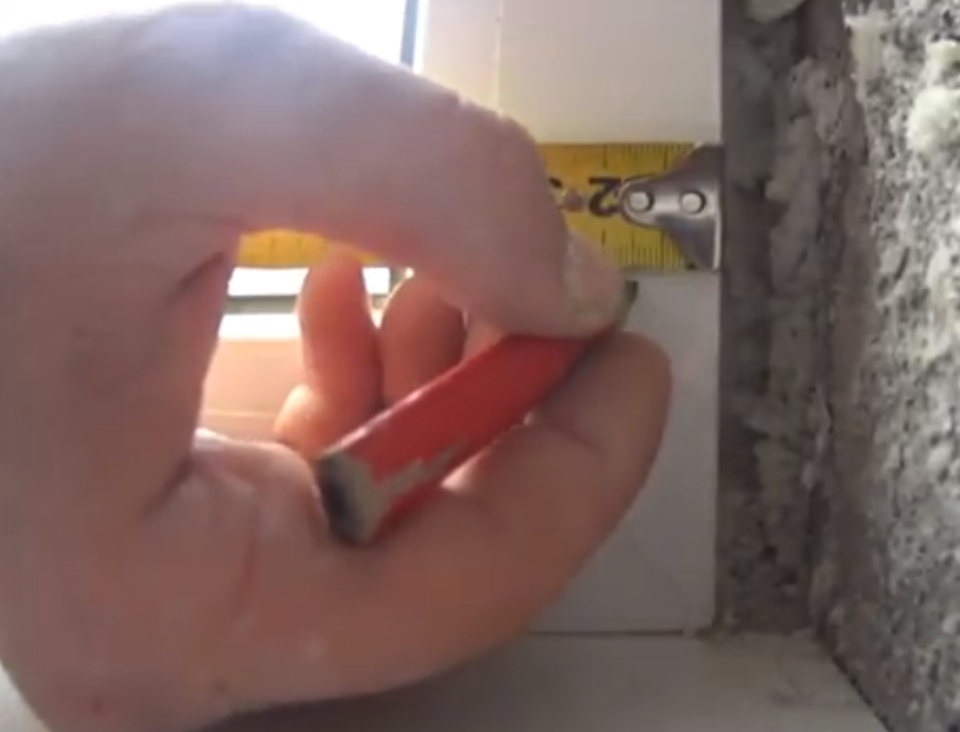
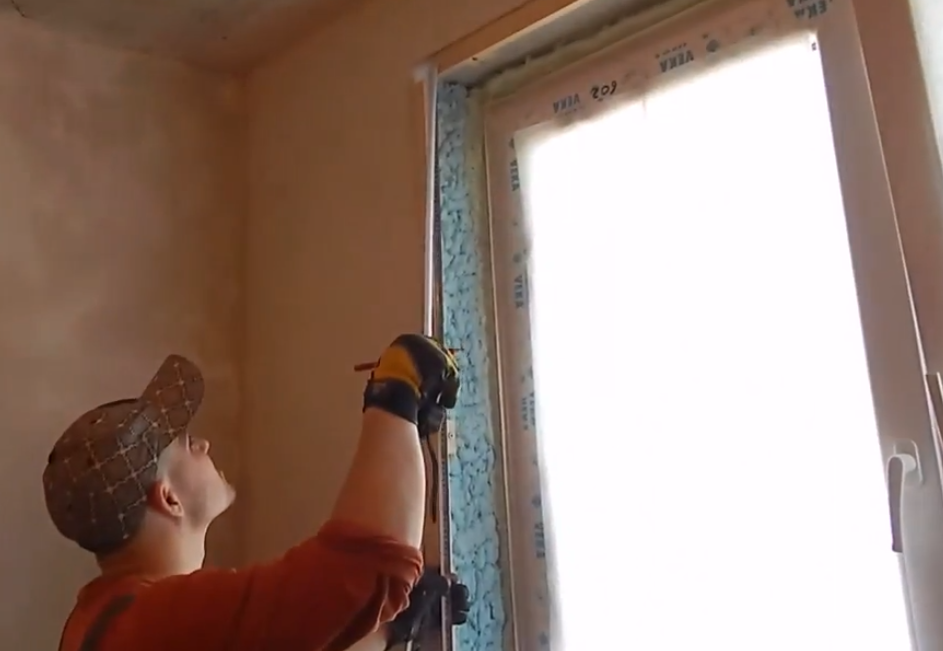 | Measurement of slopes. Measure the inside and outside heights of the side slopes and their depth. For the upper slope, you need to know its inner and outer length, as well as the depth. Write down the obtained values. |
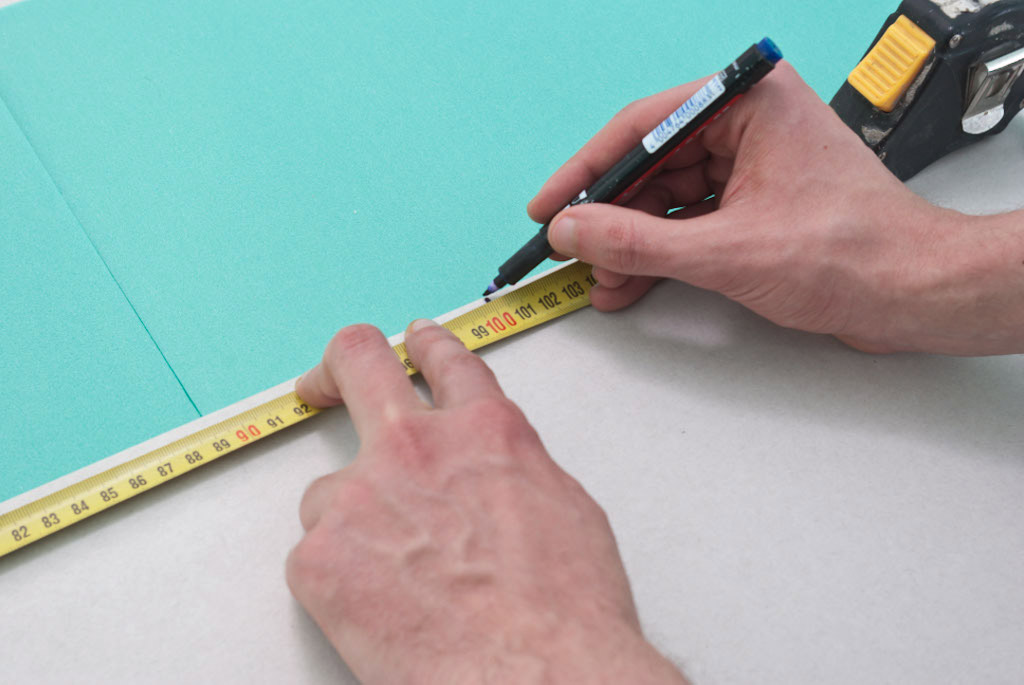 | Drywall markings. Apply markings to the drywall according to the size of the window so that the internal slopes on the windows are even and symmetrical. |
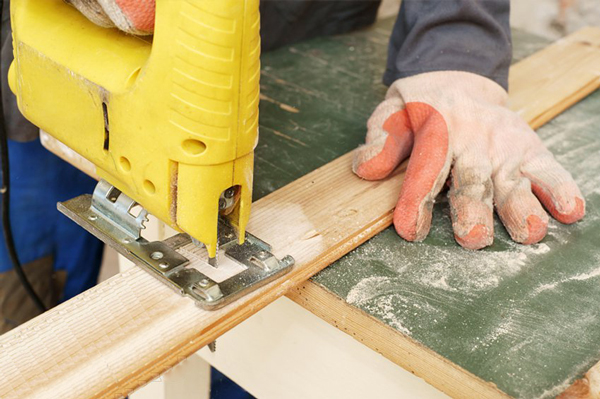
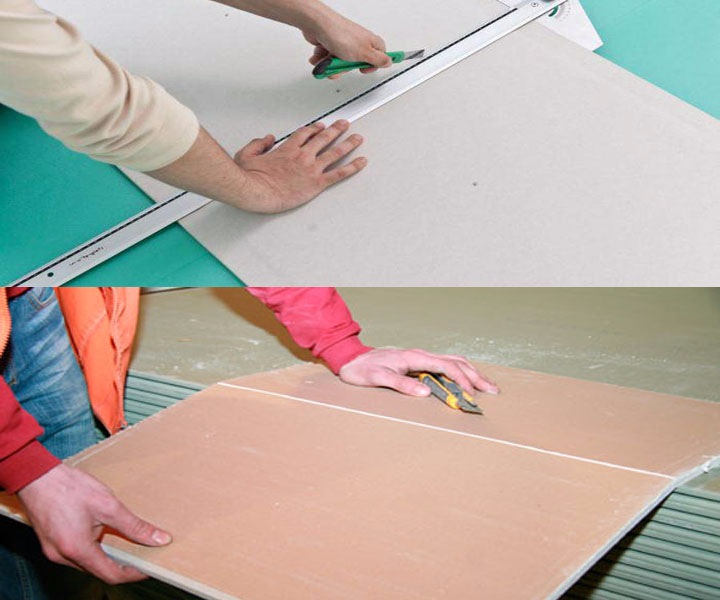 | Drywall cutting:
If you have a jigsaw, you can speed up the process by cutting out the panel with it. |
 | Putty application. Apply starter putty or special drywall glue to the surface of the slope. |
 | Bonding slopes. Attach the cut drywall to the opening, align and slightly press down. The position of the slope should be checked with a level. By this principle, cover the entire window opening with plasterboard. |
 | Fastening panels with self-tapping screws. Additionally, fix the drywall sheets with self-tapping screws, placing them in increments of about 250 mm. |
 | Installation of corners. Glue the perforated corners around the perimeter of the window opening. Be sure to check their position with a level. |
To insulate the slope, mineral wool can be placed in the space between the wall and drywall.
This completes the installation of the slopes. Drywall is a rough material, so the surface still needs to be putty and painted.
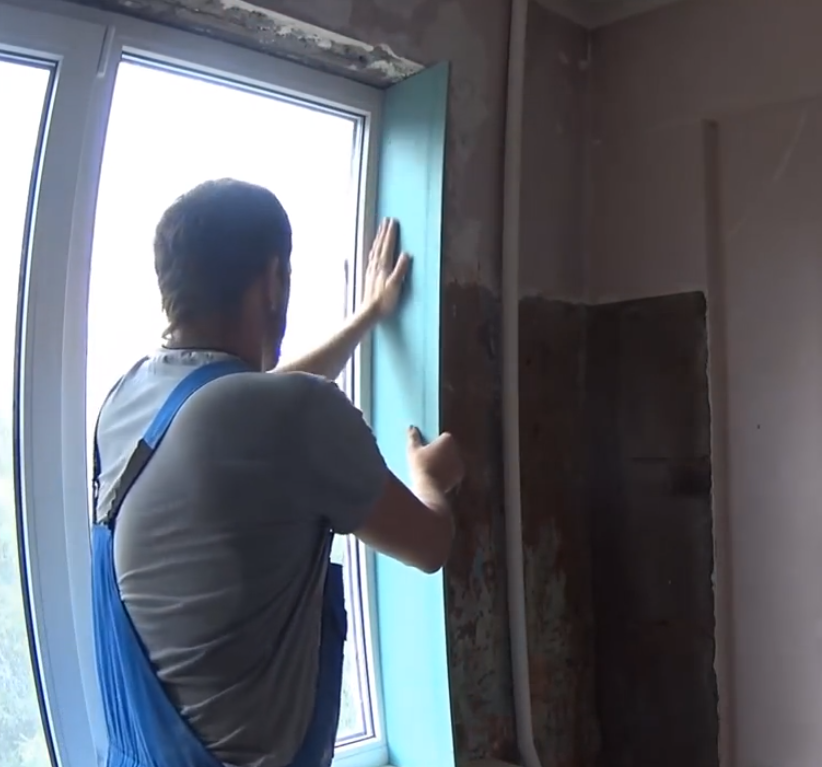
Method 3: made of plastic
Choosing from what to make slopes for plastic windows, many prefer plastic. Unlike drywall, this material does not need a fine finish. In addition, plastic is more practical, since it is absolutely not afraid of moisture and is easy to clean.

Plastic slopes have a peculiar glossy appearance. Therefore, when choosing, it is necessary to take into account the nuances of design.
Sandwich panels can be used instead of plastic panels. They consist of two layers of plastic, between which the insulation is located.
The process of installing plastic panels begins in the same way as installing plasterboard slopes:
- polyurethane foam is cut around the perimeter of the window;
- the opening is treated with antiseptic impregnation.
| Illustrations | Description of the action to be performed |
 | Preparation of materials:
|
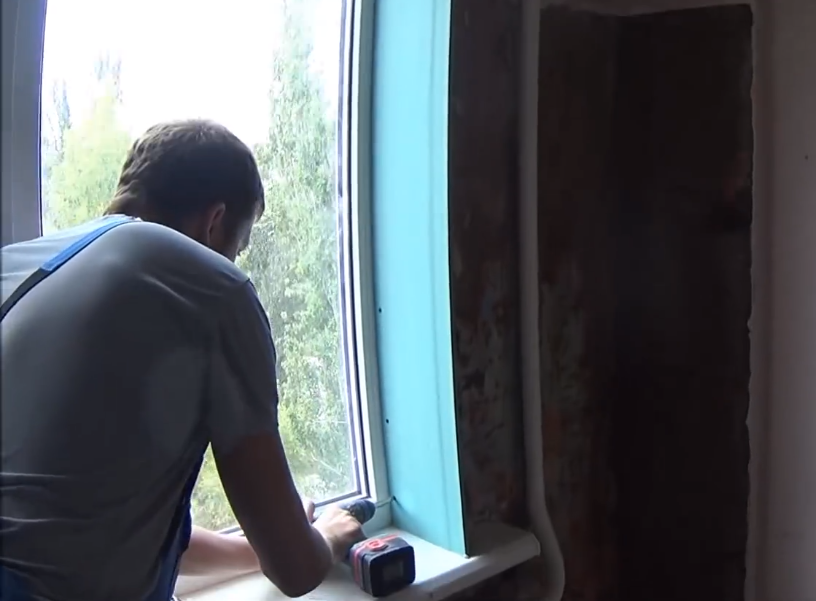
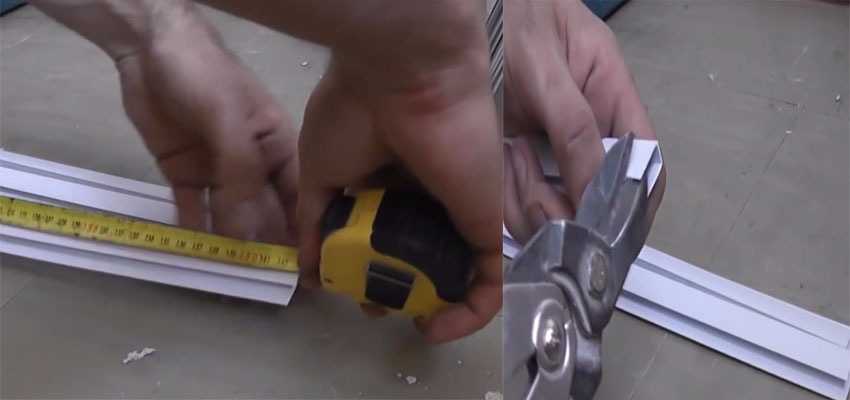 | Preparing the guides. Measure the window frame and then cut the starter profile to the height and width of the window. |
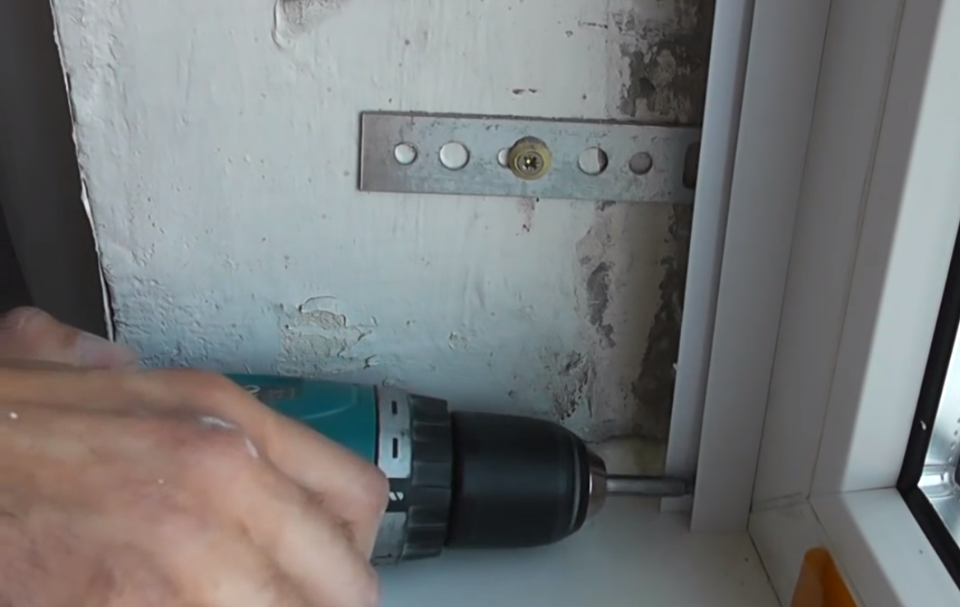 | Installation of guides. Fasten the profiles around the window perimeter with self-tapping screws. |
 | Trimming a corner profile.
|
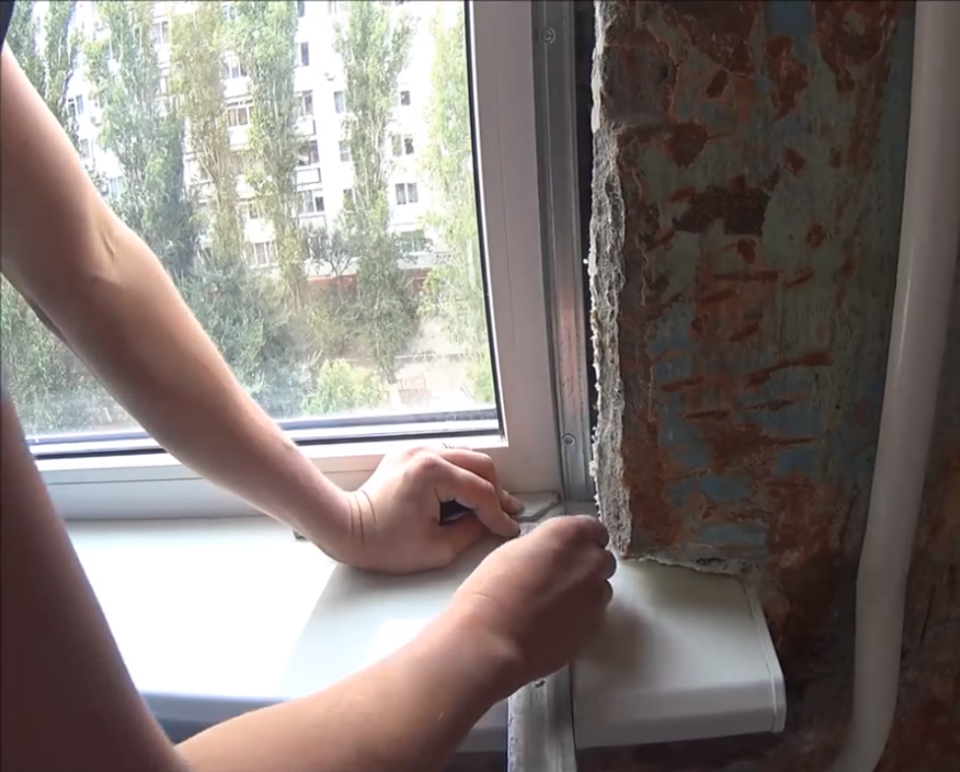
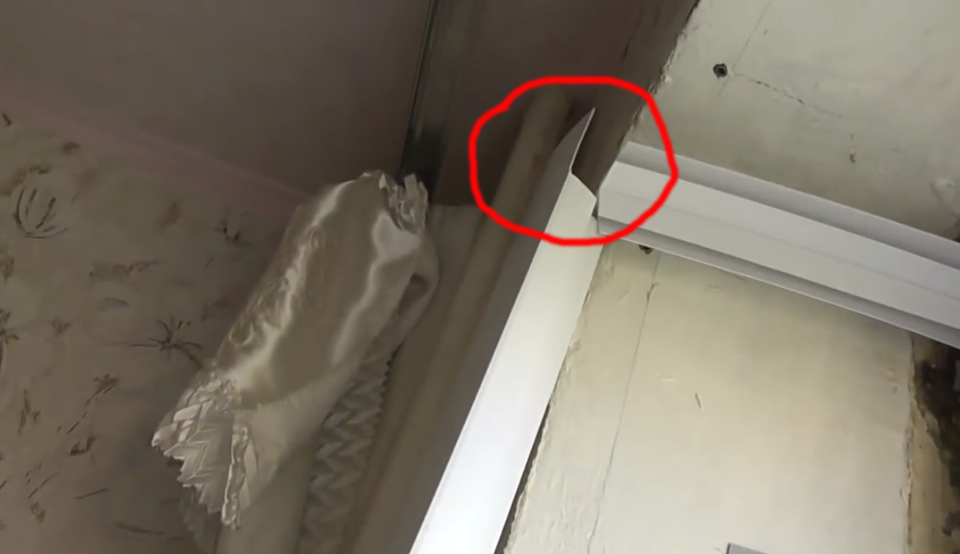 | Preparation of platbands. The finishing profile, which serves as a casing, must be attached to the opening and cut off. As a result, you should get two strips equal to the outer height of the opening and one equal to the width. The platband (the part of the profile that rests on the wall) should be slightly longer than the U-shaped profile into which the panel is inserted. This difference is the width of the casing. Therefore, the profile must be trimmed, as shown in the photo. |
 | Installation of platbands.
|
 | Preparation of plastic panels. The panels should be marked according to the size of the slopes, and then cut with a jigsaw or a hacksaw for metal. |
 | Installation of panels. Prepared plastic panels just need to be tucked into the guides. |
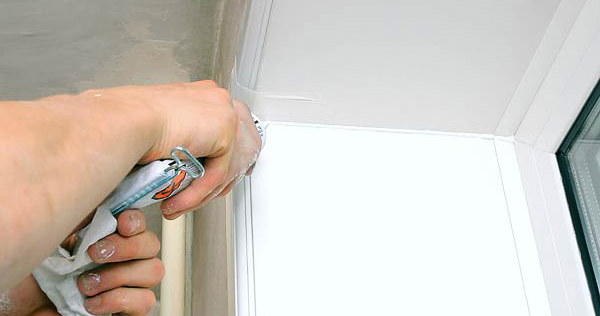 | Filling gaps with sealant. The existing gaps at the joints of the panels must be carefully filled with silicone sealant, matched to the color of the slopes. Remove excess sealant immediately. |
Now the plastic slopes are ready.
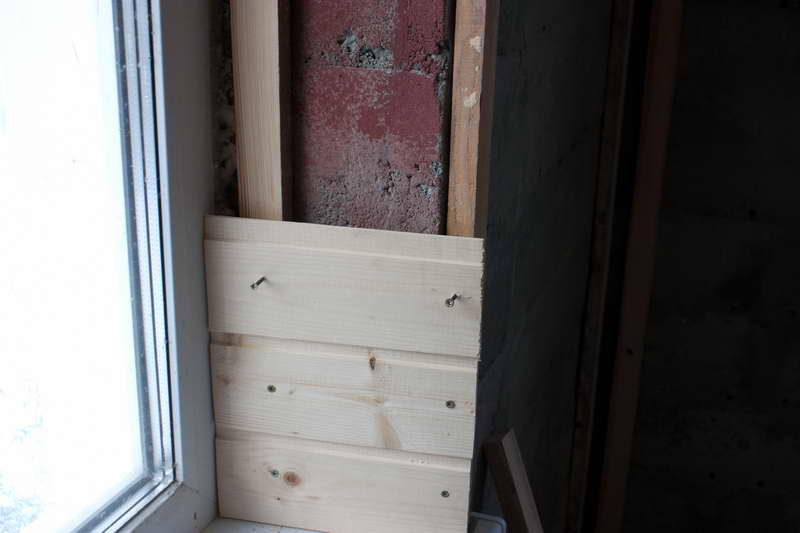
Method 4: from wood
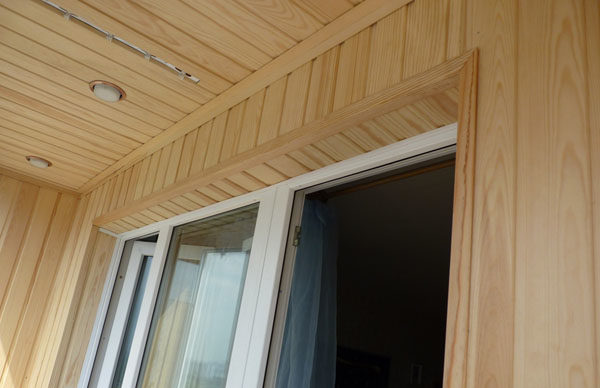
V wooden houses usually make wooden slopes from the lining. They fit perfectly into the interior of a wooden house.
Of course, wooden slopes can also be used for ordinary houses if the walls are sheathed with clapboard. For example, this solution can often be found on balconies.
If the slopes are installed for plastic windows, then, as in previous cases, the work begins with trimming the foam and preparing the opening. Further instructions are as follows:
| Illustrations | Description of the action to be performed |
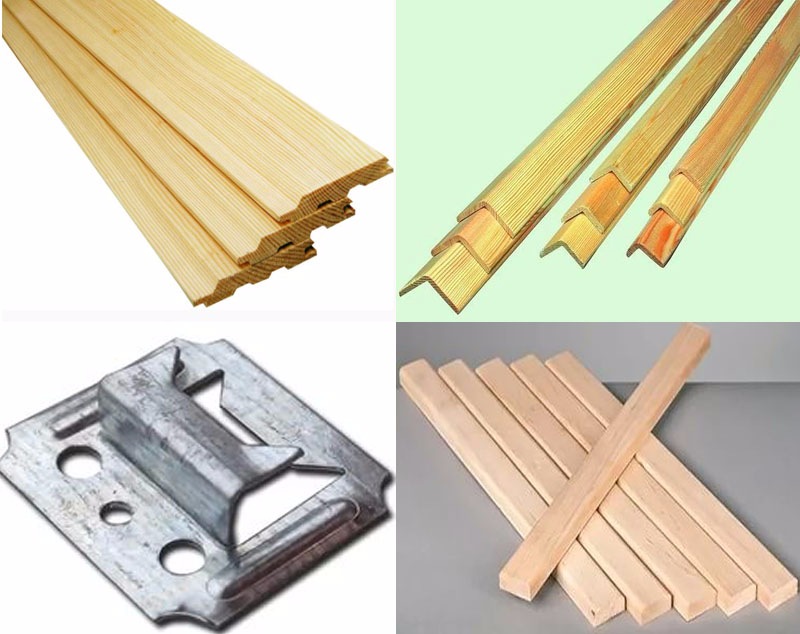 | Preparation of materials. You need to prepare:
|
 | Preparation of slats. Cut the slats to the height of the slope (inner and outer), as well as to the width. As a result, you should get six rails - 4 for vertical slopes and 2 for horizontal ones. |
 | Installation of rails.
|
 | Foaming gaps. If gaps have formed between the wall and the slats, they must be filled with polyurethane foam. You can also fill the space between the slats with foam,
|
 | Lining cutting. Cut the lining into planks with a length equal to the depth of the opening. |
 | Installation of lining. The lining must be fixed to the frame. This can be done in two ways:
|
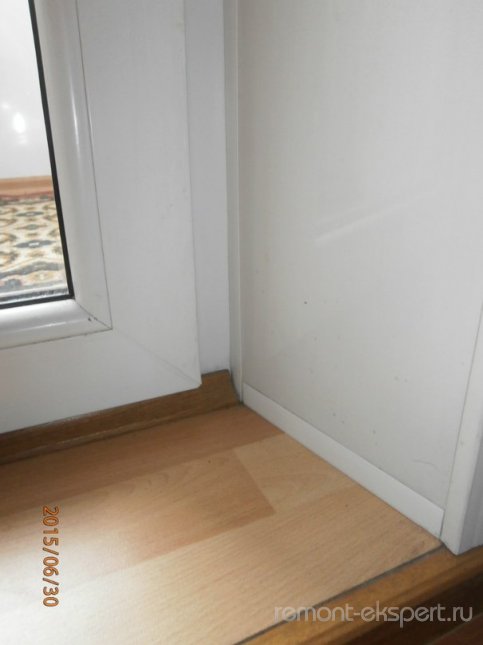
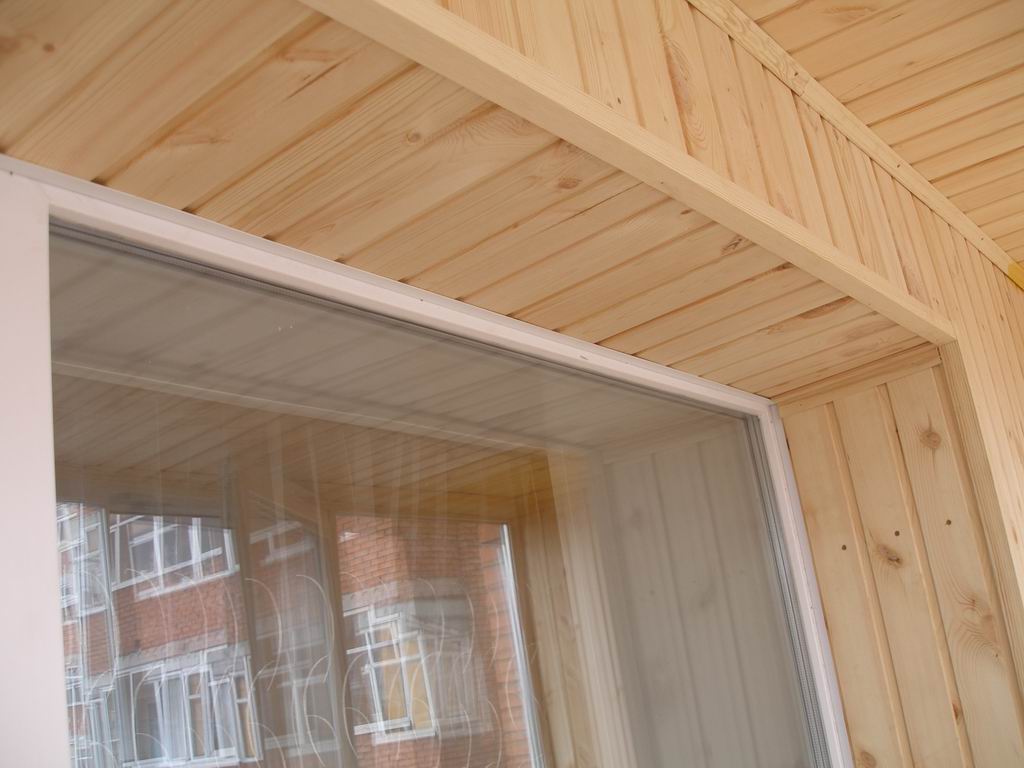 | Installation of decorative corners. Install decorative corners on all outside and inside corners. To fix them, you can use window studs with bitten off caps. |
As an alternative to clapboard, laminated MDF (Medium Density Fiber Board) panels can be used. Outwardly, they can imitate valuable wood species. The principle of their installation resembles clapboarding of slopes.
That's all the ways to trim slopes that I wanted to tell you about.
Output
Now you know how slopes are trimmed in all modern ways. Additionally, watch the video in this article. And if you have any questions, write them in the comments, and I will answer you shortly.
Today, many are interested in the best way to trim the slopes of the windows. It is almost impossible to give an unambiguous answer to it, since there are many ways that have certain advantages and disadvantages. For this reason, below we will consider the main options and their main properties.
There are internal and external slopes. We will focus on the second, since more severe requirements are imposed on them. Internal ones can be made from almost any material.
Useful information
Before finishing the slopes of the windows outside, it is advisable to familiarize yourself with the theoretical information.
What are they needed for
Some, especially inquisitive citizens may wonder, what are they for at all?
In fact, they carry very significant functions, namely:
- Protection of polyurethane foam from deformation... Over time, this material begins to lose its qualities and, as a result, ceases to properly protect the room from the penetration of cold air.
- Another equally important function is to protect the seams from moisture (precipitation)... Without proper finishing, fungus and mold will begin to form in the cracks, which will irreversibly bear disastrous consequences.
- Also, do not forget about the decorative function.... Without a properly selected frame, the frames will not have a complete look.
Note!
Quite rarely, a company that installs windows offers customers the installation of slopes.
In this regard, many people decide to carry out this task with their own hands.
What they should be
Of course, each construction operation has its own instruction, which indicates the basic requirements for the materials used. This tendency has not been spared in our question either.
In particular, there is GOST-30971, which regulates the following requirements for external slopes:
- Waterproof. They should not allow moisture to pass through (for example, during rain).
- Resistance to high and low temperatures... This property is especially important for our country, the climate of which is characterized by sharp temperature changes.
- UV resistance (sun rays). In hot summer days the sun can have a detrimental effect on many materials. In particular, they begin to fade and sometimes even lose their properties.
- Should facilitate (or at least not prevent) the evaporation of moisture from the center seams. The vapor permeability coefficient must be at least 0.15 mg / (m * h * Pa).
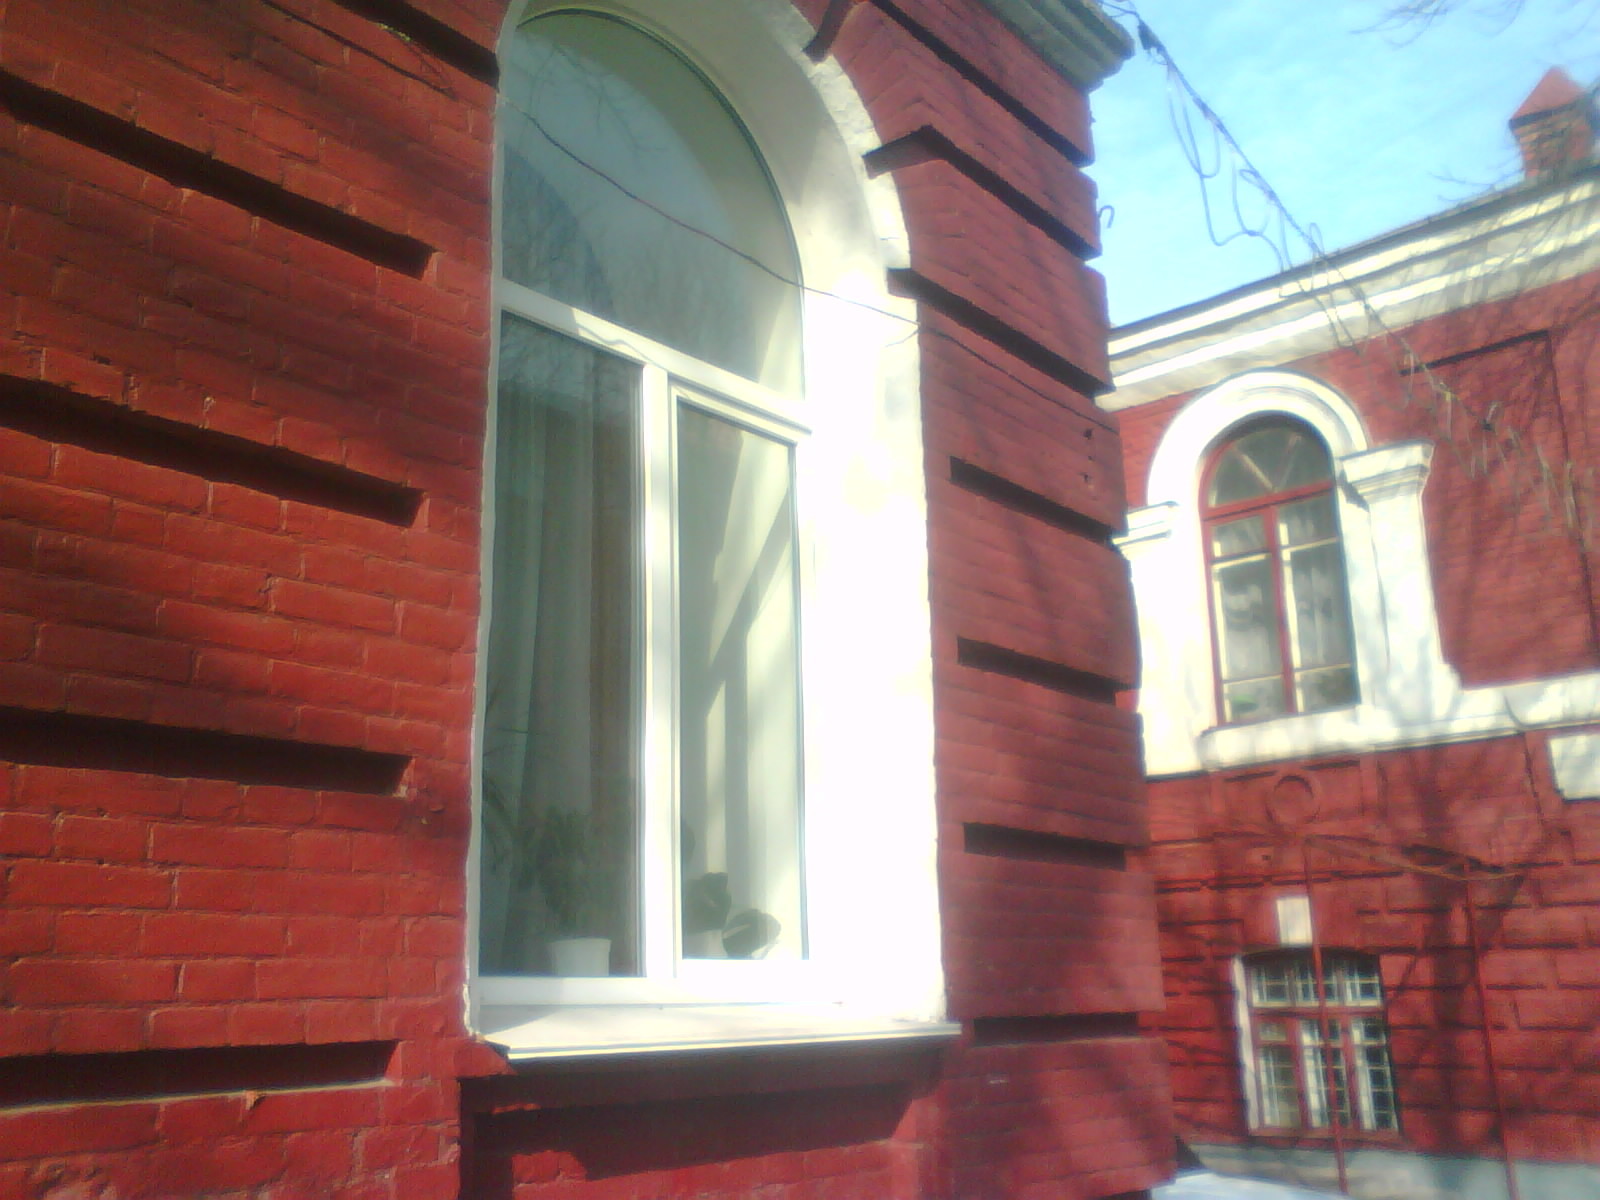
Exterior slope options
Now it's time to get down to the most important thing. If you still have not decided how to finish the external slopes of windows, then the information presented below is especially for you.
Plaster
First of all, we will consider the oldest method, known for more than a dozen years - this is plastering.
R Let's consider its main advantages:
- Low price.
- Ease of implementation. Any person can plaster the surface.
- The ability to seamlessly hide irregularities.
There are only two disadvantages, but they are very significant:
- Over time, the plaster begins to crack. This leads to the need for constant renovation.
Advice: today in hardware stores you can find special protective compounds that can increase the "life" of the plaster.
- Although this method does not require special skills, it is still extremely time consuming. It will take an inexperienced person quite a long time to realize it.
Now let's look at how to accomplish this task.
First, let's study the list of tools that you will certainly need:
- Plumb line.
- Trowel.
- Caulking.
- Container for mixing the solution.
- Malka.
- Hammer.
- Foam grater.
- Tow.
- Square.
Having prepared the above tools, you can proceed to the main front of the work.
We do everything in the following sequence:
- Before finishing the window slopes with plaster, you need to close the cracks through which cold air will seep from the street. Tow, which needs to be hammered with caulk, will perfectly cope with this task.
- Then you need to clean the original surface from dirt and slightly wet it.
- Next, we proceed to the plastering itself. To make the corners as even as possible, small boards should be fixed around the perimeter. In this case, it is desirable that a small bevel is obtained.
- To make it more attractive appearance, you can cover the surface with any paint and varnish composition.
Sandwich panels
Now let's move on to a more modern solution. These panels are by far the most attractive method.
Let's note its positive aspects:
- Ease of installation.
- Durability.
- Resistant to almost all atmospheric influences.
- Increased thermal insulation.
- Ease of care (dirt is easily removed from them).
- A wide selection of textures and shades.
Interesting: sandwich panels are two sheets of PVC, between which there is polyurethane foam (it provides thermal insulation).
There is one drawback here, but a very serious one - the high cost.
So, in order to accomplish the task, you need to prepare the following:
- Hacksaw for metal.
- Medium screwdriver and self-tapping screws.
- Liquid Nails.
- U-shaped PVC profile.
Installation is carried out in the following sequence:
- The surface is cleaned of dirt and dust.
- Next, the profile is fixed flush with self-tapping screws. It will serve as a starting bar. It will be installed on it.
- Then the panels themselves are installed. First, you need to measure and cut with a hacksaw. The top panel is fixed first: one end is fixed in the profile, the second is glued to liquid nails.
- The rest of the panels are mounted in the same way.
- If necessary, the structure is insulated. For this, a layer of some kind of heat-insulating material is laid.
Tip: The most popular insulation today is mineral wool. It carries the perfect combination of price and quality.
Sheet plastic
Such material is actively used for both exterior and interior decoration.
It has the following positive aspects:
- High moisture resistance.
- Chemical resistance.
- Increased vapor barrier.
- Provides additional thermal insulation.
There are few negative properties:
- Modest mechanical strength.
- Impressive value.
For installation, you need the following:
- PVC profile P and F-shaped.
- Hacksaw for metal.
- Powerful drill.
- Stapler and staples.
- Self-tapping screws.
- Wooden lath.
Having prepared this simple set of tools, you can proceed to the installation itself.
It is produced as follows:
- The first step is to fix the rails along the perimeter of the slopes with self-tapping screws. For this, holes are pre-made in the wall using a drill. Do not forget to monitor the evenness of the installation of the rails, using a level or plumb line.
- After that, starting profiles are mounted around the entire perimeter of the frame. They are fixed in the same way with self-tapping screws.
- Then the F-shaped profile is attached to the brackets. It is required to fit the slats between the two "tails". Thus, it is necessary to finish the joint between the wall and the slope.
- If necessary, at this stage, you can lay some kind of heat-insulating material.
- Now let's move on to. The sheets must be fixed with one end in the F-shaped, and the other in the U-shaped. Of course, in order for the structure to be durable, it is necessary to cut the plates as accurately as possible (down to millimeters).
- For more attractiveness, the sheets can be coated with white silicone. In addition, such a measure will increase their service life.
If you still have not decided how you can trim the slopes of the windows, then we hasten to tell you that there are other options. (See also the article.) For example, you can use for this purpose decorative rock or marble. However, such decisions will entail more impressive financial costs.
Finally
We hope you have gained enough useful knowledge about window decoration. In the video presented in this article, you will find additional information on this topic, which will allow you to more thoroughly understand this issue.
The final stage in the design of the window opening is finishing the slopes of the windows inside.
This is not only the aesthetic side and completeness of the interior, but also the replacement of old plaster, which makes the openings more reliable with improved thermal insulation.
If the slopes are made with high quality, their heat and sound insulation properties will only improve. Do not postpone this procedure until later, as this can lead to unpleasant consequences:
- Thermal insulation can be damaged as a result of the action of sunlight on building foam, which is usually used for processing openings;
- If the foam layer is not processed, it will draw moisture into itself, thereby destroying the structure during the cold period;
- Cracks may appear due to an increase in the volume of foam;
- Drying of the polyurethane foam leads to the fact that it begins to crumble and gradually loses its thermal insulation properties.
Slopes can be trimmed various materials: laminate, wallpaper, wood, parquet, cork,. The basis should be chosen in accordance with the design of the room and the material of the window opening itself.
Light finishing requires the use of light materials, which cannot be said about heavy types of cladding, for example, tiles. Here you should prepare a cement-gypsum base.
Let's consider the most popular options.
Plastering
This method can be called the classic finishing method. It will require the following materials and tools:
- Cement;
- Sand;
- Starting putty;
- Finishing putty;
- Water;
- Primer;
- Roller;
- Level;
- Water-based paint;
- Dye;
- Sandpaper (fine-grained).
Work should be started after 36 hours, so that the foam adheres well to the openings.

The window is cleaned of old plaster, paint, wallpaper and dust. A layer of mortar is applied to the walls, then to the slopes from the bottom up. A solution is prepared from sand, cement, water and the first layer of plaster is applied where a large amount of mixture is required.
Put each subsequent layer after the first one has completely dried. The thickness of each application should not exceed 7 mm.
After the surface is rubbed with fine-grained sandpaper and you can proceed to painting it water-based paint which can be of any color according to your design with the help of a dye.
You can also wallpaper it. The method is good because it is the basis for any type of finish. But there is also a drawback, the sand and cement mortar has an unreliable connection with the PVC frame material, which can lead to cracks.
If we talk about thermal insulation properties, then they are weak and will ultimately lead to the formation of condensation and mold. In order to prevent this from happening, it is necessary to additionally install an interlayer of insulation material.
Drywall
Basically, a moisture-resistant material is used when finishing the slopes inside, since it is resistant to condensation on the window, it is characterized by thermal and thermal insulation resistance.
Sheets of material are attached to a prepared lathing (metal or wooden). The surface should be pre-treated with a solution if there are strong potholes.
The collection of the slope begins with the panel located on top, its edge is coated with glue and inserted into the starting strip. Press the other end of the drywall against the wall. Also, this procedure must be carried out with the side panels. Here, it must be necessary to treat the joints with a neutral sealant.
To prolong the life of the corners, you can use painting corners.
The last step is to use a putty, with acrylic or oil paint on it.
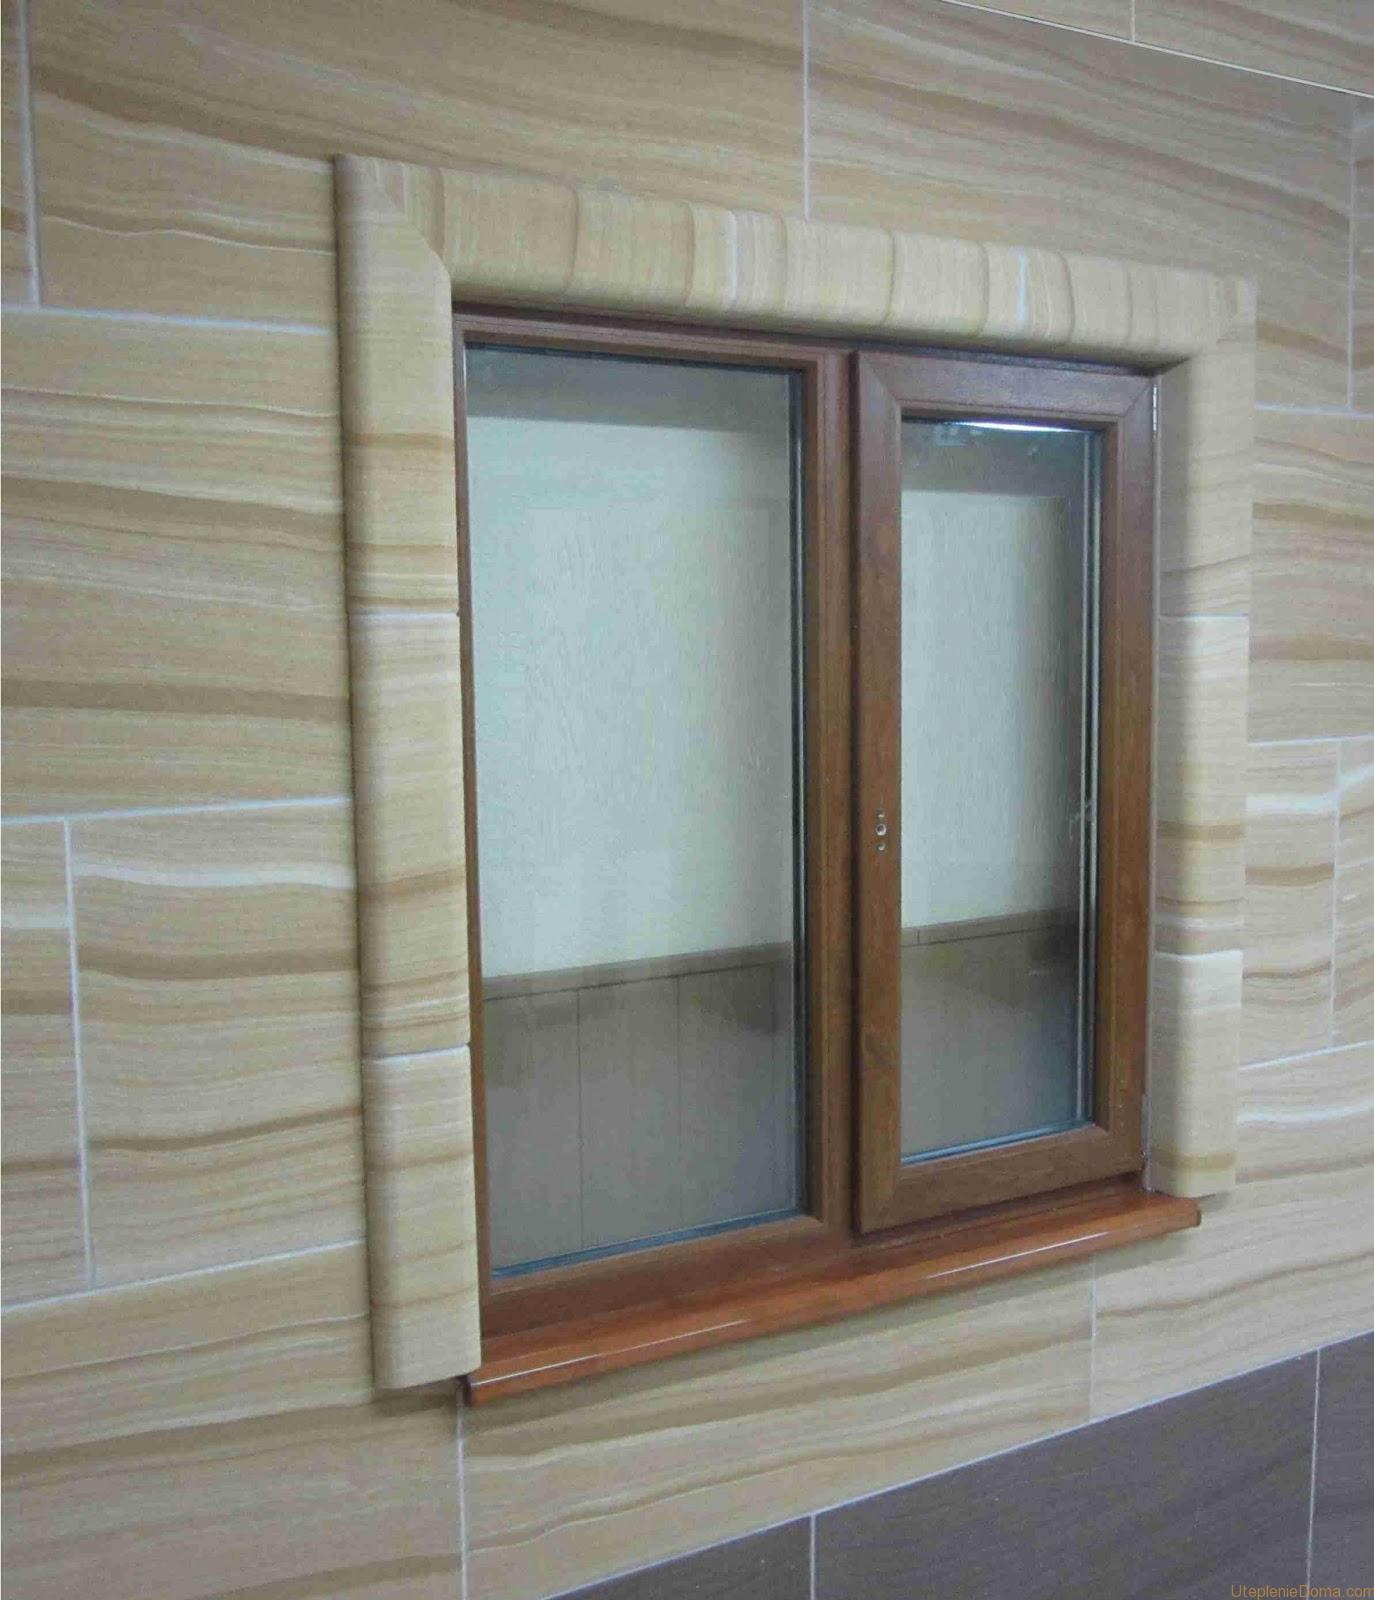
Decorative rock
Natural stone is rarely used. There are reasons for this. First, it's heavy. Secondly, it is expensive. Therefore, it is an excellent analogue. They get off door and window openings, and this work can be done independently.
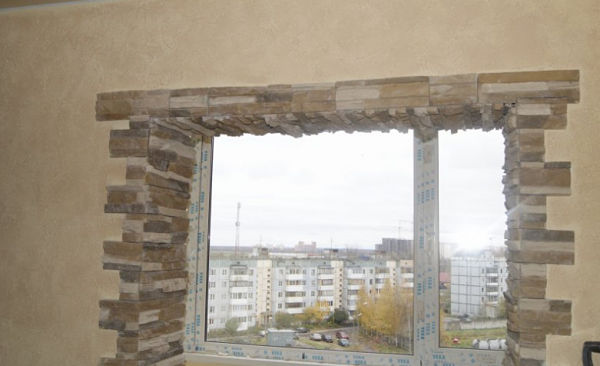
Decorative plates with a thickness of 2 cm are selected.An area for fastening is prepared artificial stone(plastering). Notches are made on the surface, for a more reliable attachment, glue is added and treated with a primer.
Then, after drying, glue is applied to the slab or wall and the stone is fixed. You can also use liquid nails. The work is carried out using a building level.
Laying is carried out in horizontal rows from bottom to top. If necessary, trim the stone.
Plastic, laminate and parquet board
The use of plastic is the most common processing option as it distinctive characteristic is durability (15-20 years).
It is convenient to install it for several reasons:
- You can start work on the same day;
- are an additional heat-insulating barrier between the room and the street;
- High moisture resistance;
- The homogeneity of the material of the glass unit and the slope makes it possible to work synchronously with temperature drops;
- Does not fade;
- Washes well, does not sweat;
- Does not need painting;
- Has an attractive appearance.
The technical features of the material allows you to make slopes of various shapes - bay windows, arched and round.
This one deserves attention, as it looks original. There is one problem with laminate flooring, it crumbles. Therefore, you should decide in advance how to hide the corner joints.
Finish from top to bottom and vice versa. The difference is noticeable only in the direction of the grooves of the lamellas. Fastening is done with self-tapping screws, each next lamella closes the groove of the other, due to which the attachment points remain invisible.
The parquet board is rather easy to saw, since the base is wood. Laminate or parquet flooring is allowed to be mounted on drywall.
The decoration of the slopes inside and outside should be done at the same time. The work is carried out at a temperature of 20-25 degrees.
To improve the quality of the slopes, they must be insulated. For an opening finished with plaster, it is better to use paint as the last layer - this will increase its moisture resistance.
Video material on the correct design of the surface of the slopes:
The decoration of the slopes of the windows inside can be different, but the deployed angle must be maintained so as not to disturb the distribution of light in the room.