Today, modern, versatile siding material is increasingly used for wall cladding. By installing window siding with your own hands, you will ensure reliable protection of the facade of buildings from the negative effects of mechanical and any atmospheric factors, while, with the help of siding, the appearance of any structure is significantly improved.
Why siding panels are popular
For the first time, siding began to be used in the late 19th century in America. As a rule, planed painted boards were used to decorate the building, which were fixed at a certain angle so that the next horizontal layer hung over the previous one, which in turn allowed water to drain along the cladding. At the beginning of the 20th century, metal (metal siding), cement and vinyl siding panels began to be used, which, unlike wood, had a higher level of strength. One of the indisputable advantages of this material is its ease of installation. If you decide to make window siding, you can carry out the installation completely independently, regardless of experience and skill, without resorting to the help of professional craftsmen.
Finishing window openings with siding is a great opportunity to decorate and refine the facade of any building, give it an exquisite and presentable look. However, the installation of siding around the window is a more painstaking and time-consuming process, which is significantly different from the process of finishing the basement or facade with siding panels, since during the work not solid strips will be used, but siding platbands. Of course, it is best to finish siding window openings in the process of sheathing the entire structure with material.
Required tools
To carry out all installation work, a preliminary calculation of all the materials necessary for the work is carried out, the necessary materials and equipment are prepared.
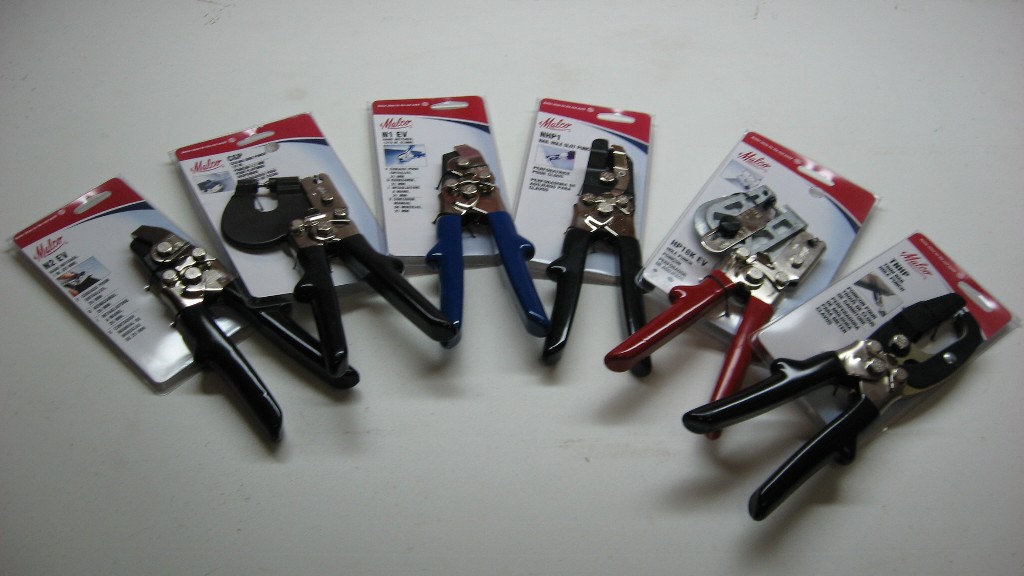
The following tools are required: a tape measure, a long construction hydraulic level, a square measuring ruler, a hacksaw for cutting metal and wood with fine teeth, a lathing hammer (metal), a cutter knife, an electric drill or perforator, a screwdriver, a screwdriver, a pencil, self-tapping screws.
As additional materials, you will need finishing profiles, a chamfer, a window strip, external and internal corners, platbands, a universal J-trim strip, drain slats.
At the preparatory stage, it is also necessary to ensure the manufacture of elements of the supporting frame, which subsequently allow the installation of the necessary accessories for finishing window structures.
Calculation and preparation for the installation of siding
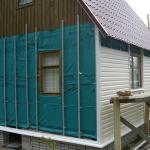
Before proceeding with the installation of siding, it is necessary to carry out a number of preparatory work. Detailed instructions must be studied, it is necessary to remove the platbands, decorative elements that go beyond the window opening, prepare and clean the surface, which must be absolutely dry before installation. If necessary, plaster all irregularities and potholes.
 Quite often it happens that wide slopes are provided in the window structure, therefore, in this case, you cannot do without installing double-sided corner profiles. In the case of installing siding panels around a window with slopes, it is necessary to level the slopes with a plaster solution by treating the surface with a water-repellent ground solution.
Before the installation of siding panels, accurate calculations of the required amount of all component materials are carried out - near-window strips, platbands, profiles, corner rails. The choice of materials for work depends on the type of construction of the window opening. For example, when installing siding of window structures with wide slopes, near-window slats are used, if the windows are flush with the surface of the walls - platbands.
Siding installation process
All installation work must be carried out in strict sequence, following the instructions. It should be borne in mind that the process of installing siding around the window has its own specifics, which depends on the depth of their location.
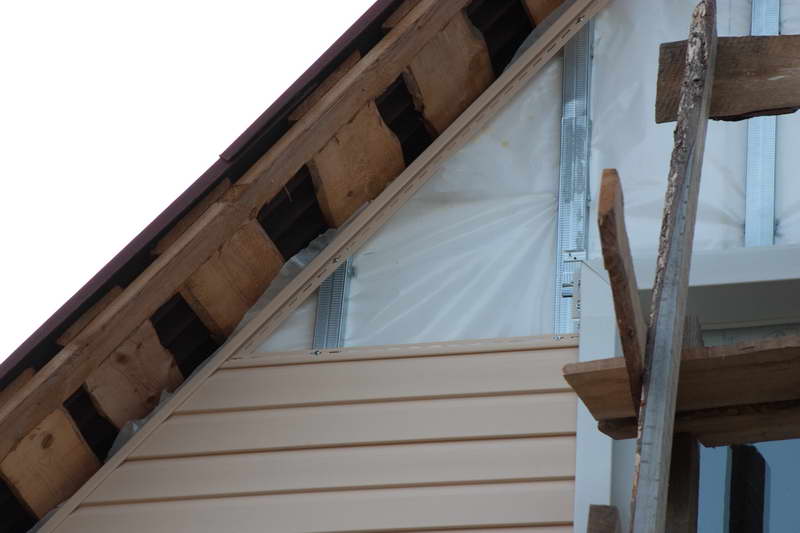
Siding finishing begins with the installation of the lathing. For this, only flat and smooth wooden or metal strips of 4 * 6 size are used. To prevent exposure to moisture, they are treated with antiseptic compounds.
The slats are installed vertically and horizontally, keeping the distance between them within 18–20 cm. Depending on the direction of the openings, the lathing is installed at an angle of 90 degrees.
It should be borne in mind that when taking measurements, you cannot be guided by the angle of inclination of the slopes. It is best to measure the frames around the entire perimeter of the window opening in all directions with a square and a hydro level.
Both external and internal corners from the upper edge of the wall are fixed at a distance of 5–6 mm, and 20 mm below the level of the starting bar. All corners must be aligned.
The J-profile is installed first on the sides, then on the upper part of the window structure, so that the end edges protrude at a distance equal to the width of the side J-profiles.
The installation of the near-window strip is carried out in the same way as the installation of the J-profile. The inner part of the window sill is fixed with a finishing strip, which is tightly nailed to the eaves of the structure.
In the next step, the siding panel is cut to the desired height, after which the top edge is pushed into the finish bar.
Installation begins with joining the panels from bottom to top until the lock and starter bar are fully snapped into place. The fixing of the panels is carried out first in the central part, moving towards the edges.
Carrying out the installation of siding around a window with an ebb, the ebb itself is fixed to the window frame. The ebb is used under the window opening and is insulated thanks to the closing part of the J-profiles.
Installation of siding for a window structure with slopes
Installation of siding around a window with slopes provides for finishing using external corners, which are mounted along the outer perimeter of the window. If the planting depth of the windows is 20–25 cm, then a regular J-bar is used, which is nailed along the entire perimeter.
- First, the side plates are installed, then an incision is made on the upper plate in the lower horizontal part, in order to get the so-called "eyelet", which is bent inward. A cutout is made in the side rails, which corresponds to the size of the "ear", and the corner is cut off on the upper rails.
- A finishing strip is fixed on the plane of the window frame, in the groove of which a J-profile is fixed, which acts as a starting strip.
- When using a near-window strip, if necessary, cut it lengthwise. The wide side is inserted into the finishing strip, which is fixed to the crate on the wall.
- Next, the outer corner and J-profile are set. The space is filled with siding panels of a certain length.
- When performing this operation, do not forget about the need to provide a compensation gap between the contacting elements of the siding in the amount of 5 - 10 mm. The gap between the profile systems can be filled with a soffit or other type of sealant.
Summing up, we can conclude that following the instructions described above, the installation of siding around windows can be carried out independently, while the main thing is to adhere to a strict sequence of work.