Probably every owner of his own home thought about how to transform the appearance of his home. One of the good options is the walls of the room.
Of all types of decorative finishes, the most common is the so-called fur coat. Small financial costs, as well as a simple technological process, have led to the popularity of this type of plaster. You do not need to be a master with many years of experience to master the technique of decorating facades. The process itself is completely simple, and you will soon see it.
Selection of tools
First of all, you need to choose the tools that you will use in the process of work:
- capacity;
- roller;
- brush with soft bristles;
- tinting paste;
- broom.
Material for plastering fur coat
Modern mixes for finishing have a number of advantages over the cement that was used before. Durability, elastic coating and low financial costs are an incomplete list of the advantages of modern materials for facade coating.
When choosing a mixture, note that there is both a dry material and a ready-to-use one. A dry mixture will be cheaper for the money, it is enough to stir it with water, as it will be immediately ready for use. But the disadvantages include the fact that all dry mixes are made on the basis of cement, and this indicates a decrease in the durability of the plaster, as well as the lack of its elasticity.

Another thing is ready-made material, for it you will have to overpay a little, but it's worth it. Acrylic copolymers are the basis of the finished mixture, this viscous mass copes well with microcracks.
One of the great options for the ready-mix is the structural plaster aura putz fur coat. It is intended for surfaces such as concrete, drywall, masonry, plaster, plywood, chipboard. The mixture has proven itself very well and has a lot of positive reviews.
Also, it does not hurt to turn the silicone decor on "plaster fur coat". It is based on silicone and acrylic resins. This mixture is characterized by its durability and water resistance.
Methods for applying plaster
There are several ways to apply plaster, they all have their pros and cons, I propose to consider each of the methods.

Method 1. Application of plaster with a stick and a broom
Decorating a small area can be done using the old stick and broom technique, but this is only effective when working with a small area. This type of plastering technology for a fur coat is carried out as follows: we take a broom, dip it into the solution and beat it on a stick in the direction of the wall, as a result we get splashes on the desired surface. This process lasts a long time, and, most importantly, you need to have considerable experience in order to apply the mixture evenly.
Method 2. Application of plaster with a brush and plank
This method of applying plaster is also a rather old method and belongs to the category of "old-fashioned". Few people use it these days, but we must consider it.
So, we need a brush and a small wooden plank. The brush needs to be dipped into the solution, then near the wall on which the fur coat will be applied, turn the brush over and run it over it with a plank towards ourselves, as a result, the spray we need will fall on the wall.
Method 3. Application of plaster with a roller
The next method of plastering under a fur coat takes less time and consists in the following: first you need to apply a thin layer of the mixture to the surface, then, while the solution is still wet, take a textured roller and run it over the surface, the roller will leave a "pile" behind it. The complexity of the method lies in the fact that it is quite difficult to obtain a uniform texture with the help of a roller, therefore, as in the previous method, one cannot do without the experienced hand of the master.

Method 4. Application of plaster using a compressor
The work can be done quickly enough with the help of a compressor, the money spent on its purchase will pay off in full with the time saved. The drawing is smoother and more rounded. The texture is quite easily regulated by the concentration of the solution, if you make the mixture more liquid, the drops become small, as a result we get a lower porosity of the surface.
Important ! The advantage of the round surface of the plaster is its durability, since the thorns crumble rather quickly.
Method 5. Plastering under a fur coat using a typewriter
If your funds are not enough to buy a compressor, you can perform plastering under a fur coat using a special machine. The process itself is more manual work, but the result is almost the same if you applied the plaster with a compressor.
The machine itself is a container where the solution is poured. There are plates inside the container, which, when the handle rotates, get dirty on the solution, then resting on a special stop, they spray onto the surface. This work is painstaking, but the result is a beautiful and uniform fur coat.

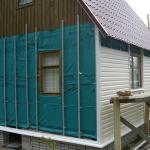
Method 6. Application of plaster through the mesh
This method is one of the most popular hand plastering techniques. Despite the fact that the grid has been used for a long time, it has not lost its popularity to this day.
To get started, we need the mesh itself with small cells. The mesh must be pressed against the wall, and then, using a trowel, apply the mixture to the surface through the mesh. Then the mesh is removed, forming after itself a layer of plaster under the fur coat.
Important ! There should be no joints or gaps between the fragments obtained, and the layer should not be duplicated.

How to paint plaster under a fur coat
Almost always dry mixes are sold with the addition of dye. Tinting pastes provide an opportunity to choose the color of plaster for a fur coat yourself. The basic colors of dry mixes are gray and white, if you want to paint a fur coat in darker tones, a gray mixture is better for you, and to create light tones, take a white mixture.
It is better to color the solution with the help of a specialist, because you can not guess with the proportions and you will not get the desired shade.
Plastering under a fur coat can also be simply painted with facade paint, the uniformity of paint application in this method is achieved much easier. The main advantage of facade paint is the ability to repeatedly repaint the fur coat, but when cracks appear in the plaster, the original color of the solution stands out, because of this, many people opt for coloration.

How to make plaster coat with your own hands
Absolutely everyone can master the technological process of applying plaster, this is a completely uncomplicated work. First of all, you should have tools and devices for applying plaster (broom, stick, roller, compressor or special machine). Do not forget also about the tools that you will need when working on finishing the surface on which you will make a fur coat (chisel, hammer, brush, trowel, shovel, as well as a container where the solution will be mixed).
Phased application of plaster coat
Decorating walls with plaster takes place in several stages, each of which is of particular importance. Therefore, it is highly undesirable to neglect even the smallest detail in the work.
Stage one: Preparing the surface
First of all, we remove the cobwebs and dust, then we get rid of traces of the old coating (if any), then if the surface of the wall is even, we apply notches with a hammer and chisel.
Stage two: priming the walls
The solution adheres better to the surface if we first apply a primer to it. There will be no problems with the purchase of a primer, it is in every hardware store, and is inexpensive. You need to apply the primer with a wide brush once, but very diligently. For a very rough wall, it is better to use a sprayer, thanks to it, the primer will get into every gap, moreover, this will save material consumption.
Stage three: Apply plaster coat
After the soil has completely dried, we begin to apply the plaster. The consistency of the solution should resemble sour cream. The solution is applied in three stages, it is better to let the master apply and level the first layer, since experience is required here. After the first layer dries, apply the second carefully, and after that we proceed to the fur coat itself.

Advantages and disadvantages of a fur coat
Summing up, it is important to remember the pros and cons of plastering a fur coat, let's start with the merits.
- First of all, these are low financial costs. In fact, you only spend money on mix and tools that are not expensive at all.
- Heat and sound insulation. It is achieved by applying a thick layer of plaster.
- It is also important that absolutely everyone can apply a fur coat and without any particular difficulties.
- Great appearance
The disadvantages, perhaps, can be attributed only to the fact that for some people this appearance of the house is outdated. Here, everyone judges for their own taste.
As you can see, it is not difficult to make plaster of the facade under a fur coat with your own hands, the main thing is to believe in yourself and then you will succeed!