An integral stage in the development of a house project is the choice of the method of its exterior decoration. It implies the choice of suitable material and a careful study of the overall style of the building. Today, the decoration of the facades of private houses directly reflects the level of wealth and taste preferences of the owners of the house, and the finishing materials used in the process of facing work are characterized not only by decorative, but also by functional purpose. In the process of choosing materials for finishing the facade of a building, it is necessary to take into account many technological nuances, such as the architectural features of the building, the landscape area, as well as the climatic characteristics of the region in which the residential building is located. Taking into account the above, it can be concluded that the used facing materials should not only be combined with the general style of the architectural object and landscape area, but also should be resistant to the influence of atmospheric precipitation. The construction market offers a wide range of cladding materials, many of which are examples of the ideal combination of price and quality. One of these options is the decoration of the facade with a fur coat, which is not only the subject of cladding, but also an independent design decision. If you are looking for a simple, practical and, at the same time, original way of decorating the facade of a house, a fur coat will be the only right solution for you. What is the essence of finishing the walls with a fur coat, what advantages and disadvantages are characteristic of it, as well as how to apply the material in the process of wall cladding in this way, we will consider in this article.
What is home decoration with a fur coat and how is it attractive?
Finishing the facade of the house with a fur coat got its name due to the external similarity with the fur located on the inside of the sheepskin coat, and therefore, speaking about this method of finishing the facade, they do not mean plush fur, but plastering, visually resembling its texture. It is important to understand that, in fact, a "fur coat" is one of the varieties of plaster, which involves the application of a sand-cement mortar by spraying onto the surface of the wall. Pouring or spraying the solution onto the surface to be treated allows achieving the roughness effect characteristic of a fur coat. Before proceeding with the acquisition of materials for the implementation of this method of finishing the facade of a house, it is necessary to study its advantages and disadvantages.

The advantages of decorating the house with a fur coat:
- In view of the excellent tolerance to temperature changes and high humidity, the "fur coat" coating will protect the base surface from external influences;
- In the case of using plaster "under a fur coat", it is possible to finish the base plane with various patterns, thanks to which the building will be different from others. In addition, in the process of preparing the solution, it is possible to give it any color shade;
- The simplicity of installation activities is also attractive, thanks to which you can do all the work with your own hands, without resorting to the help of specialists. This will significantly reduce the final cost of the repair;
- The surface design can be diversified through simple and technically available techniques, for example, by adding granular components with different fractions to the solution, using a mesh, etc.;
- Due to the low weight of the plaster, it practically does not increase the load on the walls and foundation.
Important! With regard to insulation, it should be noted that, despite the fact that the "fur coat" performs the function of insulation, it will not cope with this function in full if the walls of a residential building are thin and not sufficiently insulated.

Disadvantages of decorating the house with a fur coat:
For decorating walls under a fur coat, a number of negative aspects are also characteristic, which masters often learn about after applying plaster.
- First, the textured surface collects dust;
- Secondly, finishing the facade for a fur coat may not be combined with all stylistic solutions. For example, in the case of the correct selection of colors, it will favorably complement the traditional classical styles, then it is practically incompatible with the modern high-tech style;
- The thermal insulation qualities of a fur coat do not exceed those for traditional plaster.
As for the severity of the decorative relief, in comparison with another type of plaster - bark beetle, the fur coat loses to him in this respect, but it looks more elegant and modern.

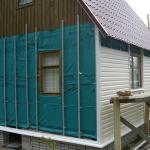
Decorating the house with a fur coat photo


Decorating a house under a fur coat with your own hands: procedure
Preparation of the rough surface
- By analogy with other methods of decorative finishing of facades, the installation of the "fur coat" begins with the preparation of the base surface, which must be carefully plastered, as it will determine its adhesive characteristics and the subsequent degree of adhesion of the "fur coat" to the base.
Important! If, after measuring the planes, you find out that the walls are quite even and their difference does not exceed 0.5 mm per sq. meter, in the process of plastering the facade, you can not expose beacons. Even greater deviations of heights on the plane of the wall are possible in the case of using a "fur coat", the fraction of which exceeds 10 mm.

- If the height differences exceed 2 cm, leveling of the wall surface will be required, which is carried out by applying a rough layer of plaster.
- First of all, they inspect the surface and, armed with a metal brush, remove the previous coating. If there is a partial tiling, it is also removed;
- To ensure high adhesive properties, the surface must be rough. On a smooth surface, using a chisel and a hammer, special notches or indentations are applied along the seams of the brickwork, which will increase the adhesive characteristics of the surface;
- Next, the surface is treated with an antiseptic, which is especially important if you are dealing with old buildings. Thanks to this procedure, you will protect the walls from fungus;
- After completing the complete treatment, apply a layer of primer, which, after drying, will provide a good adhesion of the surfaces. For maximum effect, experts recommend using a deep penetration liquid primer, which is applied with a brush or spray.

Important! To make the connection of surfaces even better and more durable, masters recommend reinforcing it with a construction mesh.
Preparation of the solution: composition of the mixture
Manual mixing of components
- For exterior decoration, a fur coat, or rather a solution, is prepared from a mixture of cement and river sand, which are mixed in certain proportions. The ratio of the components is determined by the brand of cement used. If you took M300 cement as a basis, you will need 3 parts of cement and 1 part of sand to prepare the solution. If you use cement grade M400, the ratio of the components is 4: 1, M500 - 5: 1.
- Sand and cement are poured into a container prepared in advance with smooth walls and a bottom, taking into account the ratios indicated earlier, and water is added, bringing the mixture to the consistency of mashed potatoes. Experts recommend preparing a small amount of the mixture and trying it on a small area. The need for this is explained by the fact that the decorative effect of a fur coat is determined by the density of the working mixture: the higher the density, the more pronounced the texture of the plastered surface will be.

Important! To prevent premature settling of the cement slurry, it is recommended to add a little washing powder to it. To make the consistency of the mixture more uniform, you must use a drill with a nozzle to mix the solution.
There are many ways to improve the decorative characteristics of the plaster mix. In order to diversify the type of facade plaster, the following techniques are used:
- A dye of the required color is added to the finished mixture, which will prevent fading of the painted surface and eliminate the need for its renewal;
- To make the texture more pronounced, the mixture includes the same amount of putty and enamel paint;
- For the same purpose, marble chips, pieces of colored glass and similar materials are added to the thick plaster mixture.

Important! If you plan to give the facade some shade, experts recommend giving preference to applying paint to the finished “fur coat”. This is due to the fact that in the process of tinting the solution before applying it, it will be difficult to achieve a uniform shade, since the solution will have to be mixed several times. However, if you are confident in your abilities or you have to plaster a small area, which will allow you to mix and install the "fur coat" at the same time, you can ignore these recommendations.
Using dry mixes
Cement-based dry plaster mixes are commercially available, which can be not only white, but also colored. They are mixed with water and, using a construction mixer equipped with a special nozzle, bring them to a homogeneous consistency. After holding the solution for 5 minutes, it is stirred again, after which it is completely ready for use. It is important to prepare the mixture in the amount that will be used at a time.
Use of ready-made mixtures
In addition to dry mixes, construction stores offer ready-made plaster compositions, the main difference of which is not the state of aggregation, but the chemical composition - most of the mixes are made on the basis of acrylic copolymers, which reduces the vapor permeability of the finishing layer, at the same time increasing its elasticity.

Applying a fur coat to the wall: basic methods and tools
After the solution has been prepared and all the preparatory measures have been completed, it is necessary to proceed to the direct application of the plaster. If you are a beginner, use the video presented in the article - finishing with a fur coat will not be as difficult for you as it seems at first glance.
There are four main ways to apply a fur coat to the wall. Let's consider them in more detail.
- Throwing mortar onto a wall using a broom and a stick- finishing option, in the opinion of the majority, carried out by the "old-fashioned" method. As the context suggests, it is produced with a broom and a stick. Despite the fact that the technique is gradually becoming a thing of the past, becoming obsolete, some masters still value it for its cheapness, characteristic simplicity of execution and the availability and tools used. However, it will be acceptable only for surfaces with a small area. To apply the solution with one of the simplest and most accessible methods, take a broom in one hand, dip it into its solution and, by tapping it on the stick that is in the other hand, apply the solution to the surface using drops.

Important! To obtain finer splashes, the broom must be replaced with a stiff brush, and the stick with a thin wooden strip. Run the bar across the brush in the opposite direction to the wall and fine spray will fall on the surface to be treated.

Important! In the process of applying plaster in this way, irregularities often arise that can spoil the appearance of the plastered surface. If you notice such a deficiency, remove the excess solution with a trowel and repeat the application of the solution.
- Throwing mortar through the mesh is another available method for manually applying a fur coat. The texture of the plastered surface, the installation of which was carried out using this method, will slightly differ from that applied with a broom and a stick. To make the application process more convenient, experts advise to stretch the mesh screen onto a wooden frame. The resulting structure is placed near the wall and, as the work progresses, they move it along its surface, throwing the solution onto the mesh using a trowel.

In addition to manual methods, there are hardware methods for applying a fur coat.
- Plastering with a mechanical machine is one of the modern advanced hardware methods. In the process of work, a machine is used, the design of which is nothing more than a drum made of stainless steel and equipped with blades inside. In the process of work, the mechanism is scrolled with a handle, which is located on the side of the drum. The work process is as follows:

- The solution is loaded inside the drum and the structure is directed so that the outlet faces the wall, after which the handle is turned. The unit is considered convenient to use, but it needs regular washing and thorough cleaning. If this recommendation is disregarded, the blades will soon become clogged with a solidified solution, which will lead to the failure of the mechanical structure;

- Applying a fur coat using a compressor- an apparatus that pushes the solution to the surface under pressure, which is created by compressed air. This principle of operation has certain similarities with what underlies the operation of a mechanical machine with rotating blades. The use of a compressor is appreciated by professional builders who, with its help, can perform a large amount of work in a short time. In addition, this device ensures the uniformity of the solution application, as well as the uniform shape and size of the treated drops.

Important! If you prefer this method, do not rush to purchase a compressor, it can be rented from professional builders, which will be much cheaper.
- Fragmented application of a fur coat practiced by creative people who want to diversify the design of the facade. In the process of fragmentary application of a fur coat, plaster is applied to separate sections of the wall, highlighting the protrusions of the walls or drawing various geometric shapes. In this case, textured plaster is applied to areas previously delimited by slats.

Important! Before you start applying textured plaster, carefully measure your own strength and the period of time allotted for work. It is recommended to apply the plaster on the selected surface within one day, and if you need to take a break from work, cover the edges of the freshly applied plaster with a film. This will protect the plaster from cracking after applying a new portion of the solution.
Tips from the masters to look out for
In order for the plaster for a fur coat to be used for a long time, while maintaining its original appearance, it is necessary to follow the useful advice given by our experienced craftsmen. Pay particular attention to the following guidelines.
- Plastering must be carried out under certain weather conditions. The air temperature should be in the range from +5 to +27 degrees, and direct sunlight should not fall on the plastered surface (it is best to work in cloudy, but not rainy weather). This will prevent rapid, uneven drying of the plaster layer and its subsequent cracking;
- The plaster is applied in three layers, which are applied successively in one day. In this case, each subsequent layer is thrown over after a slight drying of the previous one;
- Do not save on primer, it must be applied without fail;
- To give the mortar the desired shade, the following mineral powders are used: finely ground cobalt glass, coal powder, red iron ore, manganese powder, white asbestos and finely ground white marble. They are added to the solution while mixing sand, cement and water;
- Special requirements are also imposed on the consistency of the solution: the solution should be sparse, but at the same time it should not slide down the walls;
- To increase the graininess of the fur coat, it is recommended to use a stick with a broom or a metal mesh. To create a less pronounced texture, choose a metal mesh.

As mentioned above, to give the fur coat a uniform shade, they practice painting the facades like a fur coat. This can be done in several ways.
- One of the easiest ways is to use colored plaster, which is added to the solution in such an amount that it provides the desired shade of the required intensity. It practically does not fade, and if microscopic cracks appear, the intensity of the shade will not change.
Important! Painting the facade under a fur coat is associated with certain difficulties associated with the surface relief. The texture of the fur coat implies differences in height up to 3 mm, which, on the one hand, increases the area of the working surface and the overconsumption of paint, and on the other hand, makes painting with a roller or brush practically impossible, since the surface will be painted unevenly.
- In view of this, it is necessary to consider a more effective method of painting the facade for a fur coat - the use of a spray gun or a spray gun, which breaks the coloring composition into the smallest splashes, which allows you to evenly paint over all irregularities, while reducing paint consumption. If necessary, paint over some areas with a brush.

Despite the low cost of work (the total cost of repairs consists only of the cost of sand, cement and dyes), the result will often exceed your expectations. After reading the article, you, most likely, are convinced that the process of applying a fur coat is quite simple, especially if you have special automated devices. To consolidate your skills, we recommend that you familiarize yourself with the video below.
Wall decoration under a fur coat video