If you have planned to repair a room with your own hands, but do not know where to start, after reading the materials of our website "Remontik" you will solve this problem. Adhering to our advice, the repair work will not take long, and the final result will please you.
First of all, you must understand that the renovation of the room needs serious preliminary preparation. Most important point is the preparation of a detailed repair plan, taking into account all the nuances. Consider tips for organizing repairs from professionals:
- What type of repair to choose: major or cosmetic.
- Preparation of interior design and detailed renovation plan.
- Determine the main stages of room renovation.
- Make a list of the required tools and materials.
- Plan upcoming expenses.
- Free the room.
- How to start repairing a room with your own hands.
Now let's dwell on each of the stages in more detail, attaching photos and videos to them.
What kind of room repair is needed: major or cosmetic
First of all, you need to decide on the volume and complexity of future repairs. For the apartment to be clean and bright, it is enough to carry out superficial, cosmetic repairs: replacing the wallpaper, changing the old linoleum, whitewashing the ceiling, painting the walls, etc.
If you are planning to get rid of everything old and boring, decide on overhaul with the implementation of window replacement, wall leveling, installation of new floors, as well as modern ceilings. Your home will be transformed and become beautiful and new.
We do not recommend giving up the help of professionals when carrying out major repairs. First of all, this concerns the creation of a stylish design of the premises, including redevelopment, as well as the demolition of some partitions and walls.
When planning repairs, starting from their financial capabilities.
Choose an interior design and decide on a renovation plan
At the very beginning, decide on the design and interior of each individual room that you are going to change in your apartment. You can seek help from an experienced designer, which will slightly increase your financial costs for repairs.
For the room where you are going to carry out repairs, you need to complete detailed drawings of all stages of work, in their clear sequence.
We advise you to complete five renovation sketches for all individual rooms. In the first drawing, we recommend displaying a top view of the premises, and in the other four, each wall. Complete all drawings detailed description, as well as a plan for the sequential implementation of repairs, which will avoid inaccuracies and simplifications in work.
- The location of the furniture. Those walls that are striking most of all need to be given maximum attention and use the highest quality finishes.
- Think carefully about where to place chandeliers and lamps so that the light can better illuminate the room.
- Considering the location of the household appliances, mark the locations for the outlet. In order to then competently design the installation of electrical wiring in different rooms.
- Consider the location of the main decorative elements: mosaic, paintings, brick wall.
In the repair plan, it is necessary to indicate the required finishing option: painting, wallpapering the walls, etc. To divide the room into separate zones, we advise you to paint one of the walls in a different color in order to accentuate attention and visually divide the room. Such moments also need to be reflected in the plan.
How to correctly determine the order of repairing rooms in apartments
According to the advice of experts, in order to avoid unnecessary dust and dirt when carrying out repairs, we advise you to first of all make repairs in rooms that are located far from the front door. As the last stage of the repair, it is better to choose passage rooms, as well as a corridor through which construction tools and materials will often rush. In order not to scratch or stain the finish of the already repaired wall, and also not to damage the new floor.
As an additional protection of the repaired room, cellophane film can act (it is fixed on the outside of the door). It provides reliable protection of the premises from construction dust, dirt, plaster, paint and accidental damage.
Repair of a room in an apartment: with your own hands or by specialists
Do not carry out all the repair work yourself. If necessary, the execution of repairs or only particularly complex measures can be entrusted to experienced specialists. Firstly, knowledge and experience will allow them to carry out repairs efficiently and quickly. Secondly, you do not have to buy expensive tools with which the screed is poured or the tiles are laid out.
Even if the process of installing an interior door seems simple to you, the slightest inaccuracy in this regard is unacceptable. Of course, you can hang and arrange furniture in the kitchen, level the walls and do a little painting yourself. However, entrust more complex repair work to specialists so that later they do not have to be redone, which will significantly increase financial costs.
Make a list of required tools and materials
- After choosing the design of the room, interior and furniture, you need to make full list building materials... Their total cost and quantity directly depends on renovation works, as well as the ways of their implementation. If you have the necessary budget, it is worth purchasing building materials with a small margin.
- Prepare a list of decor items: shelves, holders, paintings, mirrors, etc. Start your purchases with the selected decor items. If the planned decor element is not available, you can quickly change it or develop a new design plan for renovating the room.
- Prepare a list of required tools to complete the repair. To do this, use the advice of a consultant in hardware stores in your city or professional repairmen.
Calculate your expenses
When the preparatory work was completed: sketches and plans for the repair were drawn up, lists of all tools and materials were prepared, a decision was made about the possibility of repairing the room on your own or with the help of repair specialists, you will calculate the average total cost of the planned repair.
Do not rush to buy all the materials when you first visit the store. In the compiled lists of tools and materials, put down the cost of various stores, which will save on purchases. Carefully consider the choice of the services of the construction team. Special attention should be paid not only to the cost of repair work, but also to the reviews of our friends about the quality of repair services.
Free the room
To ensure that your furniture is reliably protected from damage, construction dust and dirt, collect it in a central area of the room. Then cover with plastic wrap. Therefore, free up access to the ceiling and walls. We recommend moving expensive equipment and clothing to other rooms.
DIY room repair: where to start and what is the sequence of work
Repair work should start with the most dusty: replacing windows, window slopes and the installation of new window sills. Thus, you will be able to avoid dust and dirt when painting, when it is forbidden to open windows, in order to avoid an increase in humidity and temperature extremes. When slopes, windows and window sills are installed, cover them with hardboard or plastic wrap to exclude accidental dirt and mechanical damage.
Take care of marking the places for installing additional sockets, do the wiring of electrical appliances. At this stage, do not install outlets or connect them to the shield.
When using welding (for example, when changing batteries), do them simultaneously in different places in the apartment in order to quickly complete this difficult and dusty stage of work, which sometimes includes breaking down walls.
Before repairing floors, walls, ceilings, you need to carry out their condition with a water or laser level. Start by applying the thickest layers of the mortar. As they dry, you can carry out other small jobs without downtime.
Upon completion of this preparatory stage, proceed with the repair, performing it in the following sequence: repair of the ceiling, walls, floor. First, work is performed using putty, gypsum, cement mixtures. Then proceed to the installation of the floor, doors and slopes.
The last stages of the renovation work:
- painting or pasting the ceiling;
- painting walls or wallpapering;
- installation of flooring;
- installation of sills, plinths and platbands.
By following the correct order during the repair and having a clear plan of action, you can avoid many mistakes, save time and money. This is one of the main components of a durable and nice renovation, along with the observance of the technology and the quality of the materials used.
Renovation of an apartment is not a natural disaster. This is a desire to change the interior, update the atmosphere, the perception of your home. And at the same time - distrust of unfamiliar craftsmen, a desire to save financial costs. That is why the decision to make apartment repairs with their own hands is taken very often by the household. Work, as a rule, is not limited to wallpapering and laying tiles; self-repair can be done in the same way as professionals do it.
Work begins with ensuring safety: installation of new electrical wiring, heating pipes, water supply. Also, the possibility of redevelopment is being considered, the device of the "warm floor" system. The purchase of housing in a new building implies the implementation of repairs from scratch, since the apartment will be at the stage of rough preparation. Despite the fact that the apartments in the secondary market are already residential, it is also preferable to make major repairs in them, but not cosmetic. It will require more time, effort, expense, but it will justify itself with high-quality, modern housing that does not require alteration for many years.
Preparing for repair
The laying of new electrical wiring can be accompanied by the simultaneous replacement of metering devices. For such work, it is better to invite an electrician, but in the rooms you can do the wiring yourself. For this, grooves are made in the wall with a perforator according to a previously drawn up scheme. Cables are chosen with heavy-duty insulation or they are laid in special boxes. Then the wall is plastered, creating an invisible seam.
Sockets and switches are mounted in cylindrical holes. They are made with a special round nozzle using a perforator. The layout of boxes, switches, sockets depends on the repair project. It is compiled before starting work, lighting is determined in it depending on the type of ceilings and the type of lighting fixtures.
Alignment of ceilings and walls. Surface design
 Further, do-it-yourself apartment renovation includes leveling the surfaces. The process is time consuming and messy if plaster is used. However, it provides a quality surface. It is the evenness of ceilings and walls that determines the beauty of the renovation: they can be painted, revetted, and pasted over with wallpaper.
There are 2 ways to align:
- using plaster,
- sheets of drywall.
The plaster is applied to the primed wall with a wide trowel. Pre-knead the mixture to a viscous state. The work is carried out from bottom to top in semicircular movements. Before applying the paint, the surface is again primed and allowed to dry.
Plasterboard installation
For the kitchen and bathroom, choose moisture-resistant drywall (GKLV), which has a green shade of sheets. Suitable for rooms (GKL) - ordinary drywall with gray sheets. Arches that are easy to build for one person look actual and stylish in the apartment. In addition to them, drywall is used for the installation of partitions in a shared bathroom or in a room, dividing it into zones.
GKL also allows you to do:
- walls with internal shelves,
- embossed wall surfaces,
- imitation of stucco molding.
For the device of shelves, niches, additional CD profiles are used. They branch inward from the support frame of the new plasterboard wall. The profiles are interconnected with crab fasteners. After installation, the gypsum board must be plastered, then painted or pasted over with wallpaper.
Stretch ceiling
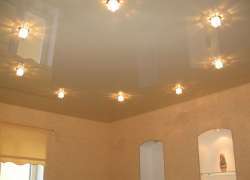 A modern way to level the ceiling without difficult and messy work -. PVC foil or textile is attached to the mounting profile, which is located along the perimeter of the ceiling. The design of such structures is extremely diverse: single and multi-level ceilings with patterns made by photo printing or artistic painting. The material has a matte or mirror finish. It will allow those who are familiar with the peculiarities of working with it to make repairs to the apartment.
It is better for a beginner to invite professionals to install a stretch ceiling.
Wall design and material
Not only wallpapers are relevant in modern renovation. From the past, drapery has returned with fabrics that are produced specifically for decorating walls. It adorns them in a special way, as with its texture it creates a muted, cozy surface. Modern technologies contribute to the creation of textile materials that are coated with water-repellent impregnations. As a result, they do not fade, are easy to clean, and have a strong structure.
 What other materials are relevant in apartment design? Today, wallpapers are in vogue and decorative plasters imitating wood, leather, velvet. Besides them - smooth, monochromatic surfaces of marble, stone, metal. You can combine by texture, color, pattern, external material, or vice versa, combine seemingly incongruous options.
The regularity of creating a harmonious space is determined by a competent combination of patterns. For example, if the walls have a pronounced pattern, the furniture should be monochromatic. It is undesirable to focus on several color combinations. One color should attract attention, maximum 2. The rest are additional, not creating unnecessary variegation.
Furniture with a pattern of harmonious shades or monochromatic furniture of a different color can be placed against plain walls.
Modern painting of walls and ceilings. Wall tiles
Decorative paints are applied to smooth or textured plaster. They contain impurities in the form of mother-of-pearl, glitter, create an antique surface similar to gems... Decorative paints provide luxurious decoration, fill micro cracks, and are easy to apply.
 In addition to paint in damp rooms, it is advisable to use ceramic tiles. It - best material for bath, toilet, kitchen (food preparation area). Ceramics or porcelain stoneware are glued to the adhesive mixture pre-distributed on the wall. It is possible to maintain a gap of 0.3 mm between tiles, but a seamless installation method can be used.
Floor in the apartment
Floor repair begins with determining its evenness. If the horizontality is slightly disturbed (2 cm), the floor is covered with a self-leveling mixture. In the case of an uneven surface (a drop of more than 2 cm), a cement screed is arranged. Decorative materials for the floor - it is parquet, laminate, porcelain stoneware tiles, linoleum. Porcelain stoneware has the greatest wear resistance. An edged board is placed in the rooms,.
Repair is not only troublesome, but also costly. But today we bring to your attention a few tips that can reduce the cost of conducting it. We hope you find our tips helpful.
So, you can save money due to the following:
- Drawing up a project - it is important to first draw up a plan for the upcoming work, quickly solving problems as they matter - at first urgent, then all the rest;
- Budget control - having planned the budget, try to adhere to it, if exceeding it, then not much. For purchases, choose large retail chains and bases;
- Do it yourself - give up the thoughtless involvement of outside specialists, do everything you can yourself;
- Variability - abandoning traditional finishes in favor of modern technologies, will allow you to get significant savings;
- Materials - don't give preference to expensive building materials. There is always an opportunity to replace them with more affordable solutions that are inexpensive, but at the same time have excellent operational and technical characteristics.
An excellent project, interesting solutions for renovating an apartment in the video from the program "Housing Problem".
The author of another story under the heading "My Housing" tells how he made repairs in his new 1-room apartment in a year. He attracted skilled craftsmen only in the most critical areas of work. For example, for laying tiles. For the rest, he relied on his own strength, taste and everyday intuition. “I must say right away that I did not specifically adhere to any particular style. Each room has its own style, but mostly closer to the classics, ”writes Victor_IV. The repair itself cost $ 5-7 thousand, and the same amount was spent on household appliances. We offer to evaluate the result.
The apartment was bought for a young family, that is, for me and my future wife. I will not waste time on controversy about the merits and demerits of a 1-room apartment. Everyone understands perfectly well: everyone chooses for himself, based on his financial capabilities, views, priorities and other factors. Our choice is to buy a 1-room apartment in a new building with a favorable location for us and a developed infrastructure.
The apartment is 45 sq. m was purchased in a 19-storey building.
The appearance of an apartment is always the beginning of a new stage in life. There was a thorough work ahead, which I wanted to do with my soul. The whole process of arrangement took us a year. Apartment renovation began in the summer of 2010, and we moved in in the summer of 2011.
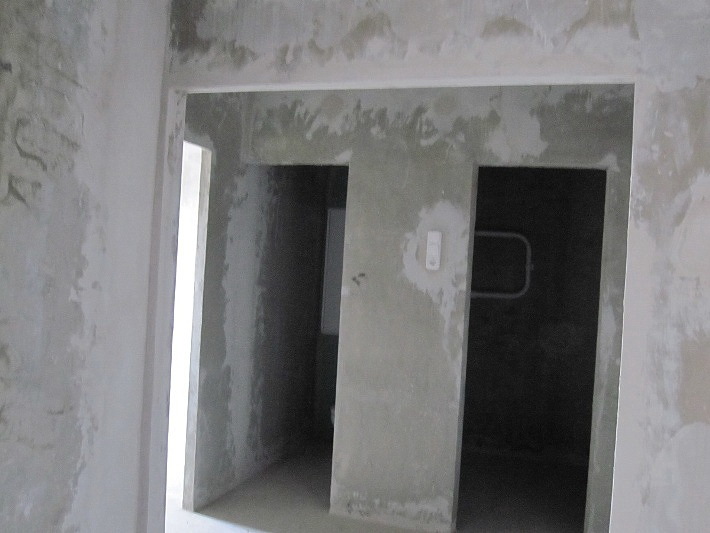
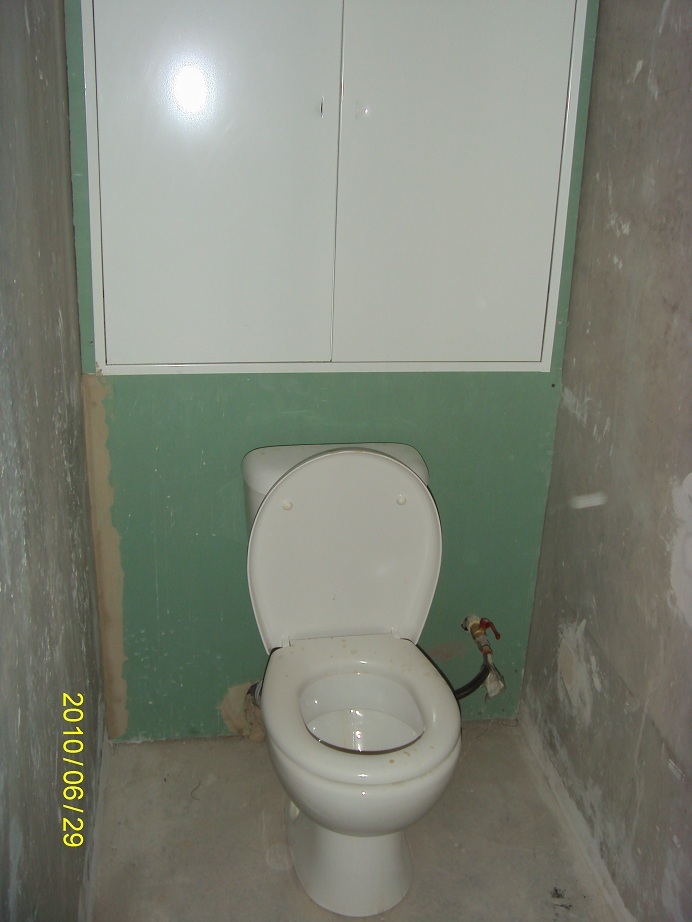
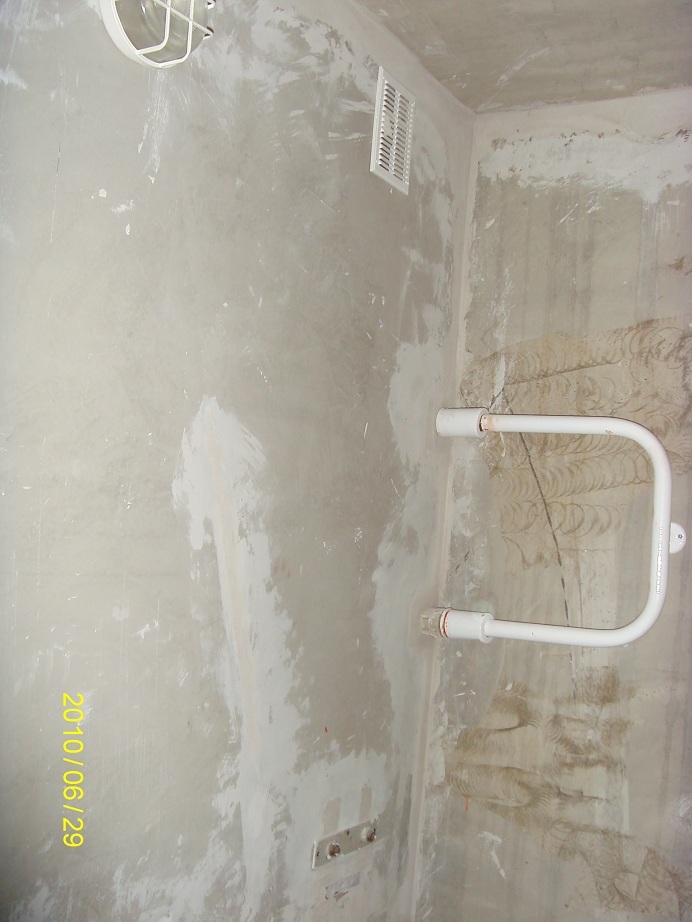
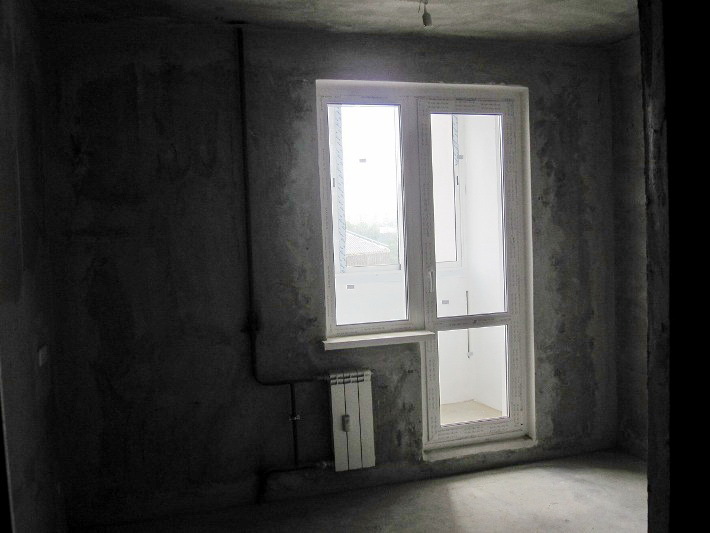
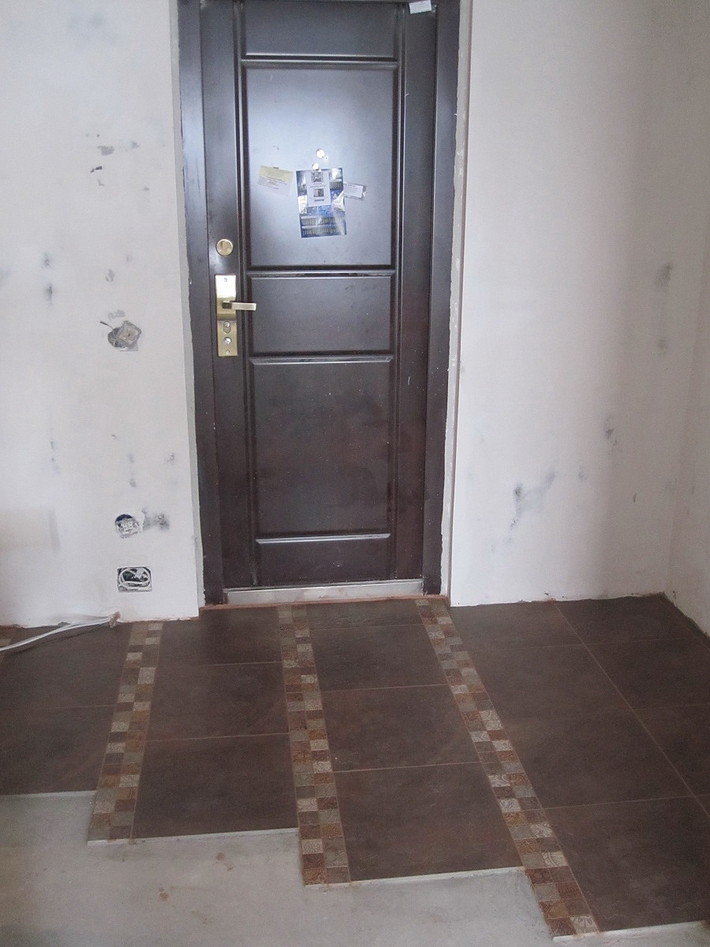
All that got from the developer in terms of finishing is double-glazed windows, an entrance metal door and a toilet bowl. The double-glazed windows, fortunately, turned out to be Rehau and, oddly enough, practically free from defects. One of them did not close well, but this malfunction was quickly eliminated by adjusting the window. Front door I did not change, since it was also of good quality and with good appearance... By the way, we have 7 apartments on the floor, and no one has changed these doors in any of them. Here are some first photos of the apartment without finishing.

![]()
First, it was necessary to decide: to do cheap and quick repairs or high-quality, but long-term. We settled on the second option. I am a design engineer by profession, and it was interesting for me to create a design project for our apartment myself. A good, high-quality repair is quite a costly business, and in the context of a limited budget, it was decided to make repairs step by step and, if possible, on our own. Looking ahead, I will say that the repair is still not finished, but I estimate its readiness at about 90-95%.
I have created many design projects, some of them involved the use of a large amount of drywall to create various niches, dividing a room into zones, ceilings of complex shapes. There was an option for a complete redevelopment to make a studio apartment. However, these options had to be abandoned due to their complexity and since, again, I was going to do the repairs myself.
Here are some sketches created in one of the computer programs.
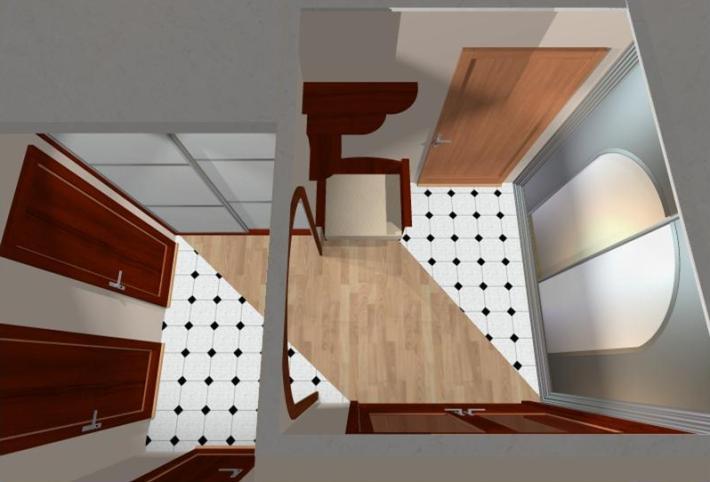

Finally, a project was chosen that was compatible with the budget and my capabilities. Specifically, work began to boil under him.
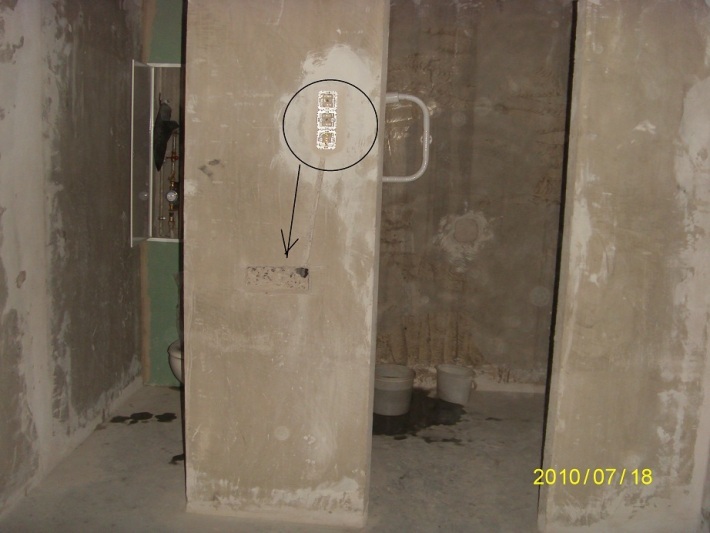
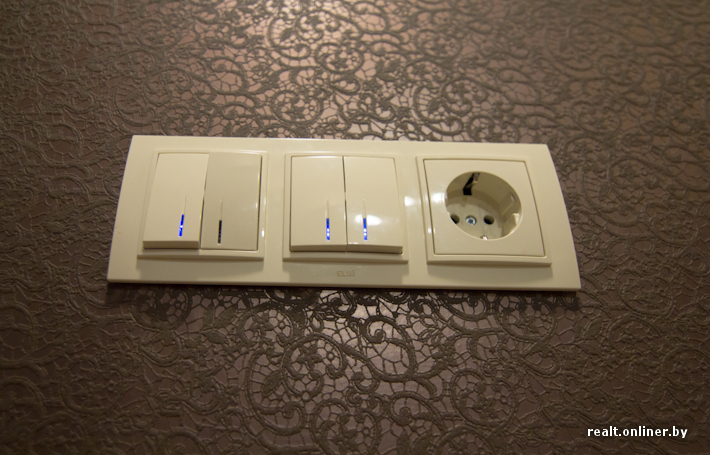
The repair began with the dirtiest work, namely the transfer of sockets and switches. I advise you to immediately buy construction respirators, since you have to breathe the same dust. Physically, the job is not easy, I had to sweat a lot. I don't know how the builders do it, I immediately cut the path with a grinder, and then knocked out the middle with a puncher. It is advisable to use a construction vacuum cleaner, it sucks up dust at least a little. Otherwise, when working with a grinder after two minutes, it is not visible standing next to person. For me the role of a construction vacuum cleaner was performed by an old Soviet vacuum cleaner "Raketa". Imported home vacuum cleaners do not need to be used, as there is a high probability that they will have to be thrown away later.
In addition to the sockets, we had to make several lines in the floor, in which the antenna cable was hidden. The cable itself was laid in a plastic hose so that it could then be taken out if necessary. According to the general plan, the apartment has one large corridor, we decided to divide it by an arch into two (large and small). Since the light was conducted only in one, it was necessary to make a strobe in the ceiling and bring an additional light source into a small corridor. It was dark in the corridor without light, and according to the project, there should be a closet there. In the bathroom, the drain pipes had to be hidden in the walls. In principle, this could have been done by yourself, however it comes about water, so it was decided to entrust this work to professionals. Several photos of the transfer of sockets.


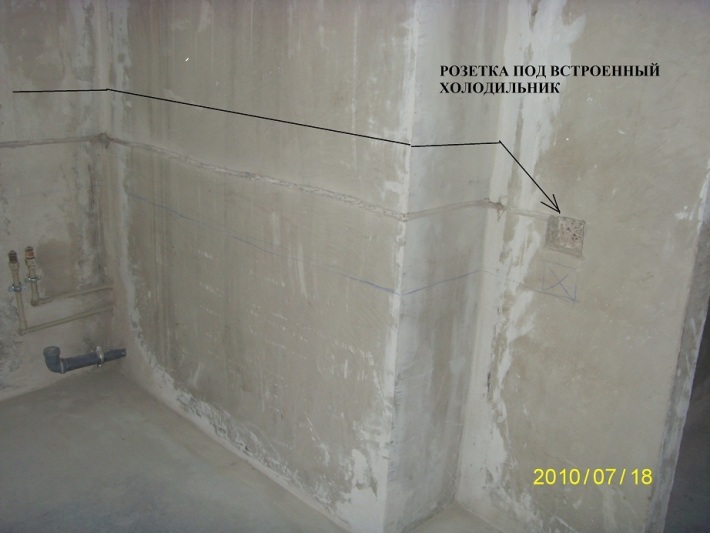
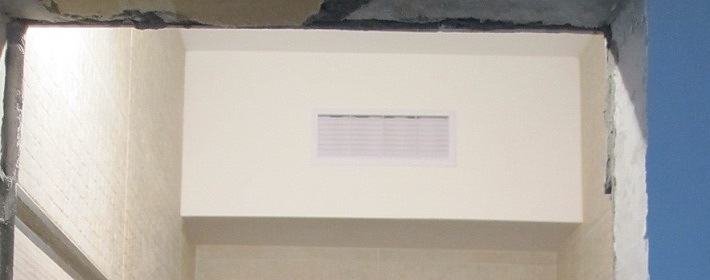
The next step is to work with drywall. According to the project, drywall was used in four places: the ceiling in the hall; decorative through niche in the large and small corridor; a box for ventilation in the toilet and an increase in the wall in the kitchen for the installation of a built-in refrigerator. The whole difficulty was that I had never made drywall constructions before. However, information from the Internet, communication on forums, several consultations with builders and a great desire removed all doubts. It was possible, of course, to make a stretch ceiling, which is more logical for new buildings, but my choice still settled on drywall, which I do not regret at all. A lot of time was spent on drywall (after all, the experience was not enough), but the result turned out better than expected - all the structures came out smooth and strong. Unfortunately, there are not very many photos.
Decorative niche in the corridor.
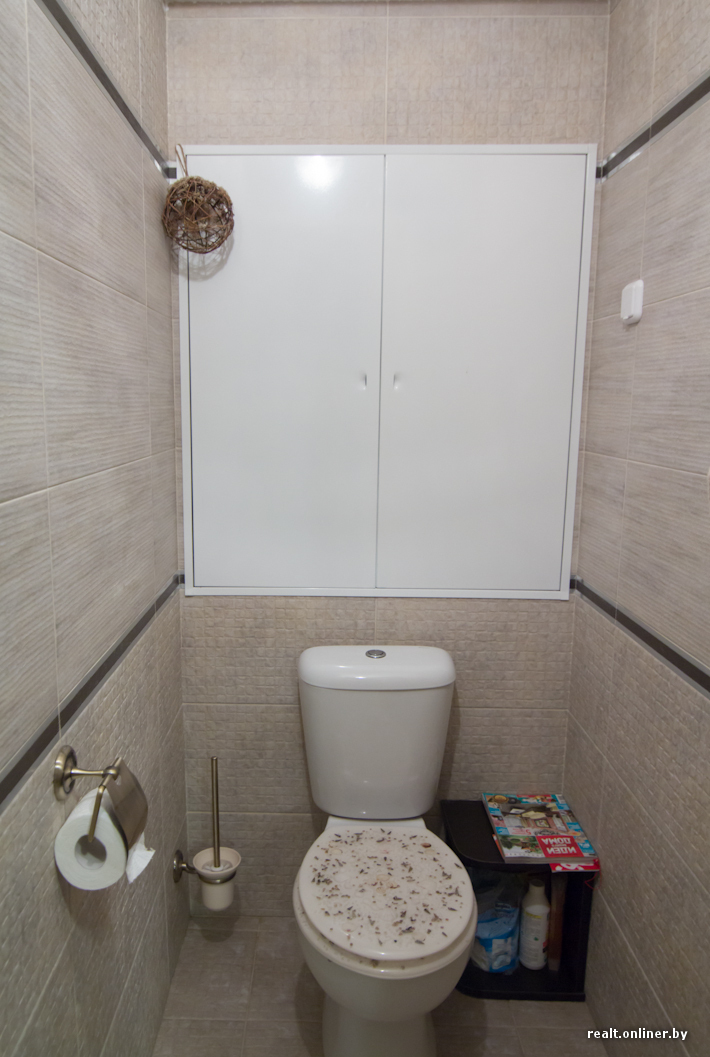
The box is in the toilet.
Ceiling in the hall.

Then began Finishing work... The walls, in principle, were quite even, except for one corner, which had to be leveled with plaster, and the rest of the surfaces with putty in two layers. Of course, I applied more layers to drywall, since there were many surfaces of complex shapes and in some places my first experience in creating drywall structures affected. The putty was everywhere used by "Acryl Puts", bought at the construction market in Uruchye.
After all the filling and sanding work and cleaning the apartment from the ubiquitous dust, it was the turn to lay ceramic tiles. I must say, I paid great attention to the choice of finishing materials. The materials market was studied inside and out. Of course, not all brands are represented here, but there is plenty to choose from. When it comes to finding tiles, I have visited almost every point of sale. These are construction markets, where prices are pleasantly pleasing to the eye, and elite salons, in which any collection delights - until you see the cost.
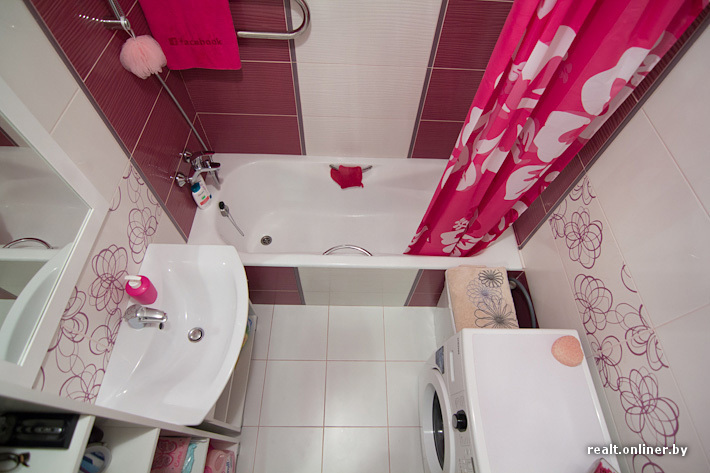
After a long search, the tiles were finally bought. The toilet and half of the corridor are quite common Polish Opoczno tiles. The bathroom is also Polish Paradyz tiles. They bought Russian tiles for the kitchen, I don't even remember the name, my wife really liked the delicate texture and color. We chose the tiles that were available so as not to delay the renovation at all. For ceramic tiles, a tiler was hired on recommendation. It would be a shame to buy a good tile, and put it "hog-blooper".
Tiles in the hallway.
In the toilet and bathroom.
On the kitchen.
Some of the wallpaper was bought at Zhdanovichi, the wallpaper in the corridor was brought from Poland at a price several times lower than ours.
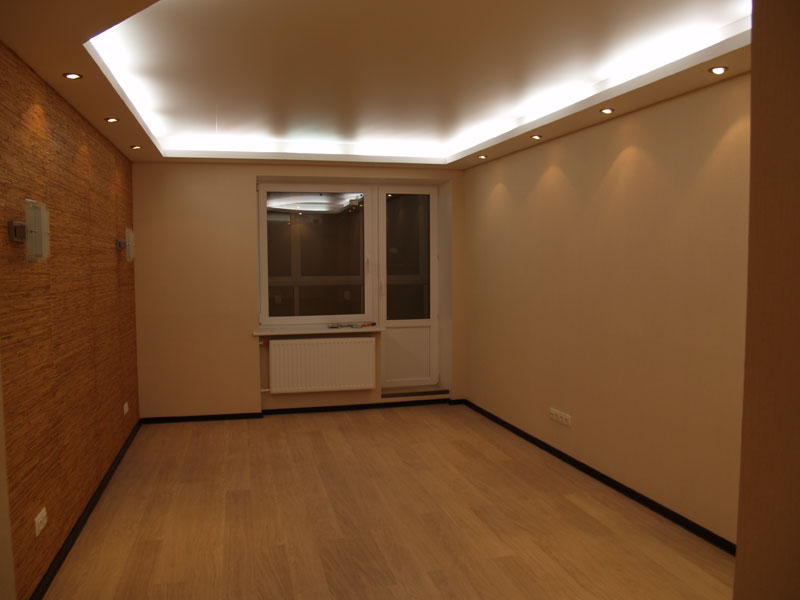
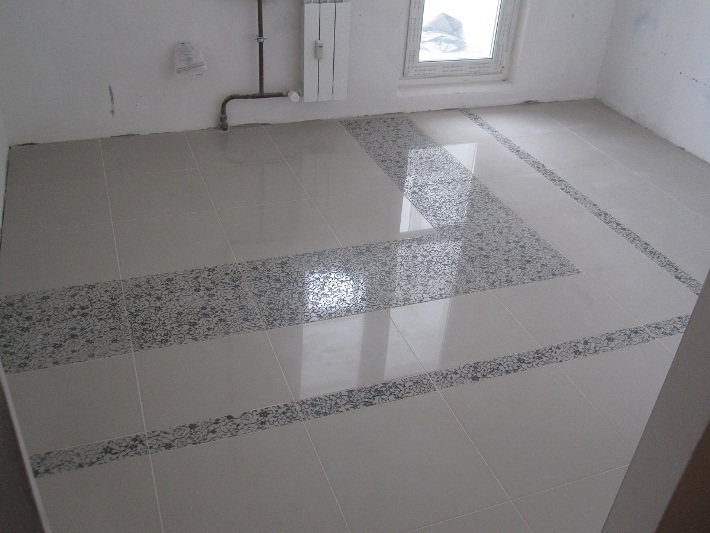
They wanted to put a parquet board on the floor, but due to the rather high cost, they had to abandon it and opt for a laminate. We chose the products of Egger, class 32. The laminate was laid without joints between rooms, since the length did not exceed the permissible length according to the laying rules. Unfortunately, there are no more intermediate photos of the renovation, so further there will be pictures of each room after the renovation - so to speak, the result of my efforts with brief description... I must say right away that I did not specifically adhere to any particular style. Each room has its own style, but mostly closer to the classics.
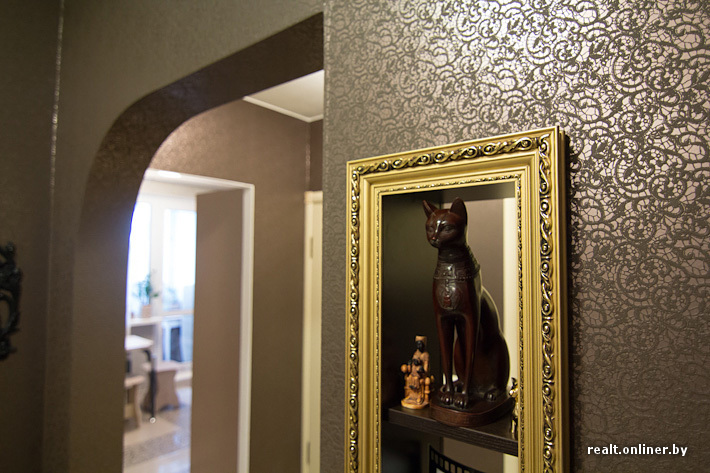
The corridor is large
The design of the corridor was determined by the baguette I saw at the furniture exhibition. Immediately came the idea of a huge mirror framed by a baguette. Subsequently, a cabinet built into the opening played the role of a mirror. A niche built of plasterboard was also framed with a baguette. A pass-through rack was installed in the niche for storing all sorts of cute knick-knacks. I bought a baguette in a store. It cost three times less than the imported one in the baguette workshops. The mirrors of the wardrobe were decorated with a unique pattern in gold paint in the color of the baguette. I installed the cabinets in the corridors myself, in production I ordered only cutting and pasting of parts.


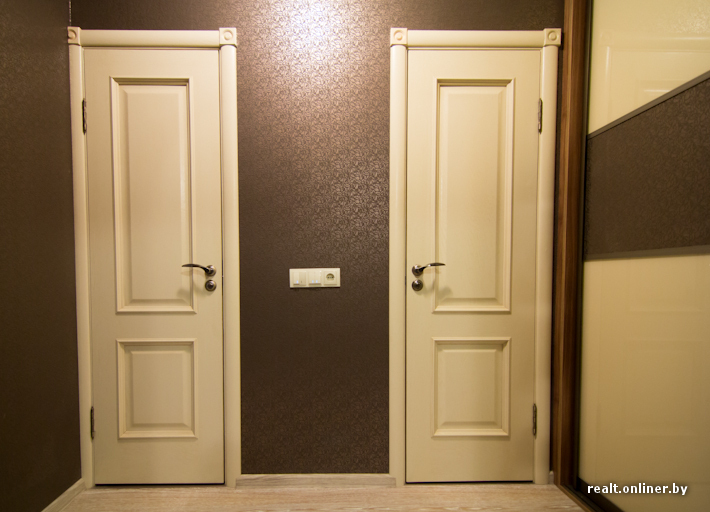
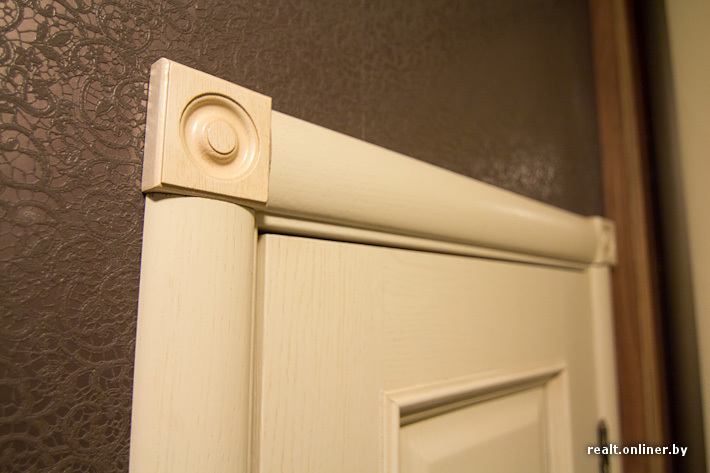
Interior doors are Belarusian, classic, veneered, ivory for contrast with dark wallpaper. The slopes of the entrance metal door looked unimportant, so I trimmed them with the same platbands and decorative rosettes as the interior doors. Classic furniture from the solid wood factory "Laguna" blended into the interior very harmoniously. A mirror was requested on the wall above the table, so an openwork frame was chosen on the IKEA website and brought to order from Moscow at a price plus 10% of the cost of the product.
![]()
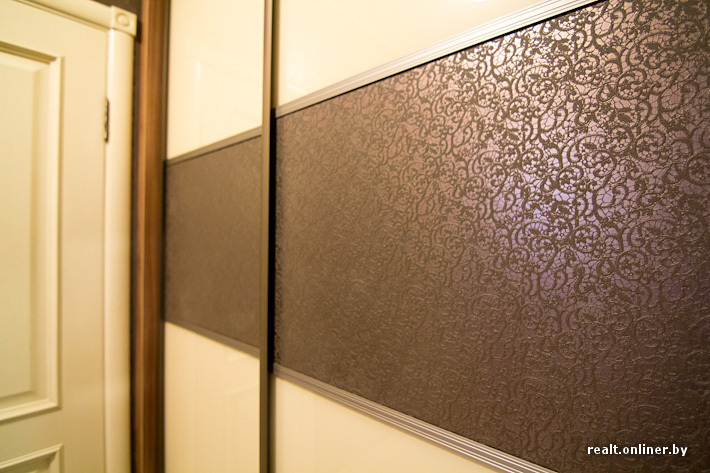
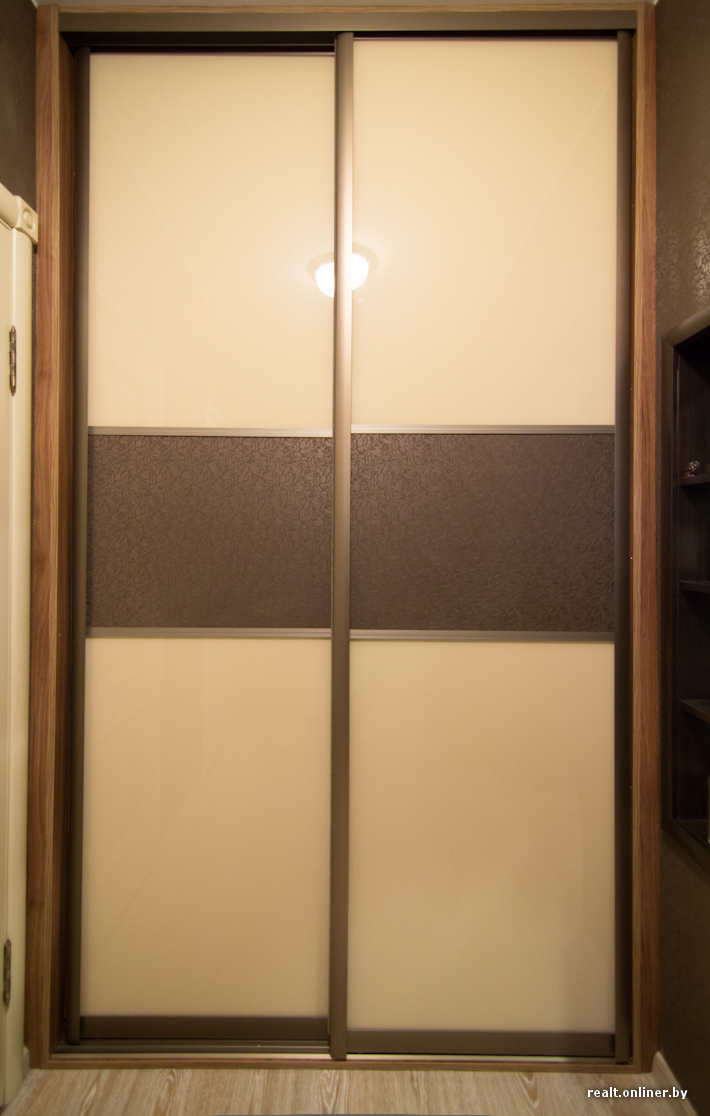
Small corridor
The small corridor is designed in a less formal style. Sliding wardrobe - mini wardrobe. Combined sliding doors with opaque glass and wallpaper inserts. The wife glued the wallpaper insert onto the chipboard base with PVA glue.
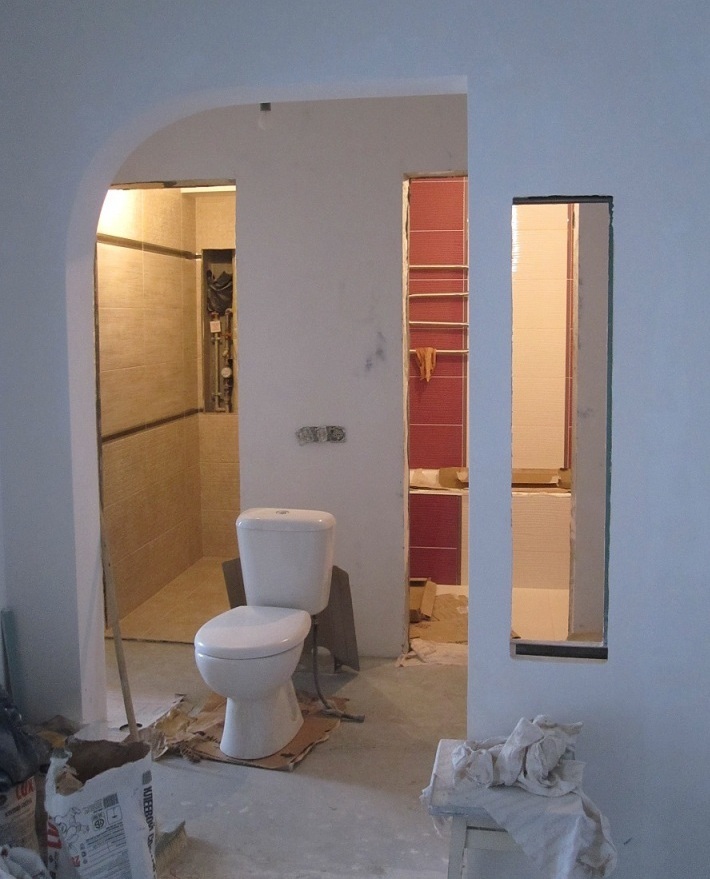
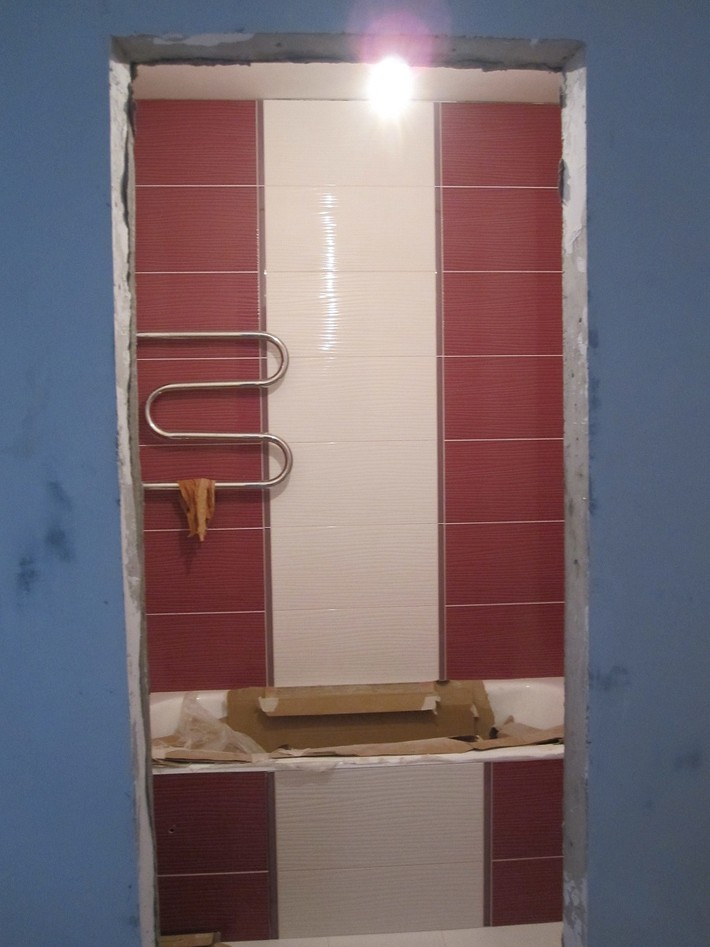
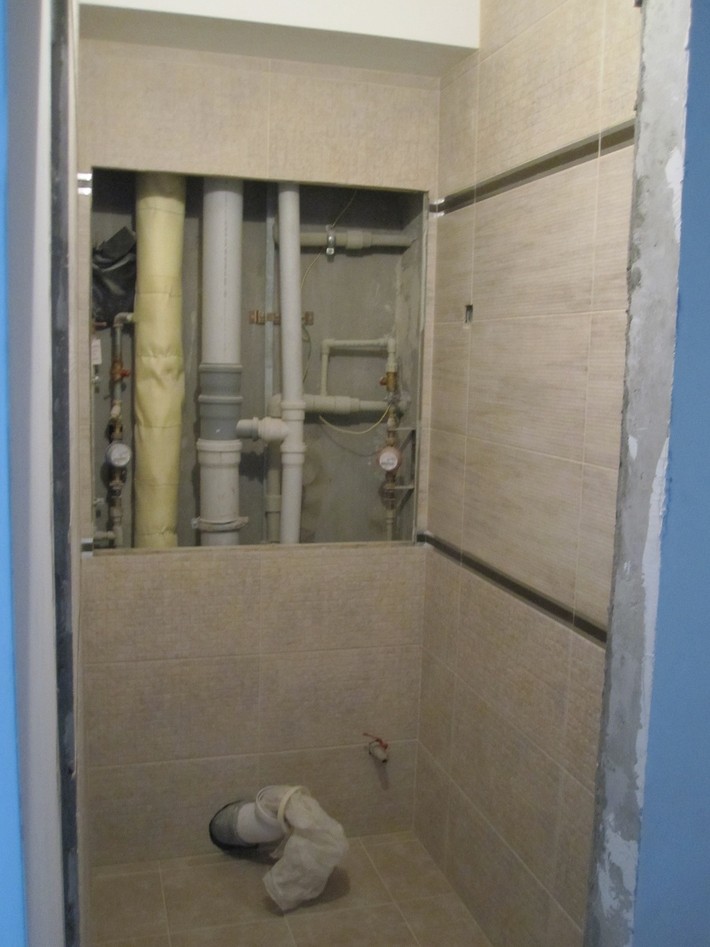
Toilet and bathroom
In the salons where they bought the tiles, the designers drew projects, but they seemed somehow boring, so the design was finalized by itself. Initially, it was decided to make the bathroom and toilet radically different in style from each other. In the toilet, on the top right, an outlet for the future boiler was brought out. A removable hatch is made under the bathroom on the left for access to the drain pipes. The opening system and mechanism were invented by ourselves.
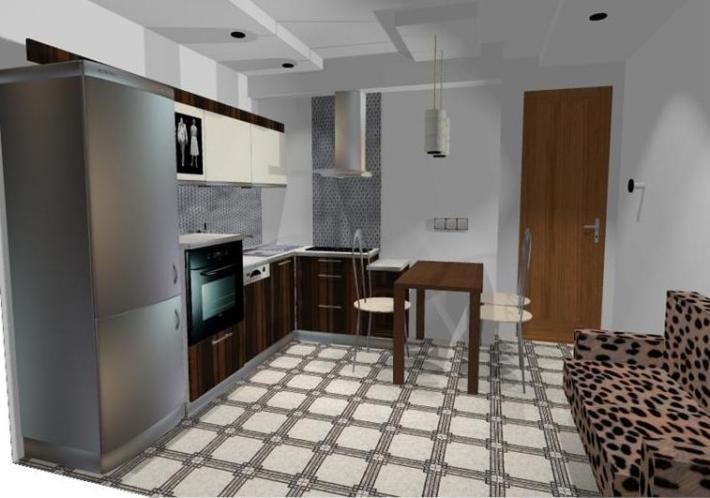
I wanted to make the kitchen as comfortable and multifunctional as possible for a 1-room apartment. Therefore, the colors were chosen closer to natural, different shades of brown. Only high quality materials and fittings were selected: Egger laminated chipboard, facades and Resopal countertops, Blum fittings. To reduce the cost of the kitchen, I assembled it and installed it myself at home. I bought all the appliances only built-in, so that the kitchen was a single composition.
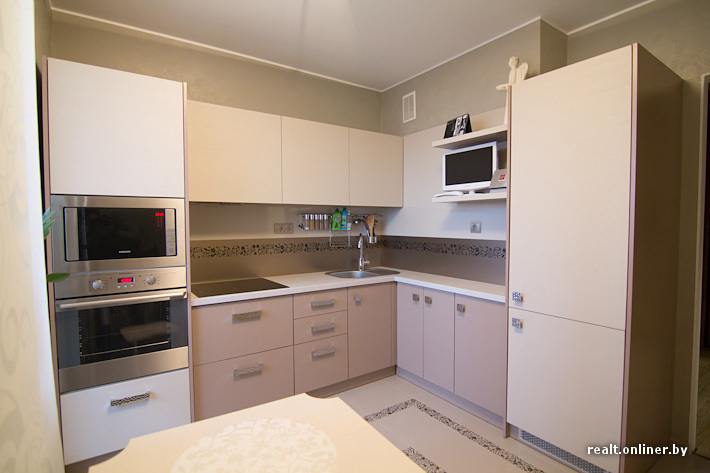
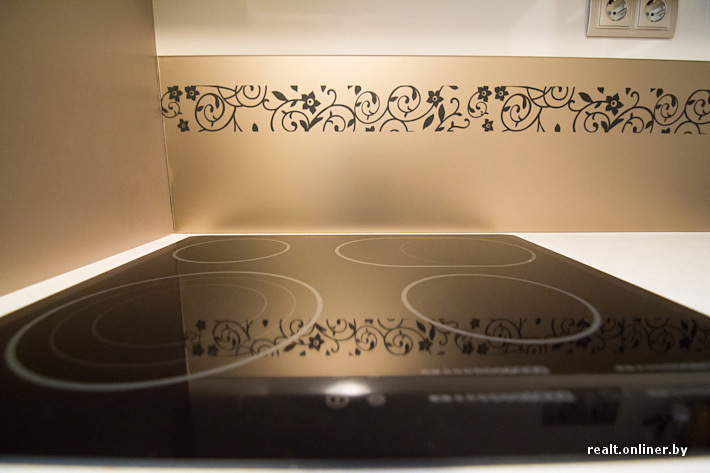
The wife is very happy with the glass work surface- it is easy to clean and looks stylish.
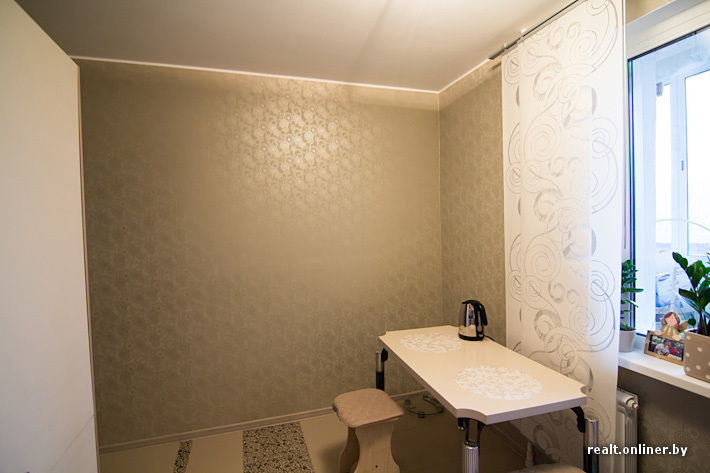
There are no handles on the upper fronts, the doors can be opened by pressing. The kitchen table top is made of the same plastic as the kitchen facades. There are Japanese curtains on the windows, bought from IKEA. The price for the whole set together with the cornice is a little over $ 100. Our curtains of this kind, only from other manufacturers, are much more expensive.
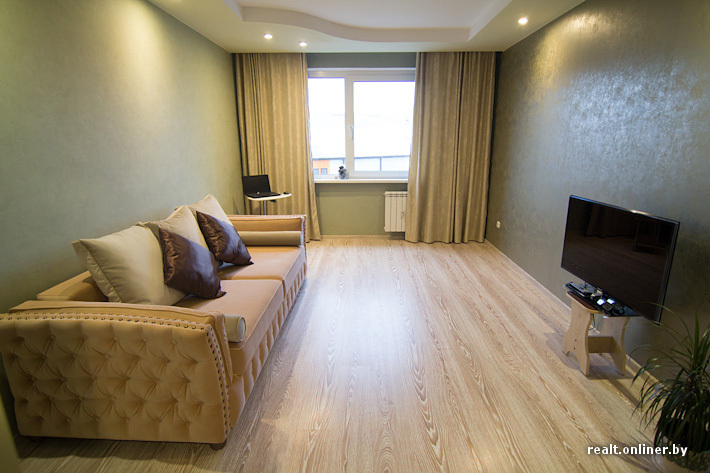
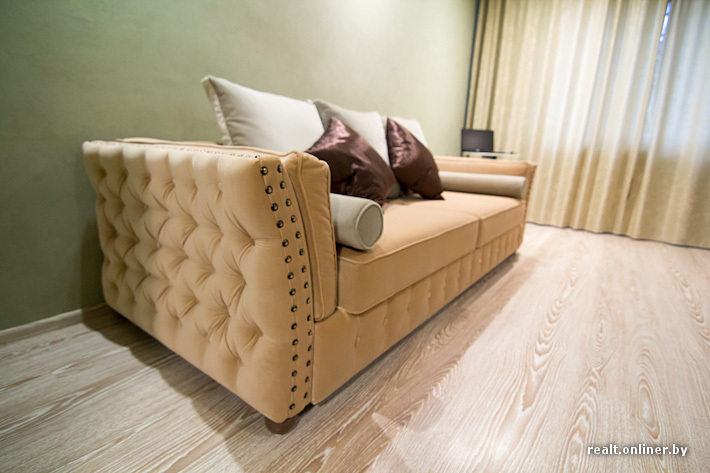
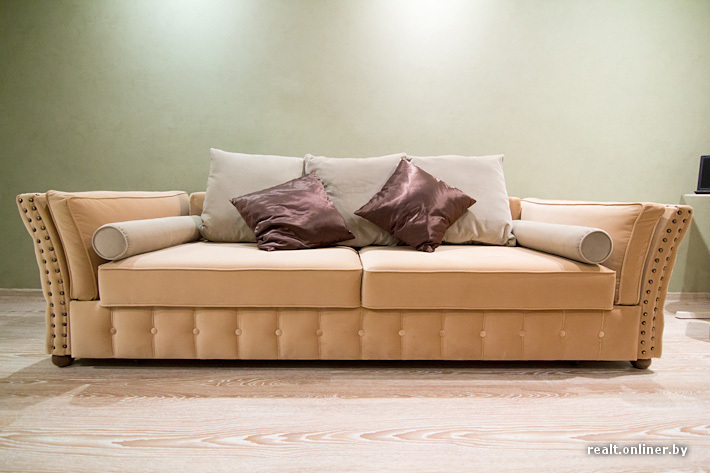
Living room, it is a bedroom, it is ... The room performs many functions, and therefore it was immediately decided to stick to natural colors. Now it remains only to solve a few questions about the furniture, I am still in the process, I do not want to greatly overload the room.
Before starting the repair, I decided to start a notebook to record expenses. But the repairs came just at the time of the second wave of devaluation and a sharp jump in the foreign exchange market. Therefore, he refused to calculate financial investments, it is difficult to estimate the real costs in dollar terms. Offhand, we invested about $ 5-7 thousand. This does not include household appliances. The same amount was allocated for its purchase.
Renovation is not a very exciting event and, moreover, takes up a lot of personal time. But seeing the result of my work, I get moral satisfaction. Whatever they say, but the family hearth, family life and comfort largely depend on the environment that surrounds you. I tried, I wanted the apartment to be comfortable in addition to its visual appeal, I paid special attention to all the little things, because the smallest and seemingly insignificant things can sometimes radically change the impression of the entire renovation as a whole.