Repairing an apartment in parts brings a lot of inconvenience, so it is better to do it all at once in the whole dwelling. This is especially important at the initial stage, which is characterized by a large amount of dirty work. For example, redevelopment, dismantling of doors and windows, removal of whitewash, wallpaper, flooring - all this extremely pollutes the room. If you correctly plan the procedure for repairing an apartment, you can reduce the time to complete not only dirty work, but the entire repair as a whole.
Acquisition of an apartment with eliminates the dismantling of old structures, this saves labor costs. Repair of the entire apartment at the same time is possible subject to the following conditions:
- the family may live elsewhere;
- it is required to find financial opportunities to pay for a large amount of materials.
Where to begin?
It is not difficult to make repairs if the styles and design of each room are predetermined. They do not have to match, for example, bright materials are used in the children's room, calm, seasoned shades are typical for the entire interior in the bedroom. If repairs in the apartment are carried out in parts, you should start from the back room, then in other rooms, moving closer to front door. Thus, their cleanliness is preserved if dirty work is still being carried out.
Personal comfort, aesthetic orientation and maximum functionality of the premises - the goal for which the repair is carried out. Having decided on the layout, texture of materials and shades, you can start acquiring them and start repairing.
If remodeling is required
Demolition of partitions is carried out at the very first stage of work, if a decision is made to change the layout of the apartment. According to the law, the permission of the relevant organizations is required. Demolition should be carried out by experienced professionals using professional tools. The construction of new walls is carried out according to the redevelopment plan.
 What is the best material for interior partitions? The following are the most popular:
- drywall,
- foam blocks,
- gas blocks,
- plaster board.
For a high-tech interior, you can use impact-resistant tinted, mirror or frosted glass. The design is decorated with engraved patterns. Such structures can be sliding, they allow you to change the space, increasing or decreasing the area of \u200b\u200bthe interior.
Installation of windows and doors
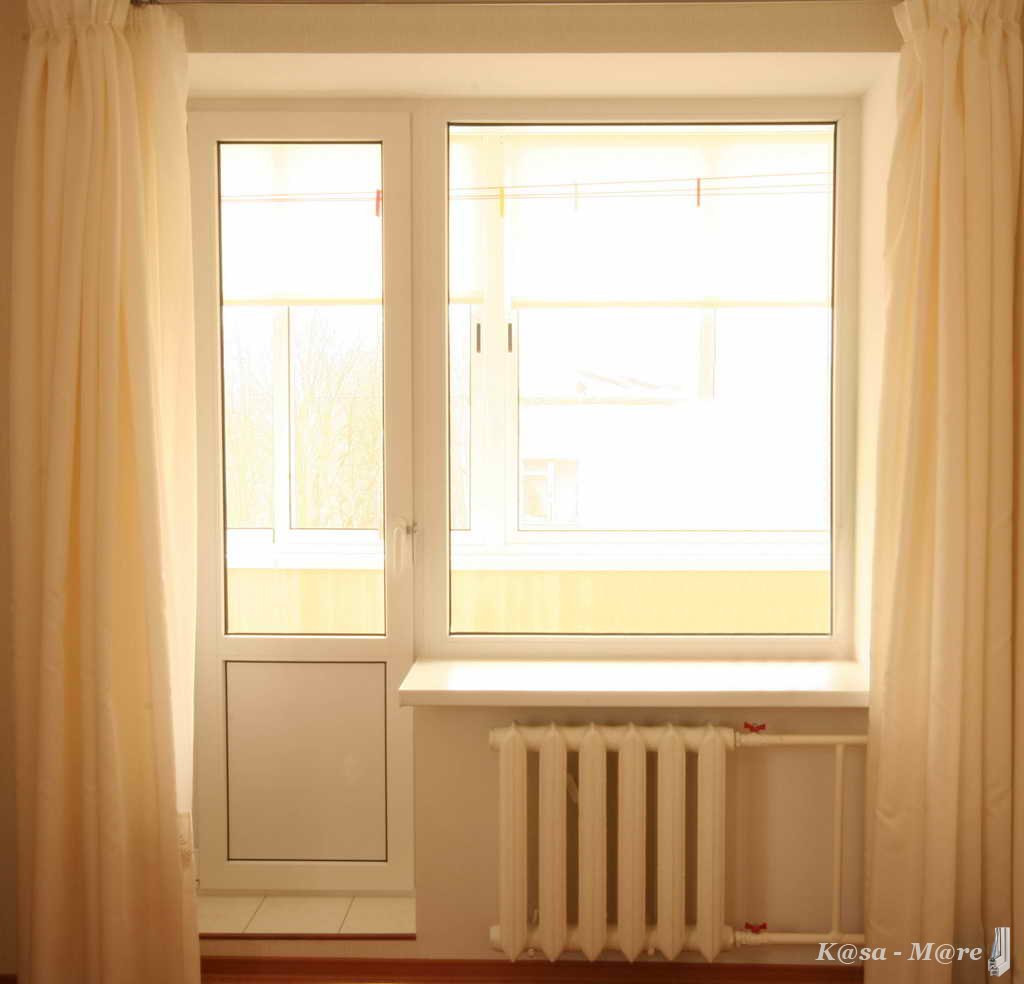 Renovation of an old apartment requires the installation of new door and window structures. In a new building, they are installed by builders, but residents often change the doors according to their preferences. If the work plan includes glazing the balcony, it is performed before installing the room window.
Entrance doors to the apartment are recommended to choose double or single armored. In the first case, the inner door is made of wood, the outer door is made of metal. Thus, in addition to sound and heat insulation, the protection of the apartment from unauthorized burglary increases. Interior doors are made in the form of different designs using classic or modern materials. The most in demand: from solid wood, panel, paneled, glass, metal-plastic. It should be noted that at this stage of the repair, only the door frame is installed, the canvas is hung after finishing the walls.
Floor and wall preparation
 Dirty work continues with the installation of a cement screed with sound insulation. After drying, the surface is polished with a grinder. Further, the procedure for performing repairs in the apartment provides for laying electrical cables, then plastering ceilings and walls. For these purposes, putties, gypsum or cement plasters are used for interior work.
It is better to align walls and ceilings with a masking fiberglass mesh. All layers of new surfaces are treated with a primer to improve adhesion with the subsequent material. You should wait for each coat of primer to dry. If laying of facing tiles is provided, then it is carried out at this stage of work.
 Finishing work and decorative finishing
This part of the repair includes: laying laminate, skirting boards, painting walls and ceilings, wallpapering, installing lighting fixtures, switches, sockets. Lastly, interior details are mounted: canvases of internal doors are hung, cornices for curtains, blinds are attached. Next, the interior decoration of the rooms is carried out in accordance with the intended design.
The sequence of repairs in a new building is needed only in order not to do the same job twice. What seems obvious on initial stage repair, by the end of the repair it may turn out to be completely wrong - redundant, ill-conceived, incorrectly done.
In addition, if the order of work is violated, at best, the amount of garbage will increase, at worst, for some work, floors, ceilings or walls will have to be cracked.
Check it out carefully here.
Shrinkage of a new building
At the initial stage of apartment renovation, it is necessary to clearly understand what new house will "settle down" in the first two years. The soil under the new house will be compacted, the walls at the joints will receive the so-called "hairline cracks" - that is, some work must be done in strict sequence.
Not only that, belated repairs of neighbors - knocking out partitions, door frames or wall chasing can also cause cracks in the walls. In addition, you need to take into account such a moment as the law on silence. When all the repairs have already been made and the neighbors with children will come to their apartments, it is unlikely that they will be able to calmly carry out noisy work or “hang out” a dust curtain.
1. Concept development
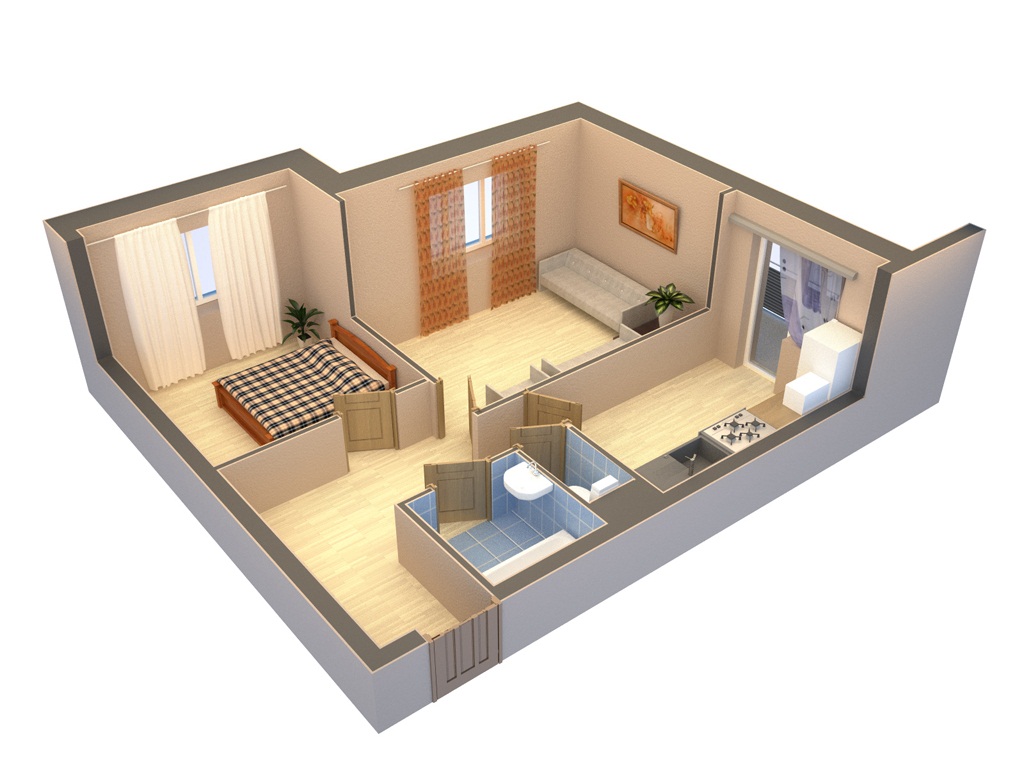
First you need to clearly define what will be from your apartment - this is not a plan, but a drawing up of the concept of an apartment. For example, you are of pre-retirement age and the main thing is home comfort and peace. Or you are 20 years old and most importantly, cool parties in the apartment. From the concept, one can clearly deduce what zones the apartment will consist of and the amount of necessary work.
2. Making a plan
After you decide what will happen and where, you need to draw up a detailed repair plan. It will consist of:- Where will the plumbing fixtures be located - showers, sinks, toilets, bidets, etc. This is necessary in order to make the final piping before repair.
- Where there will be a cooking zone, you need to determine where it will stand, tables, a refrigerator and hang shelves. Here you need to calculate the number and position of the required number of electrical outlets - in the kitchen there should be at least ten of them. If a TV, telephone or computer is planned in the kitchen, you must also stretch the appropriate cables.
- Where in the rooms and auxiliary rooms will there be and what kind of furniture. You need to clearly imagine where you will walk, where the children will sit and play. This is necessary so as not to lay the heated floor under the furniture, washing machine, refrigerator, etc.
- Where will the work area be - there will be a computer, a desktop. This is necessary in order to determine how many sockets you need to install, how many and what kind of cables to stretch - Internet cable, telephone, antenna, etc. You can also calculate the required number of fixtures.
- Where and what will be the recreation and sleep areas - here you need to correctly stretch the cables and switches for the arrangement of lighting zones.
3. Purchase of components for repair
- After drawing up a plan, you need to arrange shopping - the purchase of appropriate sanitary appliances - faucets, sinks, shower installations, etc.
- You need to buy all the electrics - cables, sockets, switches, etc.
- In accordance with the concept and measured dimensions of the kitchen, bathroom and toilet, you need to buy tiles for the floor and walls. Moreover, they buy more durable and less slippery tiles on the floor. On the walls, it's the other way around. For laying tiles, tile glue is bought, grout between the seams and plastic crosses - to maintain the inter-tile distance.
- Wallpaper and floor and ceiling plinths and glue are bought for fixing this entire economy.
- With the dimensions of the floor of the apartment, you need to visit shops selling floor coverings. Managers using computer program calculate you how much and what length and width you need to buy linoleum and laminate.
- Material for floor screed, plaster, putty and primer for walls are bought.
If the internal partitions do not match your plans, they will have to be knocked out and carried out. This is usually done with a sledgehammer or with the help of specialized companies with special saws.
After the internal walls are knocked out and new ones are built, they begin to break the joints between the wall and ceiling and floor slabs. These joints are usually very poorly sealed, and low-grade concrete is used there. If you are planning to replace interior doors, you should remove them at this stage.
- It is necessary to foam the resulting voids, and seal them with polyethylene foam bundles (such a white sausage), and again seal them with sand concrete, but from good concrete. This operation will save you from mold, cold, smells from kitchens and possible leaks.
- Now you need to stretch and part the pipes of the water supply, sewerage and batteries (if they are transferred). At the same stage, water meters are installed. There are two types of piping - tee (one pipeline departs from the collector to each plumbing device) and collector - a separate pipe goes from the collector to each plumbing fixture.
- After that, cables are pulled and, if necessary, holes for sockets are cut. Electrical wiring can be mounted in walls or stretched along the floor. Cables are usually "packed" in plastic pipes or cable ducts. Sometimes electrical wiring is included in the apartment.
- Well, the kitchen is being equipped with a ventilation system - ventilation ducts are being carried out and a place is being prepared for the hood
- Low-voltage cables are pulled - Internet, television and telephone
- The external unit of the air conditioner is hung out and technological holes are drilled in the wall for pulling pipes and cables.
- At the last stage of the preparatory stage, garbage is removed.
1. Initial stage
A) sex work
The floors in an apartment in a new building have large differences in height, which can reach 7-10 centimeters. In addition, the plates, the reverse side of which is the ceiling of the neighbors from below, are smooth and relatively even exactly at the neighbors from below (their ceiling). To eliminate this, a rough floor is made - a floor screed is made.
The work is simple - the rough floor is bought in the store in the form of a mixture, diluted with water in accordance with the instructions and the finished mixture is poured onto the floor. After that, the mixture is leveled by the rule according to pre-installed beacons.
The highest quality is a sand concrete screed. At the edges of the screed, you need to leave room for electrical wiring. Complete drying of the screed is sometimes delayed for a month (it all depends on the thickness of the layer).
A warm floor is installed on the subfloor in the right places.
B) Wall work
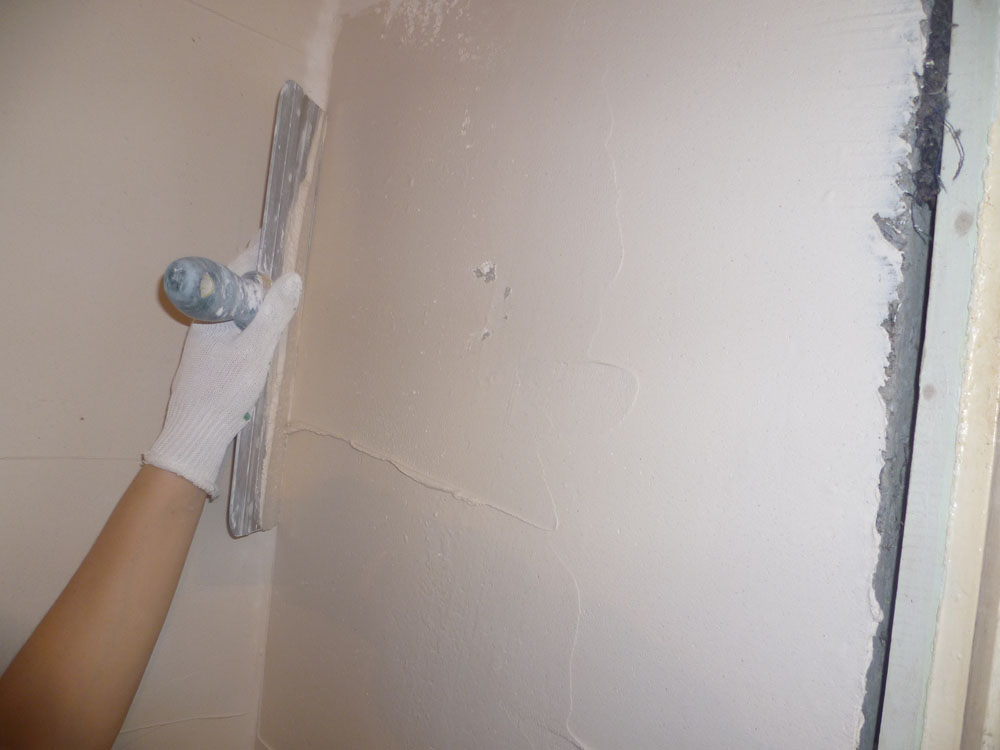
The walls are leveled with plaster. The scheme of work is approximately the same as for sexual work, only in this case the mixture is applied with a trowel on the rule (emphasis on "and") and applied to the wall according to pre-installed beacons.
After plastering, a two-meter rule is applied to the wall. In this case, the gap between the rule and the wall should be no more than 2 mm. When the wall dries completely, putty is reapplied, and after drying, the wall is sanded and torn with a primer mixture.
After that, the necessary drillings are made in the walls for wiring cables.
C) Installation of windows and entrance doors
In the vast majority of cases, you do not have to do this - windows with a window sill and slopes are installed by the developer, and the installation of doors is almost always included in the cost of manufacturing doors. The work is hard and responsible, in some cases even requiring welding.
D) Ceiling installation
If the ceiling is even, you can simply paint it, if not, it will have to be leveled. The ceiling can be leveled like this:
- Plaster and putty it (if the ceiling is relatively even and paint
- Arrange suspended plasterboard ceilings
- Arrange stretch ceilings
- Arrange a ceiling from ceiling tiles of the "Armstrong" type
- Cover the ceiling with ceiling tiles
2. Intermediate stage of repair
- Laying tiles in the bathroom, toilet and in part of the kitchen - above the sink and stove
- Plasterboard work - Plasterboard can be used to level walls or ceilings. If drywall on the ceiling is often welcome, then drywall on the walls is not the best solution. Firstly, it will eat up part of the square, and secondly, it will be impossible to hang or lean on anything on the wall. However, drywall on the ceiling can be replaced with a stretch ceiling or an Armstrong type ceiling.
- Wall primer
- Arrangement of decorative elements (stucco, "socket" under the base of the chandelier, etc.)
Having planned all the work, made an estimate and bought the necessary materials, it is necessary to start the repair work correctly. In this case, the most important thing is the proper preparation of surfaces and the entire room, the quality of which will determine the quality and duration of the operation of the design.
If the apartment is very old and has not been renovated for several decades, they first of all start with scrapping, demolition of walls and partitions, which have outlived their own, from the removal of ceilings from the ceiling and walls. This stage is one of the dirtiest and most laborious. In many houses, the old parquet has been preserved, which does not have to be removed at all - it can be preserved by protecting it with plastic wrap, which is covered with hardboard on top. But you will have to scrape the parquet after repair in any case.
The dustiest processes are window block replacements, device window slopes, window sills. These works must be carried out immediately, since then the appearance of dust and dirt will ruin the entire repair. And in the process of carrying out painting work, opening windows is generally prohibited, since large differences in humidity and temperature are unacceptable. Therefore, window replacement should be done first. After the windows are installed, they must be immediately packed with plastic wrap, and the window sills are covered with hardboard to avoid scratches during repairs.
Best to start with electrical wiring. It is necessary to decide where additional sockets will be installed, to run wires under them. The sockets themselves do not need to be installed and connected to the shield yet. Electrical wiring can be done on the floor or in the walls. In order to increase electrical safety and reliability, it is desirable to pull the wiring inside metal pipes that protect it from external damage by a drill.
If planned radiator replacement, then this stage of repair must also be carried out before the start of finishing work, since the use of welding, wall chipping, dust and debris can ruin wallpaper and coatings. The sequence of repair work involves carrying out all the stages that are not complete without debris and dust, until the walls and ceilings are finished.